
SilverXna初體驗:SpriteBatch和基本的內容管道
2011-09-03 19:39 風色年代 閱讀(2838) 評論(14) 收藏 舉報 Silverlight5 RC的發布無疑是具有里程碑意義的,Xna3D API也在原有Beta版本基礎上作了進一步擴展。
本節,我們來自行實現SpriteBatch的相關功能,以供SilverXna中簡單的2D圖形繪制之用~
Silverlight5 RC的發布無疑是具有里程碑意義的,Xna3D API也在原有Beta版本基礎上作了進一步擴展。
本節,我們來自行實現SpriteBatch的相關功能,以供SilverXna中簡單的2D圖形繪制之用~
昨天,各大IT網站紛紛刊登了Silverlight5 RC發布的消息。于是,第一時間到官網載了安裝包,更新了本地的Silverlight5 Beta版本~
Silverlight5 RC的發布無疑是具有里程碑意義的,Xna3D API也在原有Beta版本基礎上作了進一步擴展。
新增了BasicEffect、RenderTarget等Shader常用功能,上一節提到的Xna 3D數學庫也被劃入到Sliverlight原生資源當中,無需再從外部引用。
不過,目前SilverXna中的一系列繪制函數依然停留在頂點級,缺乏諸如SpriteBatch、ContentManager、Model等必要高級機制的支持。
曾一度感覺無奈,直到看過trcj兄編寫的ElGameEngine之后才恍然大悟:所謂3D,只要顯卡能畫三角形(硬件加速),支持矩陣運算(頂點著色),支持紋理采樣(像素著色),再給幾個API其實就夠用了。
本節,我們來自行實現SpriteBatch的相關功能,以供SilverXna中簡單的2D圖形繪制之用~
熟知3DGraphy機制的人應該都知道,3D領域中的2D,其實只是3D圖元繪制的一種特例:兩個三角形對接構成一個矩形表面,而后由目標紋理采樣得到各點顏色。至于頂點運算的部分,世界矩陣及攝影矩陣固定使用單位矩陣,投影矩陣采用正交投影替代原有的透視投影即可。
大家還記得Direct3D輪回《為D3D量身定做SpriteBatch》一文嗎?它其實就是對2D圖形原理的一個很好的說明~
下面,我們就把Direct3D中的代碼搬到Silverlight里,得到SilverXna專用的SpriteBatch對象~
由于Xna已經徹底舍棄了固定功能流水線(完全硬件加速),而SpriteBatch的繪制并不需要用到BasicEffect中的諸多功能,因此我們不妨自己來編寫Shader。
Silverlight5 RC初步支持了效果框架,BasicEffect使用過程中對于EffectTechniquehe和Pass的解析均是標準而到位的。
不過,由Effect的定義來推斷,我們似乎還不能隨心所欲的引入外部的.fx到Silverlight。以下依然沿用Beta版的做法~
編寫頂點著色器:
代碼清單:SpriteBatch.vs.hlsl
來自:http://www.rzrgm.cn/kenkao
-------------------------------------*/
// 世界·攝影·投影變換矩陣
float4x4 WorldViewProj : register(c0);
// 頂點著色器輸入結構
struct VertexData
{
float3 Position : POSITION; // 位置
float4 Color : COLOR; // 顏色
float2 UV : TEXCOORD; // 紋理坐標
};
// 頂點著色器輸出結構
struct VertexShaderOutput
{
float4 Position : POSITION;
float4 Color : COLOR0;
float2 UV : TEXCOORD0;
};
VertexShaderOutput main(VertexData vertex)
{
VertexShaderOutput output;
output.Position = mul(float4(vertex.Position,1), WorldViewProj); // 頂點位置變換
output.Color = vertex.Color; // 傳遞顏色
output.UV = vertex.UV; // 傳遞紋理坐標
return output;
}
編寫像素著色器:
代碼清單:SpriteBatch.ps.hlsl
來自:http://www.rzrgm.cn/kenkao
-------------------------------------*/
// 目標紋理及采樣器
texture cubeTexture : register(t0);
sampler cubeSampler = sampler_state
{
texture = <cubeTexture>;
};
// 像素著色器輸入結構
struct VertexShaderOutput
{
float4 Color : COLOR0;
float2 UV : TEXCOORD0;
};
float4 main(VertexShaderOutput vertex) : COLOR
{
return vertex.Color *= tex2D(cubeSampler, vertex.UV).rgba; // 返回顏色
}
接下來,我們要使用DirectX命令行工具對其進行編譯,得到頂點著色器及像素著色器可用的二進制文件~
微軟Silverlight5官方實例中為我們封裝了兩個批處理文件,可用于x64和x86機型頂點著色器及像素著色器的編譯生成~
>> 點擊下載:
執行相應的批處理文件:
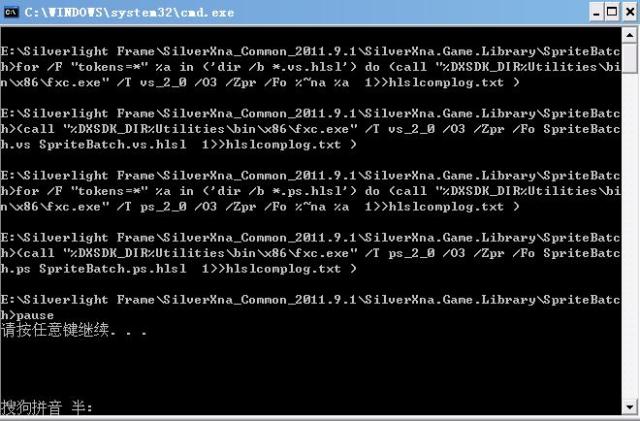
則我們將得到3個新文件:
SpriteBatch.vs(頂點著色器)
SpriteBatch.ps(像素著色器)
hlslcomplog.txt(編譯日志)
我們將得到的SpriteBatch.vs和SpriteBatch.ps引入工程,而后將其屬性設置為Resource即可~
完成Shader之后就可以開始著手編寫SpriteBatch主體代碼了~
首先是頂點結構定義:
{
public Vector3 _Position; // 位置
public Color _Color; // 顏色
public Vector2 _UV; // 紋理坐標
// 構造函數
public VertexPositionColorTexture(Vector3 position, Color color, Vector2 uv)
{
_Position = position;
_Color = color;
_UV = uv;
}
// 頂點聲明
public static readonly VertexDeclaration VertexDeclaration = new VertexDeclaration(
new VertexElement(0, VertexElementFormat.Vector3, VertexElementUsage.Position, 0),
new VertexElement(12, VertexElementFormat.Color, VertexElementUsage.Color, 0),
new VertexElement(16, VertexElementFormat.Vector2, VertexElementUsage.TextureCoordinate, 0)
);
}
接下來是SpriteBatch的編寫:
 SpriteBatch.cs

代碼清單:SpriteBatch.cs
來自:http://www.rzrgm.cn/kenkao
-------------------------------------*/
using System;
using System.Net;
using System.Collections.Generic;
using System.Windows;
using System.Windows.Controls;
using System.Windows.Documents;
using System.Windows.Ink;
using System.Windows.Input;
using System.Windows.Media.Animation;
using Microsoft.Xna.Framework;
using Microsoft.Xna.Framework.Graphics;
using System.IO;
namespace Microsoft.Xna.Framework.Graphics
{
public class SpriteBatch
{
struct SpriteNode
{
public Rectangle _DesRect; // 目標區域
public Rectangle _SurRect; // 紋理區域
public float _layerDepth; // 深度(Z坐標)
public Color _Color; // 色相
public SpriteNode(Rectangle DesRect, Rectangle SurRect, float layerDepth, Color Color)
{
_DesRect = DesRect;
_SurRect = SurRect;
_layerDepth = layerDepth;
_Color = Color;
}
}
Texture2D _ActiveTexture; // 活動紋理
VertexShader _VertexShader; // 頂點著色器
PixelShader _PixelShader; // 像素著色器
Matrix _ViewMatrix; // 攝影矩陣
Matrix _ProjMatrix; // 投影矩陣
List<SpriteNode> _SpriteNodeList; // 精靈節點列表
SilverGame _SilverGame; // SilverGame實體
public SilverGame SilverGame
{ get { return _SilverGame; } }
/// <summary>
/// 構造方法
/// </summary>
/// <param name="game">SilverGame實體對象</param>
public SpriteBatch(SilverGame game)
{
_SilverGame = game;
_SpriteNodeList = new List<SpriteNode>();
// 加載SpriteBatch頂點著色器及像素著色器
Stream shaderStream = Application.GetResourceStream(new Uri(@"SilverXna.Game.Library;component/SpriteBatch/SpriteBatch.vs", UriKind.Relative)).Stream;
_VertexShader = VertexShader.FromStream(_SilverGame.GraphicsDevice, shaderStream);
shaderStream = Application.GetResourceStream(new Uri(@"SilverXna.Game.Library;component/SpriteBatch/SpriteBatch.ps", UriKind.Relative)).Stream;
_PixelShader = PixelShader.FromStream(_SilverGame.GraphicsDevice, shaderStream);
}
/// <summary>
/// 開始繪制
/// </summary>
/// <param name="SpriteBlendMode">Blend模式</param>
public void Begin(BlendState SpriteBlendMode)
{
Begin(SpriteBlendMode, _PixelShader);
}
/// <summary>
/// 開始繪制
/// </summary>
/// <param name="SpriteBlendMode">Blend模式</param>
/// <param name="pixelShader">像素著色器</param>
public void Begin(BlendState SpriteBlendMode, PixelShader pixelShader)
{
// 得到攝影坐標
_ViewMatrix = Matrix.Identity;
// 得到投影坐標
_ProjMatrix = Matrix.CreateOrthographicOffCenter(0, _SilverGame.ActualSize.X, _SilverGame.ActualSize.Y, 0, 0, 1);
Matrix viewprojMatrix = _ViewMatrix * _ProjMatrix;
// 設置Blend模式
_SilverGame.GraphicsDevice.BlendState = SpriteBlendMode;
// 設置頂點著色器
_SilverGame.GraphicsDevice.SetVertexShader(_VertexShader);
// 傳入世界·攝影·投影矩陣參數(世界矩陣默認為單位矩陣)
_SilverGame.GraphicsDevice.SetVertexShaderConstantFloat4(0, ref viewprojMatrix);
// 設置像素著色器
_SilverGame.GraphicsDevice.SetPixelShader(pixelShader);
}
/// <summary>
/// 結束繪制
/// </summary>
public void End()
{
// 結束之前Flush一次全部精靈節點
Flush();
}
/// <summary>
/// 單幀投遞
/// </summary>
/// <param name="DesRect">目標區域</param>
/// <param name="SurRect">紋理區域</param>
/// <param name="layerDepth">深度坐標</param>
/// <param name="Color">顏色值</param>
private void PostFrame(Rectangle DesRect, Rectangle SurRect, float layerDepth, Color Color)
{
// 新增精靈節點
_SpriteNodeList.Add(new SpriteNode(DesRect, SurRect, layerDepth, Color));
}
/// <summary>
/// 合并當前全部精靈節點的頂點緩沖及索引緩沖,一次性完成繪制
/// </summary>
private void Flush()
{
// 異常判別
if (_SpriteNodeList == null || _ActiveTexture == null || _SpriteNodeList.Count == 0)
{
return;
}
// 生成頂點緩沖數組
var vb = new VertexPositionColorTexture[_SpriteNodeList.Count * 4];
// 生成索引緩沖數組
var ib = new UInt16[_SpriteNodeList.Count * 6];
int i = 0;
foreach (SpriteNode node in _SpriteNodeList)
{
// 將紋理區域折合成uv坐標
float Txcrd_LU_u = node._SurRect.Left / _ActiveTexture.Width;
float Txcrd_LU_v = node._SurRect.Top / _ActiveTexture.Height;
float Txcrd_RU_u = node._SurRect.Right / _ActiveTexture.Width;
float Txcrd_RU_v = node._SurRect.Top / _ActiveTexture.Height;
float Txcrd_RD_u = node._SurRect.Right / _ActiveTexture.Width;
float Txcrd_RD_v = node._SurRect.Bottom / _ActiveTexture.Height;
float Txcrd_LD_u = node._SurRect.Left / _ActiveTexture.Width;
float Txcrd_LD_v = node._SurRect.Bottom / _ActiveTexture.Height;
// 填充頂點緩沖區數據
vb[i * 4] = new VertexPositionColorTexture(new Vector3(node._DesRect.Left, node._DesRect.Top, node._layerDepth), node._Color, new Vector2(Txcrd_LU_u, Txcrd_LU_v));
vb[i * 4 + 1] = new VertexPositionColorTexture(new Vector3(node._DesRect.Right, node._DesRect.Top, node._layerDepth), node._Color, new Vector2(Txcrd_RU_u, Txcrd_RU_v));
vb[i * 4 + 2] = new VertexPositionColorTexture(new Vector3(node._DesRect.Right, node._DesRect.Bottom, node._layerDepth), node._Color, new Vector2(Txcrd_RD_u, Txcrd_RD_v));
vb[i * 4 + 3] = new VertexPositionColorTexture(new Vector3(node._DesRect.Left, node._DesRect.Bottom, node._layerDepth), node._Color, new Vector2(Txcrd_LD_u, Txcrd_LD_v));
// 填充索引緩沖區數據
ib[i * 6] = (UInt16)(i * 4);
ib[i * 6 + 1] = (UInt16)(i * 4 + 1);
ib[i * 6 + 2] = (UInt16)(i * 4 + 2);
ib[i * 6 + 3] = (UInt16)(i * 4);
ib[i * 6 + 4] = (UInt16)(i * 4 + 2);
ib[i * 6 + 5] = (UInt16)(i * 4 + 3);
i++;
}
// 頂點緩沖、索引緩沖賦值
VertexBuffer _VertexBuffer = new VertexBuffer(_SilverGame.GraphicsDevice, VertexPositionColorTexture.VertexDeclaration, vb.Length, BufferUsage.WriteOnly);
_VertexBuffer.SetData(0, vb, 0, vb.Length, 0);
IndexBuffer _IndexBuffer = new IndexBuffer(_SilverGame.GraphicsDevice, IndexElementSize.SixteenBits, ib.Length, BufferUsage.WriteOnly);
_IndexBuffer.SetData(0, ib, 0, ib.Length);
// 設置活動紋理
_SilverGame.GraphicsDevice.Textures[0] = _ActiveTexture;
// 設置頂點緩沖
_SilverGame.GraphicsDevice.SetVertexBuffer(_VertexBuffer);
// 設置索引緩沖
_SilverGame.GraphicsDevice.Indices = _IndexBuffer;
// 三角形繪制
_SilverGame.GraphicsDevice.DrawIndexedPrimitives(PrimitiveType.TriangleList, 0, 0, vb.Length, 0, ib.Length / 3);
// 精靈節點清空
_SpriteNodeList.Clear();
}
public void Draw(Texture2D texture, Rectangle destinationRectangle, Rectangle sourceRectangle, float layerDepth, Color color)
{
// 異常判斷
if (texture == null)
return;
// _ActiveTexture第一次賦值
if (_ActiveTexture == null)
_ActiveTexture = texture;
// 如果當前紋理與活動紋理不同
if (_ActiveTexture != texture)
{
// 則Flush一次先前的全部節點
Flush();
// 更新活動紋理
_ActiveTexture = texture;
}
// 投遞本幀
PostFrame(destinationRectangle, sourceRectangle, layerDepth, color);
}
// 一系列重載的Draw函數
public void Draw(Texture2D texture, Rectangle destinationRectangle, Rectangle sourceRectangle, Color color)
{
Draw(texture, destinationRectangle, sourceRectangle, 0, color);
}
public void Draw(Texture2D texture, Rectangle destinationRectangle, Color color)
{
Draw(texture, destinationRectangle, new Rectangle(0, 0, texture.Width, texture.Height), color);
}
public void Draw(Texture2D texture, Vector2 position, Color color)
{
Draw(texture, new Rectangle((int)position.X, (int)position.Y, texture.Width, texture.Height), new Rectangle(0, 0, texture.Width, texture.Height), color);
}
}
}
因為是純粹的3D硬件加速,所以跟傳統Silverlight應用層面的Image相比,其優勢是不言而喻的。這一點 園友 黯淡的橘子 已在其博文中給出了相關證明,大家可以參看他的文章~
我們簡單的封裝一下Silverlight資源加載的相關方法,構成一個內容管道的雛形,以便于后續功能擴展之用~
ContentManager.cs
代碼清單:ContentManager.cs
來自:http://www.rzrgm.cn/kenkao
-------------------------------------*/
using System;
using System.Net;
using System.Windows;
using System.Windows.Controls;
using System.Windows.Documents;
using System.Windows.Ink;
using System.Windows.Input;
using System.Windows.Media;
using System.Windows.Media.Imaging;
using System.Windows.Media.Animation;
using System.Windows.Shapes;
using Microsoft.Xna.Framework;
using Microsoft.Xna.Framework.Graphics;
using System.IO;
namespace Microsoft.Xna.Framework.Content
{
public class ContentManager
{
// SilverGame主體對象
SilverGame _SilverGame;
public SilverGame SilverGame
{
get
{
return _SilverGame;
}
}
/// <summary>
/// 構造方法
/// </summary>
/// <param name="game"></param>
public ContentManager(SilverGame game)
{
_SilverGame = game;
}
/// <summary>
/// 打開資源流
/// </summary>
/// <param name="uri">相對Uri</param>
/// <returns>資源流</returns>
public Stream OpenResourceStream(Uri uri)
{
return Application.GetResourceStream(uri).Stream;
}
/// <summary>
/// 打開資源流
/// </summary>
/// <param name="ProjectName">工程名</param>
/// <param name="uri">相對Uri(字符串形式)</param>
/// <returns>資源流</returns>
public Stream OpenResourceStream(string ProjectName, string uri)
{
return Application.GetResourceStream(new Uri(ProjectName + @";component/" + uri, UriKind.Relative)).Stream;
}
/// <summary>
/// 加載Texture2D
/// </summary>
/// <param name="stream">資源流</param>
/// <returns>所得Texture2D</returns>
public Texture2D LoadTexture2D(Stream stream)
{
Texture2D texture;
var image = new BitmapImage();
image.SetSource(stream);
texture = new Texture2D(_SilverGame.GraphicsDevice, image.PixelWidth, image.PixelHeight, false, SurfaceFormat.Color);
image.CopyTo(texture);
return texture;
}
/// <summary>
/// 加載頂點著色器
/// </summary>
/// <param name="stream">資源流</param>
/// <returns>所得頂點著色器</returns>
public VertexShader LoadVertexShader(Stream stream)
{
VertexShader vertexShader;
vertexShader = VertexShader.FromStream(_SilverGame.GraphicsDevice, stream);
return vertexShader;
}
/// <summary>
/// 加載像素著色器
/// </summary>
/// <param name="stream">資源流</param>
/// <returns>所得像素著色器</returns>
public PixelShader LoadPixelShader(Stream stream)
{
PixelShader pixelShader;
pixelShader = PixelShader.FromStream(_SilverGame.GraphicsDevice, stream);
return pixelShader;
}
}
}
這里的ContentManager只是一個雛形,肯定是沒辦法跟Xna原生態的ContentManager相提并論的 ^ ^
我們在SilverGame基類中聲明一個ContentManager對象,以便令全部的子類持有這個對象:
public ContentManager Content
{ get { return _Content; } }
/// <summary>
/// 構造方法
/// </summary>
/// <param name="GameSurface">所關聯的渲染表面</param>
public SilverGame(DrawingSurface GameSurface)
{
_GameSurface = GameSurface;
_Content = new ContentManager(this);
_ActualSize = new Vector2((float)_GameSurface.ActualWidth, (float)_GameSurface.ActualHeight);
// 自動為渲染表面關聯必要的事件
_GameSurface.Loaded += new RoutedEventHandler(_GameSurface_Loaded);
_GameSurface.Unloaded += new RoutedEventHandler(_GameSurface_Unloaded);
_GameSurface.Draw += new EventHandler<DrawEventArgs>(_GameSurface_Draw);
_GameSurface.SizeChanged += new SizeChangedEventHandler(_GameSurface_SizeChanged);
// 虛函數調用——初始化
this.Initialize();
}
然后是主體代碼:
Game.cs
代碼清單:Game.cs
來自:http://www.rzrgm.cn/kenkao
-------------------------------------*/
using System;
using System.Net;
using System.Windows;
using System.Windows.Controls;
using System.Windows.Documents;
using System.Windows.Ink;
using System.Windows.Input;
using System.Windows.Media.Imaging;
using System.Windows.Media.Animation;
using Microsoft.Xna.Framework;
using Microsoft.Xna.Framework.Graphics;
using Microsoft.Xna.Framework.Input;
using System.IO;
namespace SilverXna
{
public class Game : SilverGame
{
SpriteBatch _SpriteBatch;
Texture2D texture;
public Game(DrawingSurface GameSurface)
: base(GameSurface)
{ }
public override void Initialize()
{
base.Initialize();
}
public override void LoadContent()
{
_SpriteBatch = new SpriteBatch(this);
Stream imageStream = Content.OpenResourceStream("SilverXna","Content/SLXNA.png");
texture = Content.LoadTexture2D(imageStream);
base.LoadContent();
}
public override void UnloadContent()
{
base.UnloadContent();
}
public override void Update(TimeSpan DeltaTime, TimeSpan TotalTime)
{
base.Update(DeltaTime, TotalTime);
}
public override void Draw(TimeSpan DeltaTime, TimeSpan TotalTime)
{
GraphicsDevice.Clear(ClearOptions.Target | ClearOptions.DepthBuffer, new Color(100, 149, 237, 255), 1.0f, 0);
_SpriteBatch.Begin(BlendState.AlphaBlend);
_SpriteBatch.Draw(texture, new Vector2(100, 100), new Color(255, 255, 255, 255));
_SpriteBatch.End();
base.Draw(DeltaTime, TotalTime);
}
}
}
SpriteBatch的用法跟原生態的Xna環境下的用法是一模一樣的,相關繪制方法可以在現有基礎上隨意重載擴展,并且兼容Shazzam全部的ps特效,你只需借助Content對象Load得到相應的PixelShader,而后傳入SpriteBatch重載的Begin函數中即可 ^ ^
最后是效果圖:
![]()
雖然目前Silverlight5 RC版本下的Xna框架還不夠盡善盡美,但我們看到的是光明的前景,未來值得期待 ^ ^
以上,謝謝~
=============================================
>> Silverlight5 RC資源下載及工具包語言版本沖突問題的解決方法:
http://space.cnblogs.com/group/topic/49727/


 浙公網安備 33010602011771號