
Day 83 VUE——組件、插槽、生命周期
VUE——組件
局部組件
創建子組件、掛載子組件、調用子組件
注意:在組件中,這個 data 必須是一個函數,返回一個對象。


<div id="app">
    <!-- 3、使用組件 -->
    <app></app>
</div>
<script src="./vue.js"></script>
<script>
    // 組件
    // 創建子組件、掛載子組件、調用子組件
    ///1、創建組件
    const app={
        data(){
            return {
                msg:'這是第一個局部組件'
            }
        },
        template:
            `
            <div>
                <h2>{{ msg }}</h2>
                <button @click='handClick'>改變</button>
            </div>
            `,
        methods:{
            handClick(){
                this.msg = '修改局部組件'
            }
        }
    }
    new Vue({
        el:'app',
        data:{

        },
        // 2、掛載組件
        components:{
            app
        }
    })
</script>
全局組件
// 全局組件
// 每個全局組件都需要定義一次 Vue.component
// 全局變量的使用:可以在任意 template 中進行引入。
// 引入方式:<Vheader></Vheader> or <Vconter />
// 使用手法:在任意 template 中引入

// 第一個參數:組件名(Vheader)
// 第二個參數:配置
Vue.component(
    'Vheader',{
        template:`
        <div>
            我是導航組件
        </div>`
    }
)

Vue.component(
    'Vsider',{
        template:`
        <div>
            我是側邊欄組件
        </div>`
    }
)
組件通信
父傳子
父傳子:通過 props 來進行通信
1.在子組件中聲明 props 接收在父組件掛載的屬性
2.可以在子組件的 template 中任意使用
3.在父組件綁定自定義的屬性
<!DOCTYPE html>
<html lang="en">
<head>
    <meta charset="UTF-8">
    <meta name="viewport" content="width=device-width, initial-scale=1.0">
    <title>Document</title>
</head>
<body>
    <div id="app">
        <parent></parent>
    </div>
    <script src="./vue.js"></script>
    <script>
        // 父傳子:通過 props 來進行通信

        // 1.在子組件中聲明 props 接收在父組件掛載的屬性
        // 2.可以在子組件的 template 中任意使用
        // 3.在父組件綁定自定義的屬性

        // 全局組件為子組件
        Vue.component(
            'children',{
                template:`
                    <div>
                        <h3>這是子組件</h3>
                        <h3>{{ childData }}</h3>
                    </div>
                `,
                props:['childData']
            }
        )

        // 局部組件為父組件
        const parent = {
            data(){
                return {
                    msg:'這是父組件'
                }
            },
            template:`
            <div>
                <children :childData='msg'></children>

            </div>
            `,

        }

        new Vue({
            el:'#app',
            data:{

            },
            components:{
                parent
            }
        })
    </script>
</body>
</html>
子傳父
在父組件中,子組件上綁定自定義事件
在子組件中,觸發原生的事件,在事件函數通過 this.$emit 觸發自定義事件
<!DOCTYPE html>
<html lang="en">
<head>
    <meta charset="UTF-8">
    <meta name="viewport" content="width=device-width, initial-scale=1.0">
    <title>Document</title>
</head>
<body>
    <div id="app">
        <parent></parent>
    </div>
    <script src="./vue.js"></script>
    <script>
        // 子傳父
        // 在父組件中,子組件上綁定自定義事件
        // 在子組件中,觸發原生的事件,在事件函數通過 this.$emit 觸發自定義事件

        // 全局組件為子組件
        Vue.component(
            'child',{
                template:`
                <div>
                    <h3>這是子組件</h3>
                    <input type="text" @input = 'handleInput'>
                </div>
                `,
                methods:{
                    handleInput(e){
                        const val = e.target.value
                        this.$emit('inputHand',val)
                    }
                }
            }
        )


        // 局部組件為父組件
        const parent = {
            data(){
                return {
                    msg:'這是父組件',
                    newVal:''
                }
            },
            methods:{
                input(newVal){
                    this.newVal = newVal
                }
            },
            template:`
            <div>
                <h3>{{ msg }}</h3>
                <p>顯示:{{ newVal }}</p>
                <child @inputHand='input'></child>
            </div>
            `
        }

        new Vue({
            el:'#app',
            data:{

            },
            components:{
                parent
            }
        })
    </script>
</body>
</html>
平行組件通信
<!DOCTYPE html>
<html lang="en">
<head>
    <meta charset="UTF-8">
    <meta name="viewport" content="width=device-width, initial-scale=1.0">
    <title>Document</title>
</head>
<body>
    <div id="app">
        <!-- <app2></app2>
        <app1></app1> -->
        <App></App>
    </div>
    <script src="./vue.js"></script>
    <script>
        // 平行組件
        const bus = new Vue();

        Vue.component('app1',{
            data(){
                return{
                    msg:0
                }
            },
            template:`
            <div>
                <h3>msg:{{ msg }}</h3>
            </div>
            `,
            created(){
                // $on 綁定事件
                bus.$on('add',(n)=>{
                    this.msg += n
                })
            }
        })

        Vue.component('app2',{
            data(){
                return{

                }
            },
            template:`
            <div>
                <button @click='handClick'>+1</button>
            </div>
            `,
            methods:{
                handClick(){
                    bus.$emit('add',1);
                }
            }

        })


        const App = {
            data(){
                return{

                }
            },
            template:`
                <div>
                    <app2></app2>
                    <app1></app1>
                </div>
            `,
        }

        new Vue({
            el:'#app',
            data:{

            },
            components:{
                App
            }

        })
    </script>
</body>
</html>
組件通信其它方式(provide和inject)
<!DOCTYPE html>
<html lang="en">
<head>
    <meta charset="UTF-8">
    <meta name="viewport" content="width=device-width, initial-scale=1.0">
    <title>Document</title>
</head>
<body>
    <div id="app">
        <App></App>
    </div>
    <script src="./vue.js"></script>
    <script>
        // provide 提供變量
        // inject 注入變量
        // provide 在父組件中提供變量,然后在子組件中使用 inject 注入變量,無論組件嵌套有多深
        Vue.component('app1',{
            data(){
                return{

                }
            },
            inject:['msg'],
            template:`
            <div>
                <h3>{{ msg }}</h3>
            </div>
            `,
            created(){
                console.log(this.msg)
                // 還可以通過 $pareent $chilred 的方式來獲取父組件、子組件的值
                console.log(this.$parent.$parent)
                console.log(this.$children)
            }
        })

        const App = {
            data(){
                return{

                }
            },
            template:`
                <div>
                    <app1></app1>
                </div>
            `,
            provide(){
                return{
                    msg:'父組件中的數據'
                }
            }
        }

        new Vue({
            el:'#app',
            data:{

            },
            components:{
                App
            }

        })
    </script>
</body>
</html>
組件異步加載
html文件
<!DOCTYPE html>
<html lang="en">
<head>
    <meta charset="UTF-8">
    <meta name="viewport" content="width=device-width, initial-scale=1.0">
    <title>Document</title>
</head>
<body>
    <div id="app">
        <App></App>
    </div>
    <script src="./vue.js"></script>
    <script type="module">
        const App = {
            data(){
                return{
                    isShow:false
                }
            },
            methods:{
                handClick(){
                    this.isShow = !this.isShow
                }
            },
            components:{
                Test:()=>import('./Test.js')
            },
            template:`
                <div>
                    <Test v-if="isShow"></Test>
                    <button @click='handClick'>異步加載</button>
                </div>

            `
        }

        new Vue({
            el:'#app',
            data:{

            },
            components:{
                App
            }
        })
    </script>
</body>
</html>
js文件
export default {
    data(){
        return{
            msg:'亦雙弓'
        }
    },
    template:`
        <div>
            <h3>{{msg}}</h3>
        </div>
    `
}
VUE——插槽
匿名插槽
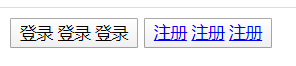
<!DOCTYPE html>
<html lang="en">
<head>
    <meta charset="UTF-8">
    <meta name="viewport" content="width=device-width, initial-scale=1.0">
    <title>Document</title>
</head>
<body>
    <div id="app">
        <App></App>
    </div>
    <script src="./vue.js"></script>
    <script>
        Vue.component('MBtn',{
            template:`
                <button>
                    <slot></slot>
                </button>
            `
        })

        const App = {
            data(){
                return{
                    title:'父組件'
                }
            },
            template:`
                <div>
                    <m-btn>登錄</m-btn>
                    <m-btn><a href='#'>注冊</a></m-btn>
                </div>
            `

        }

        new Vue({
            el:'#app',
            data:{

            },
            components:{
                App
            }
        })
    </script>
</body>
</html>
注意:匿名插槽 <slot></slot> 只能出現一次,如果出現多次,則會出造成以下情況。
<button>
<slot></slot>
<slot></slot>
<slot></slot>
</button>
具名插槽
<!DOCTYPE html>
<html lang="en">
<head>
    <meta charset="UTF-8">
    <meta name="viewport" content="width=device-width, initial-scale=1.0">
    <title>Document</title>
</head>
<body>
    <div id="app">
        <App></App>
    </div>
    <script src="./vue.js"></script>
    <script>
        Vue.component('MBtn',{
            // 插入組件的順序和命名時的順序無關
            template:`
                <button>
                    <slot name = 'login'></slot>
                    <slot name = 'register'></slot>
                    <slot name = 'submit'></slot>
                </button>
            `
        })

        const App = {
            data(){
                return{
                    title:'父組件'
                }
            },
            template:`
                <div>
                    <m-btn>
                        <template slot = 'login'>
                            登錄
                        </template>
                    </m-btn>
                    <m-btn>
                        <template slot = 'submit'>
                            提交
                        </template>
                    </m-btn>
                    <m-btn>
                        <template slot = 'register'>
                            注冊
                        </template>
                    </m-btn>

                </div>
            `

        }

        new Vue({
            el:'#app',
            data:{

            },
            components:{
                App
            }
        })
    </script>
</body>
</html>
注意:插入組件的順序和命名時的順序無關
作用域插槽
有時讓插槽內容能夠訪問子組件中才有的數據是很有用的
<!DOCTYPE html>
<html lang="en">
<head>
    <meta charset="UTF-8">
    <meta name="viewport" content="width=device-width, initial-scale=1.0">
    <title>Document</title>
</head>
<body>
    <div id='app'>
        <App></App>
    </div>
    <script src="./vue.js"></script>
    <script>
        // 要求:
        // 1.之前數據格式和應用接口不變,正常顯示
        // 2.新功能模塊:增加對勾
        const todoList = {
            data(){
                return{

                }
            },
            props:{
                todos: Array,
                defaultValue:[]
            },
            template:`
                <ul>
                    <li v-for='item in todos' :key='item.id'>
                        <slot :itemValue = 'item'>

                        </slot>
                        {{ item.title }}
                    </li>
                </ul>
            `
        }

        const App = {
            data(){
               return{
                    todoList:[
                        {
                            title:'你的玫瑰',
                            isComplate:true,
                            id:1
                        },
                        {
                            title:'獨善其身',
                            isComplate:false,
                            id:2
                        },
                        {
                            title:'失憶的金魚',
                            isComplate:false,
                            id:3
                        },
                        {
                            title:'浪費',
                            isComplate:true,
                            id:4
                        },
                    ]
                }
            },
            components:{
                todoList
            },
            template:`
                <todoList :todos="todoList">
                    <template v-slot='data'>
                        <input type="checkbox" v-model="data.itemValue.isComplate" />
                    </template>
                </todoList>
            `,
        }
        new Vue({
            el:'#app',
            data:{

            },
            components:{
                App
            }
        })
    </script>
</body>
</html>
生命周期
生命周期鉤子
beforeCreate
created                                         重要
beforeMount
mounted                                         重要
beforeUpdate
updated                                         重要
activated       組件激活    配合 keep-alive     需要掌握
deactivated     組件停用    配合 keep-alive     需要掌握
beforeDestroy   銷毀之前                        需要掌握
destroyed       銷毀完成                        需要掌握
<!DOCTYPE html>
<html lang="en">
<head>
    <meta charset="UTF-8">
    <meta name="viewport" content="width=device-width, initial-scale=1.0">
    <title>Document</title>
    <style>
        .active{
            color: red;
        }
    </style>
</head>
<body>
    <div id="app">
        <App></App>
    </div>
    <script src="./vue.js"></script>
    <script>

        /*
            beforeCreate
            created                                         重要
            beforeMount
            mounted                                         重要
            beforeUpdate
            updated                                         重要
            activated       組件激活    配合 keep-alive     需要掌握
            deactivated     組件停用    配合 keep-alive     需要掌握
            beforeDestroy   銷毀之前                        需要掌握
            destroyed       銷毀完成                        需要掌握
        */

        Vue.component('Test',{
            data(){
                return{
                    msg:'亦雙弓',
                    isRed:false
                }
            },
            methods:{
                handClick(){
                    this.msg = 'ysg';
                    this.isRed = true;
                }
            },
            template:`
                <div>
                    <button @click='handClick'>改變</button>
                    <h3 :class="{active:isRed}">{{msg}}</h3>
                </div>
            `,
            beforeCreate(){
                console.log('組件創建之前',this.$data)
            },
            created(){
                // 這時可以做一件非常重要的事情:發送 ajax 請求后端數據
                console.log('組件創建完成',this.$data)
            },
            beforeMount(){
                // 即將掛載
               console.log('DOM掛載之前', document.getElementById('app'))
            },
            mounted(){
                console.log('DOM掛載完成', document.getElementById('app'))
            },
            beforeUpdate(){
                // 獲取更新之前 原始的DOM
                console.log('更新之前的DOM',document.getElementById('app').innerHTML)
            },
            updated(){
                // 獲取更新之后 最新的DOM
                console.log('更新之后的DOM',document.getElementById('app').innerHTML)
            },
            beforeDestroy(){
                // 銷毀之前
                console.log('銷毀之前')
            },
            destroyed(){
                // 銷毀完成
                console.log('銷毀完成')
            },
            activated(){
                console.log('組件激活')
            },
            deactivated(){
                console.log('組件停用')
            },
        })

        const App = {
            data(){
                return{
                    isShow:true
                }
            },
            components:{

            },
            methods:{
                handClick(){
                    this.isShow = !this.isShow
                }
            },
            template:`
                <div>
                    <keep-alive>
                        <Test v-if="isShow"></Test>
                    </keep-alive>

                    <button @click='handClick'>銷毀與否</button>
                </div>

            `
        }

        new Vue({
            el:'#app',
            data:{

            },
            components:{
                App
            }
        })
    </script>
</body>
</html>
refs的使用
1.如果給標簽添加 ref,獲取的是真實的 DOM 節點
2.如果給子組件添加 ref,獲取的是當前子組件對象
<!DOCTYPE html>
<html lang="en">
<head>
    <meta charset="UTF-8">
    <meta name="viewport" content="width=device-width, initial-scale=1.0">
    <title>Document</title>
</head>
<body>
    <div id="app">
        <App></App>
    </div>
    <script src="./vue.js"></script>
    <script type="module">

        Vue.component('Test',{
            data(){
                return{
                    msg:'亦雙弓'
                }
            },
            template:`
                <h3>{{msg}}</h3>
            `
        })

        const App = {
            data(){
                return{

                }
            },
            mounted(){
                // 1.如果給標簽添加 ref,獲取的是真實的 DOM 節點
                // 2.如果給子組件添加 ref,獲取的是當前子組件對象
                console.log(this.$refs.btn);
                console.log(this.$refs.test);
                // 加載界面 自動獲取焦點
                this.$refs.input.focus();

            },
            template:`
                <div>
                    <Test ref='test'></Test>
                    <input type="text" ref="input"></input>
                    <button ref='btn'>改變</button>
                </div>
                `
        }

        new Vue({
            el:'#app',
            data:{

            },
            components:{
                App
            }
        })
    </script>
</body>
</html>
nextTick
nextTick的使用
<!DOCTYPE html>
<html lang="en">
<head>
    <meta charset="UTF-8">
    <meta name="viewport" content="width=device-width, initial-scale=1.0">
    <title>Document</title>
</head>
<body>
    <div id="app">
        <h3>{{ msg }}</h3>
    </div>
    <script src="./vue.js"></script>
    <script type="module">
        const vm = new Vue({
            el:'#app',
            data:{
                msg:'亦雙弓'
            },
        })

        vm.msg = 'new msg'
        console.log(vm.$el.textContent) // 獲取的還是沒變化前的 msg
        Vue.nextTick(()=>{
            // 為了數據變化之后等待 vue 完成更新 DOM,可以在數據變化之后立即使用 Vue.nextTick 在當前的
            // 回調函數中可以獲取最新的 DOM
            console.log(vm.$el.textContent) // 獲取的是變化后的 msg
        })

    </script>
</body>
</html>
nextTick的應用
<!DOCTYPE html>
<html lang="en">
<head>
    <meta charset="UTF-8">
    <meta name="viewport" content="width=device-width, initial-scale=1.0">
    <title>Document</title>
</head>
<body>
    <div id="app">
        <App></App>
    </div>
    <script src="./vue.js"></script>
    <script>
        /*
            要求:
                在頁面拉取一個接口,這個接口返回一些數據,這些數據是這個頁面的一個浮層組件要依賴的,
                然后在接口已返回數據就展示了這個浮層組件,
                并在展示的同時,上報一些數據給后臺(這些數據是父組件從接口拿的)。
                這個時候,神奇的事情發送了,雖然拿到了數據,但是浮層展現的時候,這些數據還未更新到組件上去,上報時報
        */
        const Pop = {
            data(){
                return{
                    isShow:false
                }
            },
            props:{
                name:{
                    type:String,
                    default:''
                }
            },
            template:`
                <div v-if='isShow'>
                    {{ name }}
                </div>
            `,
            methods:{
                show(){
                    this.isShow = true // 彈窗組件展示
                    console.log(this.name)
                }
            },
        }
        const App = {
            data(){
                return{
                    name:''
                }
            },
            created(){
                // 模擬異步請求
                setTimeout(()=>{
                    this.name = 'ysg'
                    this.$nextTick(()=>{
                        this.$refs.pop.show()
                    })
                },1000)
            },
            components:{
                Pop
            },
            template:`
            <pop ref='pop' :name="name"></pop>
            `
        }
        new Vue({
            el:'#app',
            components:{
                App
            }
        })

    </script>
</body>
</html>
mixin
mixin混入偷懶技術
mixin 來分發 Vue 中可復用的功能
<!DOCTYPE html>
<html lang="en">
<head>
    <meta charset="UTF-8">
    <meta name="viewport" content="width=device-width, initial-scale=1.0">
    <title>Document</title>
</head>
<body>
    <div id="app">
        <h3>
            {{ msg }}
        </h3>
    </div>

    <script src="./vue.js"></script>
    <script>
        const myMixin={
            data(){
                return{
                    msg:123     // 界面上就會顯示 123
                }
            },
            created(){
                this.sayHello()
            },
            methods:{
                sayHello(){
                    console.log('Hello 123')  // console 中就會顯示 Hello world
                }
            }
        }

        new Vue({
            el:'#app',
            data:{
                title:'亦雙弓',
                msg:'ysging'    // 假如這里也有 msg 就會優先顯示這里的
            },
            created(){
                console.log('111111')   // created() 會同時顯示,假如這里存在 this.sayHello(),則會調用兩次 這里的 sayHello()
            },
            mixins:[myMixin]      // 數組,可放入多個混入對象
        })

    </script>
</body>
</html>
mixin混入技術應用
創建全局的 mixin 要格外的小心,因為每個組件實例創建時,都會被調用
使用比較少
Vue.mixin({
})
<!DOCTYPE html>
<html lang="en">
<head>
    <meta charset="UTF-8">
    <meta name="viewport" content="width=device-width, initial-scale=1.0">
    <title>Document</title>
</head>
<body>
    <div id="app">

    </div>
    <script src="./vue.js"></script>
    <script>
        /*
            創建全局的 mixin 要格外的小心,因為每個組件實例創建時,都會被調用
            使用比較少
            Vue.mixin({

            })
        */
        const Temp = {
            data(){
                return{
                    isShow:false
                }
            },
            methods:{
                toggleShow(){
                    this.isShow = !this.isShow
                }
            }
        }

        const app2 = {
            template :`
                <div v-if='isShow'> App2 組件 </div>
            `,
            // 局部的 mixin
            mixins: [Temp]
        }

        const app1 = {
            template :`
                <div v-if='isShow'> App1 組件 </div>
            `,
            mixins: [Temp]
        }

        new Vue({
            el:'#app',
            data:{
            },
            components:{
                app1, app2
            },
            template:`
                <div>
                    <button @click='handleApp1'>app1</button>
                    <button @click='handleApp2'>app2</button>
                    <app1 ref='a1'></app1>
                    <app2 ref='a2'></app2>
                </div>
            `,
            methods:{
                handleApp1(){
                    this.$refs.a1.toggleShow()
                },
                handleApp2(){
                    this.$refs.a2.toggleShow()
                },
            }
        })

    </script>
</body>
</html>
對象變更檢測注意事項
Vue 不能檢測對象屬性的添加與刪除
如果想要動態 添加與刪除 屬性,使用以下方法
// 方法一
this.$set(this.user,'age',20);
// 方法二 添加多個響應式屬性
this.user = Object.assign({},this.user,{
age:20,
phone:123456789
})
<!DOCTYPE html>
<html lang="en">
<head>
    <meta charset="UTF-8">
    <meta name="viewport" content="width=device-width, initial-scale=1.0">
    <title>Document</title>
</head>
<body>
    <div id="app">
        <h3>
            {{ user.name }} {{ user.age }} {{ user.phone }}
        </h3>
        <button @click='handClick'>添加屬性</button>
    </div>
    <script src="./vue.js"></script>
    <script>
        // Vue 不能檢測對象屬性的添加與刪除
        new Vue({
            el:'#app',
            data:{
                user:{}
            },
            created(){
                setTimeout(()=>{
                    this.user = {
                        name:'張三',
                    }
                },2000)
            },
            methods:{
                handClick(){
                    // this.user.age = 20
                    // 如果想要動態 添加與刪除 屬性,使用以下方法
                    // 方法一
                    this.$set(this.user,'age',20);
                    // 方法二 添加多個響應式屬性
                    this.user = Object.assign({},this.user,{
                        age:20,
                        phone:123456789
                    })

                }
            }
        })

    </script>
</body>
</html>

 浙公網安備 33010602011771號