TP6框架--EasyAdmin學習筆記:實現數據庫增刪查改
這是我寫的學習EasyAdmin的第三章,這一章我給大家分享下如何進行數據庫的增刪查改
上一章鏈接:點擊這里前往
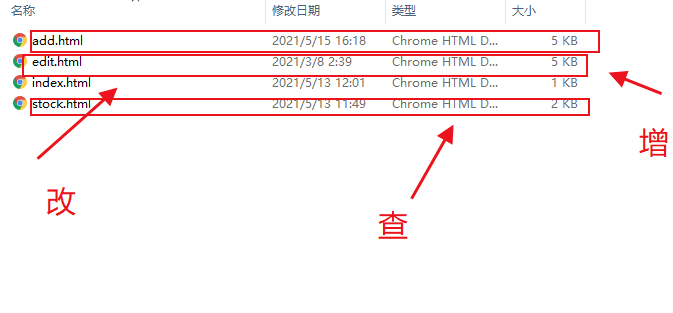
上一章我們說到,我仿照官方案例,定義了一條路由goodsone和創建了對應數據庫,我們可以看到view復制goodsone的文件夾中又這么幾個文件
這些文件中,index.html是我們看到的列表頁面,因為easyadmin前端采用的是layui,所有我們看到的內容是這樣的
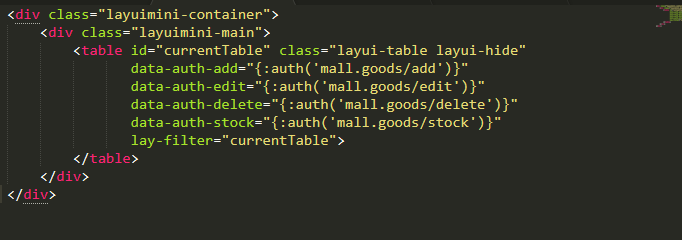
我們可以看到很明顯的layui痕跡,這里中增刪改查已經又框架默認方法,路由的格式如上圖設置即可
頁面效果如下:

這里沒有layui知識的小伙伴會有一個疑問,頁面中的數據和按鈕是怎么出來的,上章定義路由的過程中,每一個路由都需要一個對應的js文件,這里的表單和按鈕就是在哪里設置的,內容如下:
define(["jquery", "easy-admin"], function ($, ea) {

    var init = {
        table_elem: '#currentTable',
        table_render_id: 'currentTableRenderId',
        index_url: 'mall.goodsone/index',
        add_url: 'mall.goodsone/add',
        edit_url: 'mall.goodsone/edit',
        delete_url: 'mall.goodsone/delete',
        export_url: 'mall.goodsone/export',
        modify_url: 'mall.goodsone/modify',
        stock_url: 'mall.goodsone/stock',
    };

    var Controller = {

        index: function () {
            ea.table.render({
                init: init,
                toolbar: ['refresh',
                    [{
                        text: '添加',
                        url: init.add_url,
                        method: 'open',
                        auth: 'add',
                        class: 'layui-btn layui-btn-normal layui-btn-sm',
                        icon: 'fa fa-plus ',
                        extend: 'data-full="true"',
                    }],
                    'delete', 'export'],
                cols: [[
                    {type: "checkbox"},
                    {field: 'id', width: 80, title: 'ID'},
                    {field: 'sort', width: 80, title: '排序', edit: 'text'},
                    {field: 'cate.title', minWidth: 80, title: '商品分類'},
                    {field: 'title', minWidth: 80, title: '商品名稱'},
                    {field: 'logo', minWidth: 80, title: '分類圖片', search: false, templet: ea.table.image},
                    {field: 'market_price', width: 100, title: '市場價', templet: ea.table.price},
                    {field: 'discount_price', width: 100, title: '折扣價', templet: ea.table.price},
                    {field: 'total_stock', width: 100, title: '庫存統計'},
                    {field: 'stock', width: 100, title: '剩余庫存'},
                    {field: 'virtual_sales', width: 100, title: '虛擬銷量'},
                    {field: 'sales', width: 80, title: '銷量'},
                    {field: 'status', title: '狀態', width: 85, search: 'select',selectList: {0: '禁用', 1: '啟用'}, templet: ea.table.switch},
                    {field: 'create_time', minWidth: 80, title: '創建時間'},
                    {
                        width: 250,
                        title: '操作',
                        templet: ea.table.tool,
                        operat: [
                            [{
                                text: '編輯',
                                url: init.edit_url,
                                method: 'open',
                                auth: 'edit',
                                class: 'layui-btn layui-btn-xs layui-btn-success',
                                extend: 'data-full="true"',
                            },
                            // {
                            //     text: '入庫',
                            //     url: init.stock_url,
                            //     method: 'open',
                            //     auth: 'stock',
                            //     class: 'layui-btn layui-btn-xs layui-btn-normal',
                            // }
                            ],
                            'delete']
                    }
                ]],
            });

            ea.listen();
        },
        add: function () {
            ea.listen();
        },
        edit: function () {
            ea.listen();
        },
        stock: function () {
            ea.listen();
        },
    };
    return Controller;
});
上方的代碼大家可以清晰的看到各個增刪查改的路由,直接照抄即可,layui大佬可以直接根據項目來修改,而對應的路由代碼是放在controller層,代碼如下大家而可以參考:
<?php


namespace app\admin\controller\mall;


use app\admin\model\MallGoodsOne;
use app\admin\traits\Curd;
use app\common\controller\AdminController;
use EasyAdmin\annotation\ControllerAnnotation;
use EasyAdmin\annotation\NodeAnotation;
use think\Facade\Db;
use think\App;

/**
 * Class Goods
 * @package app\admin\controller\mall
 * @ControllerAnnotation(title="商城商品管理")
 */
class GoodsOne extends AdminController
{

    use Curd;

    protected $relationSearch = true;

    public function __construct(App $app)
    {
        parent::__construct($app);
        $this->model = new MallGoodsOne();
    }

    /**
     * @NodeAnotation(title="列表")
     */
    public function index()
    {
        //var_dump($this->request->isAjax());exit();
        if ($this->request->isAjax()) {
            if (input('selectFields')) {
                return $this->selectList();
            }
            list($page, $limit, $where) = $this->buildTableParames();
            $count = $this->model
                ->withJoin('cate', 'LEFT')
                ->where($where)
                ->count();
            $list = $this->model
                ->withJoin('cate', 'LEFT')
                ->where($where)
                ->page($page, $limit)
                ->order($this->sort)
                ->select();
            $data = [
                'code'  => 0,
                'msg'   => '',
                'count' => $count,
                'data'  => $list,
            ];
            return json($data);
        }
        return $this->fetch();
    }
}
如果本文對你有所幫助,麻煩你點個贊,下一章講下如何在EasyAdmin中用php來實現excel導入表中。

 浙公網安備 33010602011771號