
網絡編程實踐筆記_4_"阿貝云"_"免費云服務器"_簡易博客_
有了簡單方便的服務器,(在我的理解下還是個電腦主機,只不過連著網,實際就像個內網的AGV小車,可以ssh到他而已),
ssh遠程控制和scp遠程傳輸文件之后,就可以準備代碼了,
沒做過網頁編碼,也沒了解過什么前后臺。
也不知道剛開始要干嘛,就在百度AI搜了一下:
“想自己搭建一個服務器,建立一個微型信息收發服務器”
結果給出的結果是
硬件準備
建議使用閑置電腦或樹莓派作為基礎設備,配置至少雙核CPU(如i5)、8GB內存和500GB SSD+HDD混合存儲,確保千兆網卡支持23。若追求低功耗,樹莓派是理想選擇,其功耗僅5W左右2。
操作系統選擇
推薦Ubuntu Server或CentOS等Linux系統,它們免費且穩定性高,適合運行輕量級服務23。若習慣Windows環境,可選用Windows Server 2016及以上版本,但需注意驅動兼容性問題4。
就光看到很高的配置,下面的也沒仔細看。
然后AI搜索了一下:
“如何在免費云平臺上搭建服務器”
習慣的往下拽看內容,結果上面可選項里最后一條吸引了我的注意力:
阿貝云?:國內免備案服務,免費虛擬主機+域名,適合個人博客或測試環境
也不懂什么是備案,什么是域名,就記住名字了,
接著AI搜:
”阿貝云上搭建微型服務器“
給出一段稍微能看懂的代碼,是python寫的,喜出望外,這個比較熟,還省事,就這么干了
(上面還有一段關鍵的,就是防火墻放行端口那命令,又被習慣的略過了,導致后來折騰了一天時間)
不過經過上面的搜索,看到了幾個關鍵詞,flask看出是個py庫,還有系統名字是CentOS,應該是就是Ubantu的馬甲,
還有一個不知道是什么的Gunicorn
都扔給AI,繼續AI搜索:
“阿貝云的使用方式,比如想要用python+flask做一個最簡單的博客應用,使用CentOS,Gunicorn”
這次有詳細操作過程和兩端代碼,全拷貝下來,照著做。
在CentOS系統上使用Python+Flask部署博客應用,可通過Gunicorn作為WSGI服務器實現生產環境運行。以下是關鍵步驟和配置方法:
環境準備與依賴安裝
需安裝Python 3、pip及Flask框架,通過pip install flask gunicorn命令安裝核心依賴12。對于數據庫支持,可添加SQLAlchemy或直接使用SQLite3。
應用代碼結構
基礎Flask應用需包含路由定義和模板渲染功能。例如主文件app.py需定義首頁路由和文章展示邏輯,使用render_template加載HTML模板34。
Gunicorn部署配置
通過命令gunicorn --bind 0.0.0.0:5000 app:app啟動服務,其中app:app表示模塊名與應用實例名12。若需后臺運行,可結合nohup或Supervisor管理進程2。
完整項目示例
以下為博客應用的完整代碼結構和部署文件:
代碼說明:
app.py定義基礎路由和文章數據模擬;index.html使用Jinja2模板引擎渲染動態內容;requirements.txt列出運行所需的Python包及版本。
部署時需將整個項目上傳至CentOS服務器,通過虛擬環境安裝依賴后,使用Gunicorn命令啟動服務12。對于持久化存儲,可擴展SQLAlchemy實現數據庫集成3。
中途和前面還有點AI搜索內容,主打就是一個哪里不懂問哪里,在代碼量不大的情況下,AI給出的回答還是挺豐富的,要自己取舍理解
記得他最先給的一個創建文章的html文件,使用的命令和整體博客系統給的不一樣,我還追問了
@app.route('/create', methods=['GET', 'POST']) def create(): if request.method == 'POST': title = request.form['title'] content = request.form['content'] new_post = Post(title=title, content=content) db.session.add(new_post) db.session.commit() return redirect(url_for('index')) return render_template('create.html') 使用了這種數據庫創建函數,請修改index.html與之對應
之后又給了我一個40多行的更新后的網頁文件。
在本地拿pycharm運行他給的三個文件之一的main.py,各種提示命令找不到,然后接著搜,按回答,安裝各種pip包,最后運行起來,pycharm下面的輸出欄里就會出現本機地址:5000 這么一個鏈接,點開就自動打開瀏覽器,結果一個空白還是個404沒記住,pycharm下面信息也報錯了,提示找不到index.html.
老規矩接著搜,原來是沒把網頁文件放到合適的文件夾里,我還好奇百度給的代碼里,網頁文件名前面帶著路徑。。。。按他給的結構,建立好文件夾,放到對應位置。再運行!
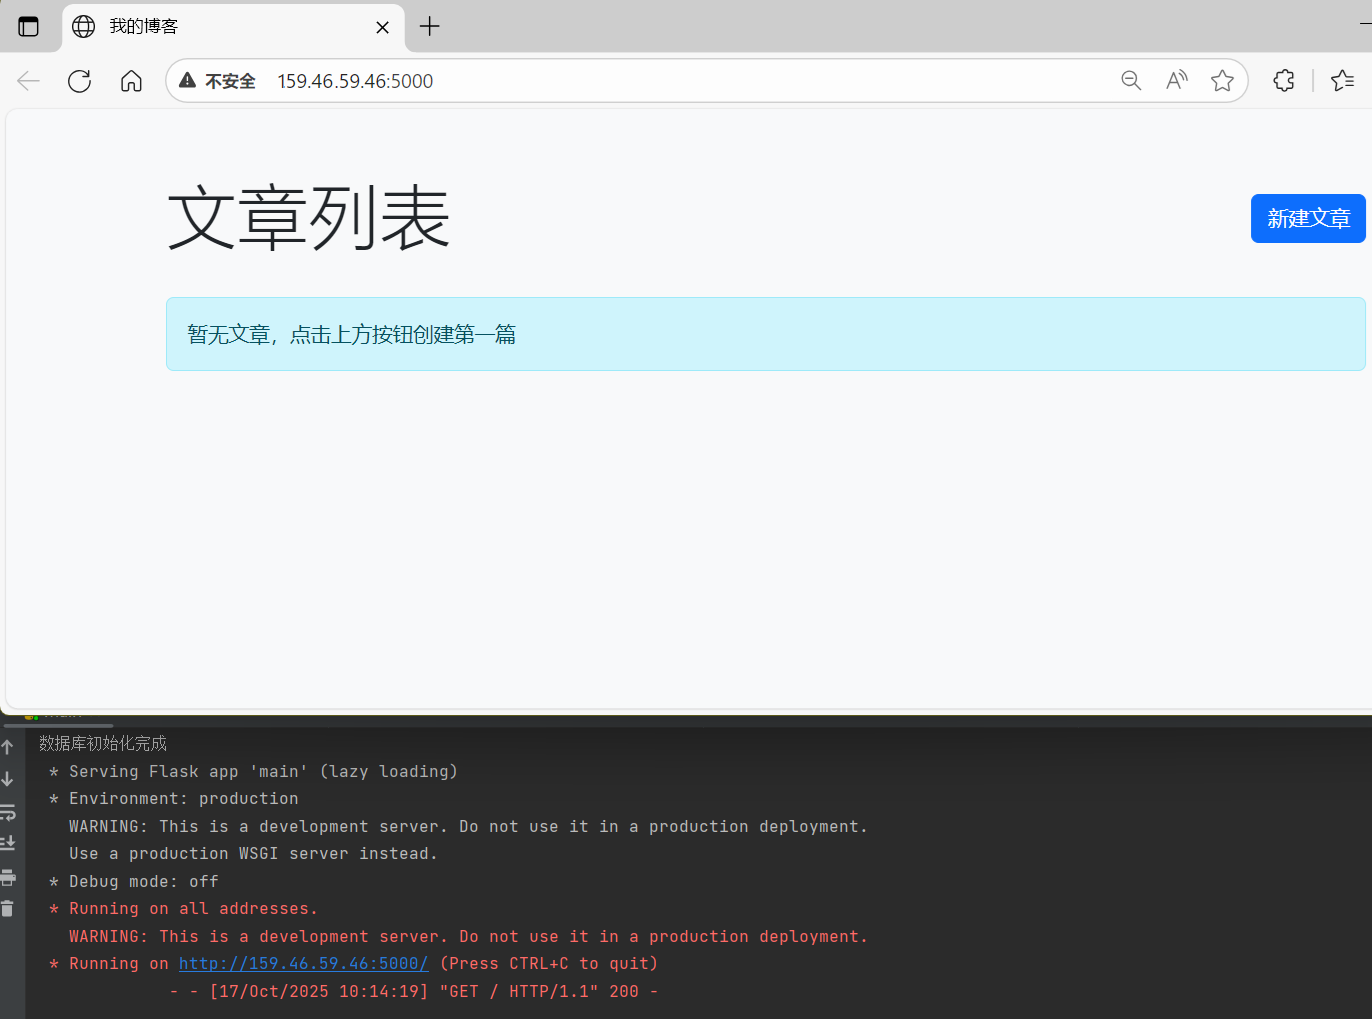
橫空出世
然后自己新建了好多,一個個便利貼樣子的帖子就出來啦,不過排布方式和顯示方式我也控制不了,不過也挺滿意的,后續的代碼修改,也可以進行了

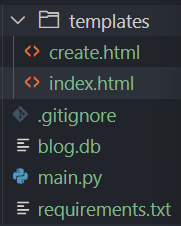
結構中,index.html 代碼如下:
 1 <!DOCTYPE html>
 2 <html lang="zh-CN">
 3 <head>
 4     <meta charset="UTF-8">
 5     <meta name="viewport" content="width=device-width, initial-scale=1.0">
 6     <title>我的博客</title>
 7     <link href="https://cdn.jsdelivr.net/npm/bootstrap@5.3.0/dist/css/bootstrap.min.css" rel="stylesheet">
 8 </head>
 9 <body class="bg-light">
10     <div class="container py-5">
11         <div class="d-flex justify-content-between align-items-center mb-4">
12             <h1 class="display-4">文章列表</h1>
13             <a href="/create" class="btn btn-primary">新建文章</a>
14         </div>
15
16         <div class="row g-4">
17             {% for post in posts %}
18             <div class="col-md-6 col-lg-4">
19                 <div class="card shadow-sm h-100">
20                     <div class="card-body">
21                         <h5 class="card-title">{{ post.title }}</h5>
22                         <p class="card-text text-muted">{{ post.content|truncate(100) }}</p>
23                     </div>
24                     <div class="card-footer bg-transparent">
25                         <small class="text-muted">發布于 {{ post.created_at.strftime('%Y-%m-%d') }}</small>
26                     </div>
27                 </div>
28             </div>
29             {% else %}
30             <div class="col-12">
31                 <div class="alert alert-info">暫無文章,點擊上方按鈕創建第一篇</div>
32             </div>
33             {% endfor %}
34         </div>
35     </div>
36
37     <script src="https://cdn.jsdelivr.net/npm/bootstrap@5.3.0/dist/js/bootstrap.bundle.min.js"></script>
38 </body>
39 </html>
Create.html如下
 1 <!DOCTYPE html>
 2 <html lang="zh-CN">
 3 <head>
 4     <meta charset="UTF-8">
 5     <meta name="viewport" content="width=device-width, initial-scale=1.0">
 6     <title>新建文章 - 我的博客</title>
 7     <link href="https://cdn.jsdelivr.net/npm/bootstrap@5.3.0/dist/css/bootstrap.min.css" rel="stylesheet">
 8     <style>
 9         .form-container {
10             max-width: 800px;
11             margin: 2rem auto;
12             padding: 2rem;
13             background: white;
14             border-radius: 10px;
15             box-shadow: 0 0.5rem 1rem rgba(0, 0, 0, 0.1);
16         }
17         .form-title {
18             margin-bottom: 1.5rem;
19             padding-bottom: 0.5rem;
20             border-bottom: 1px solid #eee;
21         }
22         .form-control:focus {
23             border-color: #86b7fe;
24             box-shadow: 0 0 0 0.25rem rgba(13, 110, 253, 0.25);
25         }
26     </style>
27 </head>
28 <body class="bg-light">
29     <div class="container py-5">
30         <div class="form-container">
31             <h2 class="form-title">撰寫新文章</h2>
32             <form method="POST" action="/create">
33                 <div class="mb-3">
34                     <label for="title" class="form-label">文章標題</label>
35                     <input type="text" class="form-control" id="title" name="title" required>
36                 </div>
37                 <div class="mb-4">
38                     <label for="content" class="form-label">文章內容</label>
39                     <textarea class="form-control" id="content" name="content" rows="10" required></textarea>
40                 </div>
41                 <div class="d-flex justify-content-between">
42                     <a href="/" class="btn btn-outline-secondary">取消</a>
43                     <button type="submit" class="btn btn-primary">發布文章</button>
44                 </div>
45             </form>
46         </div>
47     </div>
48
49     <script src="https://cdn.jsdelivr.net/npm/bootstrap@5.3.0/dist/js/bootstrap.bundle.min.js"></script>
50     <script>
51         // 自動聚焦標題輸入框
52         document.addEventListener('DOMContentLoaded', function() {
53             document.getElementById('title').focus();
54         });
55     </script>
56 </body>
57 </html>
main.py代碼如下
  1 # This is a sample Python script.
  2 from flask import Flask, render_template, request, redirect, url_for, jsonify
  3 from flask_sqlalchemy import SQLAlchemy
  4 from datetime import datetime
  5 import sqlite3
  6 import bcrypt
  7 from functools import wraps
  8 import os
  9
 10
 11 # Press Shift+F10 to execute it or replace it with your code.
 12 # Press Double Shift to search everywhere for classes, files, tool windows, actions, and settings.
 13
 14
 15 def print_hi(name):
 16     # Use a breakpoint in the code line below to debug your script.
 17     print(f'Hi, {name}')  # Press Ctrl+F8 to toggle the breakpoint.
 18     post_created_at = datetime.now()  # 實際應用中這里是從數據庫獲取的時間
 19
 20
 21 def init_database():
 22     # 連接數據庫(不存在則自動創建)
 23     conn = sqlite3.connect('blog.db')
 24     cursor = conn.cursor()
 25
 26     cursor.execute("SELECT name FROM sqlite_master WHERE type='table' AND name='users'")
 27     if cursor.fetchone():
 28         conn.close()
 29         print("數據庫已存在,跳過初始化")
 30         return
 31
 32     # 創建用戶表
 33     cursor.execute('''CREATE TABLE IF NOT EXISTS users(
 34         id INTEGER PRIMARY KEY AUTOINCREMENT,
 35         username TEXT UNIQUE NOT NULL,
 36         password TEXT NOT NULL,
 37         created_at TIMESTAMP DEFAULT CURRENT_TIMESTAMP
 38     )''')
 39
 40     # 創建文章表
 41     cursor.execute('''CREATE TABLE IF NOT EXISTS posts(
 42         id INTEGER PRIMARY KEY AUTOINCREMENT,
 43         title TEXT NOT NULL,
 44         content TEXT NOT NULL,
 45         author_id INTEGER NOT NULL,
 46         created_at TIMESTAMP DEFAULT CURRENT_TIMESTAMP,
 47         FOREIGN KEY(author_id) REFERENCES users(id)
 48     )''')
 49
 50     # 插入初始用戶
 51     cursor.execute("INSERT OR IGNORE INTO users(username, password) VALUES (?,?)",
 52                    ('user1', 'securepassword123'))
 53
 54     # 插入示例文章
 55     cursor.execute("INSERT INTO posts(title, content, author_id) VALUES (?,?,?)",
 56                    ('歡迎使用博客', '這是第一篇示例文章', 1))
 57
 58     conn.commit()
 59     conn.close()
 60     print("數據庫初始化完成")
 61
 62
 63 app = Flask(__name__)
 64 app.config['SQLALCHEMY_DATABASE_URI'] = 'sqlite:///blog.db'
 65 app.config['SQLALCHEMY_TRACK_MODIFICATIONS'] = False
 66 db = SQLAlchemy(app)
 67
 68
 69 class Post(db.Model):
 70     id = db.Column(db.Integer, primary_key=True)
 71     title = db.Column(db.String(100), nullable=False)
 72     content = db.Column(db.Text, nullable=False)
 73     created_at = db.Column(db.DateTime, default=datetime.now, nullable=False)
 74
 75
 76 @app.route('/')
 77 def index():
 78     posts = Post.query.order_by(Post.created_at.desc()).all()
 79     return render_template('index.html', posts=posts)
 80
 81
 82 @app.route('/create', methods=['GET', 'POST'])
 83 def create():
 84     if request.method == 'POST':
 85         title = request.form['title']
 86         content = request.form['content']
 87         new_post = Post(title=title, content=content)
 88         db.session.add(new_post)
 89         db.session.commit()
 90         return redirect(url_for('index'))
 91     return render_template('create.html')
 92
 93 # Press the green button in the gutter to run the script.
 94 if __name__ == '__main__':
 95     print_hi('PyCharm')
 96     init_database()
 97     with app.app_context():
 98         db.create_all()
 99     app.run(host='0.0.0.0', port=5000)
100
101 # See PyCharm help at https://www.jetbrains.com/help/pycharm/
102 # sudo apt-get update
103 # sudo apt-get install python3-pip
104 # sudo pip3 install virtualenv
105 # mkdir /var/www/flaskapp && cd /var/www/flaskapp
106 # virtualenv -p python3 venv
107 # source venv/bin/activate
108 # pip install flask gunicorn

 浙公網安備 33010602011771號