如何使用 HTML5 Canvas 制作水波紋效果
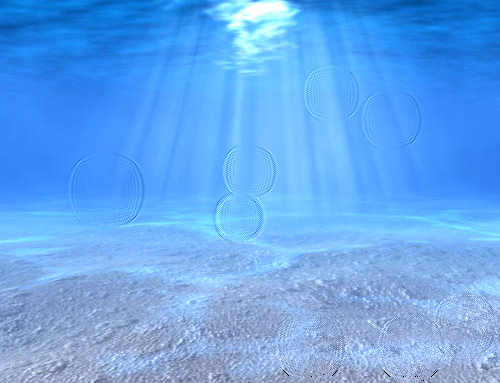
今天,我們繼續分享 JavaScript 實現的效果例子,這篇文章會介紹使用 JavaScript 實現水波紋效果。水波效果以圖片為背景,點擊圖片任意位置都會觸發。有時候,我們使用普通的 Javascript 就可以創建一個很有趣的解決功能。
Step 1. HTML
和以前一樣,首先是 HTML 代碼:
<!DOCTYPE html>
<html>
    <head>
        <meta charset=utf-8 />
        <title>Water drops effect</title>
        <link rel="stylesheet" href="css/main.css" type="text/css" />
        <script src="js/vector2d.js" type="text/javascript" charset="utf-8"></script>
        <script src="js/waterfall.js" type="text/javascript" charset="utf-8"></script>
    </head>
    <body>
        <div class="example">
            <h3><a href="#">Water drops effect</a></h3>

            <canvas id="water">HTML5 compliant browser required</canvas>
            <div id="switcher">
                <img onclick='watereff.changePicture(this.src);' src="data_images/underwater1.jpg" />
                <img onclick='watereff.changePicture(this.src);' src="data_images/underwater2.jpg" />
            </div>
            <div id="fps"></div>
        </div>
    </body>
</html>
Step 2. CSS
這是用到的 CSS 代碼:
body{background:#eee;margin:0;padding:0}
.example{background:#FFF;width:600px;border:1px #000 solid;margin:20px auto;padding:15px;-moz-border-radius: 3px;-webkit-border-radius: 3px}

#water {
    width:500px;
    height:400px;
    display: block;
    margin:0px auto;
    cursor:pointer;
}
#switcher {
    text-align:center;
    overflow:hidden;
    margin:15px;
}
#switcher img {
    width:160px;
    height:120px;
}
Step 3. JS
下面是主要的 JavaScript 代碼:
function drop(x, y, damping, shading, refraction, ctx, screenWidth, screenHeight){
    this.x = x;
    this.y = y;
    this.shading = shading;
    this.refraction = refraction;
    this.bufferSize = this.x * this.y;
    this.damping = damping;
    this.background = ctx.getImageData(0, 0, screenWidth, screenHeight).data;
    this.imageData = ctx.getImageData(0, 0, screenWidth, screenHeight);

    this.buffer1 = [];
    this.buffer2 = [];
    for (var i = 0; i < this.bufferSize; i++){
        this.buffer1.push(0);
        this.buffer2.push(0);
    }

    this.update = function(){
        for (var i = this.x + 1, x = 1; i < this.bufferSize - this.x; i++, x++){
            if ((x < this.x)){
                this.buffer2[i] = ((this.buffer1[i - 1] + this.buffer1[i + 1] + this.buffer1[i - this.x] + this.buffer1[i + this.x]) / 2) - this.buffer2[i];
                this.buffer2[i] *= this.damping;
            } else x = 0;
        }

        var temp = this.buffer1;
        this.buffer1 = this.buffer2;
        this.buffer2 = temp;
    }

    this.draw = function(ctx){
        var imageDataArray = this.imageData.data;
        for (var i = this.x + 1, index = (this.x + 1) * 4; i < this.bufferSize - (1 + this.x); i++, index += 4){
            var xOffset = ~~(this.buffer1[i - 1] - this.buffer1[i + 1]);
            var yOffset = ~~(this.buffer1[i - this.x] - this.buffer1[i + this.x]);
            var shade = xOffset * this.shading;
            var texture = index + (xOffset * this.refraction  + yOffset * this.refraction * this.x) * 4;
            imageDataArray[index] = this.background[texture] + shade;
            imageDataArray[index + 1] = this.background[texture + 1] + shade;
            imageDataArray[index + 2] = 50 + this.background[texture + 2] + shade;
        }
        ctx.putImageData(this.imageData, 0, 0);
    }
}

var fps = 0;

var watereff = {
    // variables
    timeStep : 20,
    refractions : 2,
    shading : 3,
    damping : 0.99,
    screenWidth : 500,
    screenHeight : 400,
    pond : null,
    textureImg : null,
    interval : null,
    backgroundURL : 'data_images/underwater1.jpg',

    // initialization
    init : function() {
        var canvas = document.getElementById('water');
        if (canvas.getContext){

            // fps countrt
            fps = 0;
            setInterval(function() {
                document.getElementById('fps').innerHTML = fps / 2 + ' FPS';
                fps = 0;
            }, 2000);

            canvas.onmousedown = function(e) {
                var mouse = watereff.getMousePosition(e).sub(new vector2d(canvas.offsetLeft, canvas.offsetTop));
                watereff.pond.buffer1[mouse.y * watereff.pond.x + mouse.x ] += 200;
            }
            canvas.onmouseup = function(e) {
                canvas.onmousemove = null;
            }

            canvas.width  = this.screenWidth;
            canvas.height = this.screenHeight;
            this.textureImg = new Image(256, 256);
            this.textureImg.src = this.backgroundURL;
            canvas.getContext('2d').drawImage(this.textureImg, 0, 0);
            this.pond = new drop(
                this.screenWidth,
                this.screenHeight,
                this.damping,
                this.shading,
                this.refractions,
                canvas.getContext('2d'),
                this.screenWidth, this.screenHeight
            );
            if (this.interval != null){
                clearInterval(this.interval);
            }
            this.interval = setInterval(watereff.run, this.timeStep);
        }
    },

    // change image func
    changePicture : function(url){
        this.backgroundURL = url;
        this.init();
    },

    // get mouse position func
    getMousePosition : function(e){
        if (!e){
            var e = window.event;
        }
        if (e.pageX || e.pageY){
            return new vector2d(e.pageX, e.pageY);
        } else if (e.clientX || e.clientY){
            return new vector2d(e.clientX, e.clientY);
        }
    },

    // loop drawing
    run : function(){
        var ctx = document.getElementById('water').getContext('2d');
        watereff.pond.update();
        watereff.pond.draw(ctx);
        fps++;
    }
}

window.onload = function(){
    watereff.init();
}
正如你所看到的,這里使用 Vector2D 函數,這個函數在 vector2d.js 里提供了。另一個很難的方法是使用純數學實現,感興趣的可以自己實驗一下。
您可能感興趣的相關文章
作者:山邊小溪
主站:yyyweb.com 記住啦:)
歡迎任何形式的轉載,但請務必注明出處。


 浙公網安備 33010602011771號