
AIDL基本使用
1、概述
Binder能干什么?Binder可以提供系統(tǒng)中任何程序都可以訪問的全局服務。這個功能當然是任何系統(tǒng)都應該提供的,下面我們簡單看一下Android的Binder的框架
Android Binder框架分為服務器接口、Binder驅(qū)動、以及客戶端接口;簡單想一下,需要提供一個全局服務,那么全局服務那端即是服務器接口,任何程序即客戶端接口,它們之間通過一個Binder驅(qū)動訪問。
服務器端接口:實際上是Binder類的對象,該對象一旦創(chuàng)建,內(nèi)部則會啟動一個隱藏線程,會接收Binder驅(qū)動發(fā)送的消息,收到消息后,會執(zhí)行Binder對象中的onTransact()函數(shù),并按照該函數(shù)的參數(shù)執(zhí)行不同的服務器端代碼。
Binder驅(qū)動:該對象也為Binder類的實例,客戶端通過該對象訪問遠程服務。
客戶端接口:獲得Binder驅(qū)動,調(diào)用其transact()發(fā)送消息至服務器
如果大家對上述不了解,沒關(guān)系,下面會通過例子來更好的說明,實踐是檢驗真理的唯一標準嘛
2、AIDL的使用
如果對Android比較熟悉,那么一定使用過AIDL,如果你還不了解,那么也沒關(guān)系,下面會使用一個例子展示AIDL的用法。
我們使用AIDL實現(xiàn)一個跨進程的加減法調(diào)用
1、服務端
新建一個項目,創(chuàng)建一個包名:com.zhy.calc.aidl,在包內(nèi)創(chuàng)建一個ICalcAIDL文件:
package com.zhy.calc.aidl;
interface ICalcAIDL
{
    int add(int x , int y);
    int min(int x , int y );
}
注意,文件名為ICalcAIDL.aidl
然后在項目的gen目錄下會生成一個ICalcAIDL.java文件,暫時不貼這個文件的代碼了,后面會詳細說明
然后我們在項目中新建一個Service,代碼如下:
package com.example.zhy_binder;

import com.zhy.calc.aidl.ICalcAIDL;

import android.app.Service;
import android.content.Intent;
import android.os.IBinder;
import android.os.RemoteException;
import android.util.Log;

public class CalcService extends Service
{
    private static final String TAG = "server";

    public void onCreate()
    {
        Log.e(TAG, "onCreate");
    }

    public IBinder onBind(Intent t)
    {
        Log.e(TAG, "onBind");
        return mBinder;
    }

    public void onDestroy()
    {
        Log.e(TAG, "onDestroy");
        super.onDestroy();
    }

    public boolean onUnbind(Intent intent)
    {
        Log.e(TAG, "onUnbind");
        return super.onUnbind(intent);
    }

    public void onRebind(Intent intent)
    {
        Log.e(TAG, "onRebind");
        super.onRebind(intent);
    }

    private final ICalcAIDL.Stub mBinder = new ICalcAIDL.Stub()
    {

        @Override
        public int add(int x, int y) throws RemoteException
        {
            return x + y;
        }

        @Override
        public int min(int x, int y) throws RemoteException
        {
            return x - y;
        }

    };

}
在此Service中,使用生成的ICalcAIDL創(chuàng)建了一個mBinder的對象,并在Service的onBind方法中返回
最后記得在AndroidManifest中注冊
<service android:name="com.example.zhy_binder.CalcService" >
           <intent-filter>
               <action android:name="com.zhy.aidl.calc" />

               <category android:name="android.intent.category.DEFAULT" />
           </intent-filter>
 </service>
這里我們指定了一個name,因為我們一會會在別的應用程序中通過Intent來查找此Service;這個不需要Activity,所以我也就沒寫Activity,安裝完成也看不到安裝圖標,悄悄在后臺運行著。
到此,服務端編寫完畢。下面開始編寫客戶端
2、客戶端
客戶端的代碼比較簡單,創(chuàng)建一個布局,里面包含4個按鈕,分別為綁定服務,解除綁定,調(diào)用加法,調(diào)用減法
布局文件:
<LinearLayout xmlns:android="http://schemas.android.com/apk/res/android"
    xmlns:tools="http://schemas.android.com/tools"
    android:layout_width="match_parent"
    android:layout_height="match_parent"
    android:orientation="vertical" >

    <Button
        android:layout_width="fill_parent"
        android:layout_height="wrap_content"
        android:onClick="bindService"
        android:text="BindService" />

    <Button
        android:layout_width="fill_parent"
        android:layout_height="wrap_content"
        android:onClick="unbindService"
        android:text="UnbindService" />

    <Button
        android:layout_width="fill_parent"
        android:layout_height="wrap_content"
        android:onClick="addInvoked"
        android:text="12+12" />

    <Button
        android:layout_width="fill_parent"
        android:layout_height="wrap_content"
        android:onClick="minInvoked"
        android:text="50-12" />

</LinearLayout>
主Activity
package com.example.zhy_binder_client;

import android.app.Activity;
import android.content.ComponentName;
import android.content.Context;
import android.content.Intent;
import android.content.ServiceConnection;
import android.os.Bundle;
import android.os.IBinder;
import android.util.Log;
import android.view.View;
import android.widget.Toast;

import com.zhy.calc.aidl.ICalcAIDL;

public class MainActivity extends Activity
{
    private ICalcAIDL mCalcAidl;

    private ServiceConnection mServiceConn = new ServiceConnection()
    {
        @Override
        public void onServiceDisconnected(ComponentName name)
        {
            Log.e("client", "onServiceDisconnected");
            mCalcAidl = null;
        }

        @Override
        public void onServiceConnected(ComponentName name, IBinder service)
        {
            Log.e("client", "onServiceConnected");
            mCalcAidl = ICalcAIDL.Stub.asInterface(service);
        }
    };

    @Override
    protected void onCreate(Bundle savedInstanceState)
    {
        super.onCreate(savedInstanceState);
        setContentView(R.layout.activity_main);

    }

    /**
     * 點擊BindService按鈕時調(diào)用
     * @param view
     */
    public void bindService(View view)
    {
        Intent intent = new Intent();
        intent.setAction("com.zhy.aidl.calc");
        bindService(intent, mServiceConn, Context.BIND_AUTO_CREATE);
    }
    /**
     * 點擊unBindService按鈕時調(diào)用
     * @param view
     */
    public void unbindService(View view)
    {
        unbindService(mServiceConn);
    }
    /**
     * 點擊12+12按鈕時調(diào)用
     * @param view
     */
    public void addInvoked(View view) throws Exception
    {

        if (mCalcAidl != null)
        {
            int addRes = mCalcAidl.add(12, 12);
            Toast.makeText(this, addRes + "", Toast.LENGTH_SHORT).show();
        } else
        {
            Toast.makeText(this, "服務器被異常殺死,請重新綁定服務端", Toast.LENGTH_SHORT)
                    .show();

        }

    }
    /**
     * 點擊50-12按鈕時調(diào)用
     * @param view
     */
    public void minInvoked(View view) throws Exception
    {

        if (mCalcAidl != null)
        {
            int addRes = mCalcAidl.min(58, 12);
            Toast.makeText(this, addRes + "", Toast.LENGTH_SHORT).show();
        } else
        {
            Toast.makeText(this, "服務端未綁定或被異常殺死,請重新綁定服務端", Toast.LENGTH_SHORT)
                    .show();

        }

    }

}
很標準的綁定服務的代碼。
直接看運行結(jié)果:

我們首先點擊BindService按鈕,查看log
08-09 22:56:38.959: E/server(29692): onCreate
08-09 22:56:38.959: E/server(29692): onBind
08-09 22:56:38.959: E/client(29477): onServiceConnected
可以看到,點擊BindService之后,服務端執(zhí)行了onCreate和onBind的方法,并且客戶端執(zhí)行了onServiceConnected方法,標明服務器與客戶端已經(jīng)聯(lián)通
然后點擊12+12,50-12可以成功的調(diào)用服務端的代碼并返回正確的結(jié)果
下面我們再點擊unBindService
08-09 22:59:25.567: E/server(29692): onUnbind
08-09 22:59:25.567: E/server(29692): onDestroy
由于我們當前只有一個客戶端綁定了此Service,所以Service調(diào)用了onUnbind和onDestory
然后我們繼續(xù)點擊12+12,50-12,通過上圖可以看到,依然可以正確執(zhí)行,也就是說即使onUnbind被調(diào)用,連接也是不會斷開的,那么什么時候會端口呢?
即當服務端被異常終止的時候,比如我們現(xiàn)在在手機的正在執(zhí)行的程序中找到該服務:
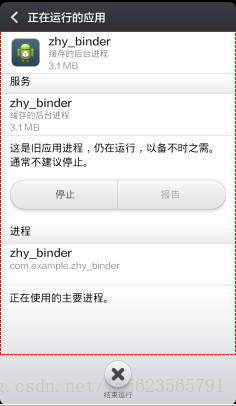
點擊停止,此時查看log
08-09 23:04:21.433: E/client(30146): onServiceDisconnected
可以看到調(diào)用了onServiceDisconnected方法,此時連接被斷開,現(xiàn)在點擊12+12,50-12的按鈕,則會彈出Toast服務端斷開的提示。
說了這么多,似乎和Binder框架沒什么關(guān)系,下面我們來具體看一看AIDL為什么做了些什么。
3、分析AIDL生成的代碼
1、服務端
先看服務端的代碼,可以看到我們服務端提供的服務是由
private final ICalcAIDL.Stub mBinder = new ICalcAIDL.Stub()
    {

        @Override
        public int add(int x, int y) throws RemoteException
        {
            return x + y;
        }

        @Override
        public int min(int x, int y) throws RemoteException
        {
            return x - y;
        }

    };
ICalcAILD.Stub來執(zhí)行的,讓我們來看看Stub這個類的聲明:
public static abstract class Stub extends android.os.Binder implements com.zhy.calc.aidl.ICalcAIDL
清楚的看到這個類是Binder的子類,是不是符合我們文章開通所說的服務端其實是一個Binder類的實例
接下來看它的onTransact()方法:
@Override public boolean onTransact(int code, android.os.Parcel data, android.os.Parcel reply, int flags) throws android.os.RemoteException
{
switch (code)
{
case INTERFACE_TRANSACTION:
{
reply.writeString(DESCRIPTOR);
return true;
}
case TRANSACTION_add:
{
data.enforceInterface(DESCRIPTOR);
int _arg0;
_arg0 = data.readInt();
int _arg1;
_arg1 = data.readInt();
int _result = this.add(_arg0, _arg1);
reply.writeNoException();
reply.writeInt(_result);
return true;
}
case TRANSACTION_min:
{
data.enforceInterface(DESCRIPTOR);
int _arg0;
_arg0 = data.readInt();
int _arg1;
_arg1 = data.readInt();
int _result = this.min(_arg0, _arg1);
reply.writeNoException();
reply.writeInt(_result);
return true;
}
}
return super.onTransact(code, data, reply, flags);
}
文章開頭也說到服務端的Binder實例會根據(jù)客戶端依靠Binder驅(qū)動發(fā)來的消息,執(zhí)行onTransact方法,然后由其參數(shù)決定執(zhí)行服務端的代碼。
可以看到onTransact有四個參數(shù)
code , data ,replay , flags
code 是一個整形的唯一標識,用于區(qū)分執(zhí)行哪個方法,客戶端會傳遞此參數(shù),告訴服務端執(zhí)行哪個方法
data客戶端傳遞過來的參數(shù)
replay服務器返回回去的值
flags標明是否有返回值,0為有(雙向),1為沒有(單向)
我們仔細看case TRANSACTION_min中的代碼
data.enforceInterface(DESCRIPTOR);與客戶端的writeInterfaceToken對用,標識遠程服務的名稱
int _arg0;
_arg0 = data.readInt();
int _arg1;
_arg1 = data.readInt();
接下來分別讀取了客戶端傳入的兩個參數(shù)
int _result = this.min(_arg0, _arg1);
reply.writeNoException();
reply.writeInt(_result);
然后執(zhí)行this.min,即我們實現(xiàn)的min方法;返回result由reply寫回。
add同理,可以看到服務端通過AIDL生成Stub的類,封裝了服務端本來需要寫的代碼。
2、客戶端
客戶端主要通過ServiceConnected與服務端連接
private ServiceConnection mServiceConn = new ServiceConnection()
    {
        @Override
        public void onServiceDisconnected(ComponentName name)
        {
            Log.e("client", "onServiceDisconnected");
            mCalcAidl = null;
        }

        @Override
        public void onServiceConnected(ComponentName name, IBinder service)
        {
            Log.e("client", "onServiceConnected");
            mCalcAidl = ICalcAIDL.Stub.asInterface(service);
        }
};
如果你比較敏銳,應該會猜到這個onServiceConnected中的IBinder實例,其實就是我們文章開通所說的Binder驅(qū)動,也是一個Binder實例
在ICalcAIDL.Stub.asInterface中最終調(diào)用了:
return new com.zhy.calc.aidl.ICalcAIDL.Stub.Proxy(obj);
這個Proxy實例傳入了我們的Binder驅(qū)動,并且封裝了我們調(diào)用服務端的代碼,文章開頭說,客戶端會通過Binder驅(qū)動的transact()方法調(diào)用服務端代碼
直接看Proxy中的add方法
@Override public int add(int x, int y) throws android.os.RemoteException
{
android.os.Parcel _data = android.os.Parcel.obtain();
android.os.Parcel _reply = android.os.Parcel.obtain();
int _result;
try {
_data.writeInterfaceToken(DESCRIPTOR);
_data.writeInt(x);
_data.writeInt(y);
mRemote.transact(Stub.TRANSACTION_add, _data, _reply, 0);
_reply.readException();
_result = _reply.readInt();
}
finally {
_reply.recycle();
_data.recycle();
}
return _result;
}
首先聲明兩個Parcel對象,一個用于傳遞數(shù)據(jù),一個用戶接收返回的數(shù)據(jù)
_data.writeInterfaceToken(DESCRIPTOR);與服務器端的enforceInterfac對應
_data.writeInt(x);
_data.writeInt(y);寫入需要傳遞的參數(shù)
mRemote.transact(Stub.TRANSACTION_add, _data, _reply, 0);
終于看到了我們的transact方法,第一個對應服務端的code,_data,_repay分別對應服務端的data,reply,0表示是雙向的
_reply.readException();
_result = _reply.readInt();
最后讀出我們服務端返回的數(shù)據(jù),然后return。可以看到和服務端的onTransact基本是一行一行對應的。
到此,我們已經(jīng)通過AIDL生成的代碼解釋了Android Binder框架的工作原理。Service的作用其實就是為我們創(chuàng)建Binder驅(qū)動,即服務端與客戶端連接的橋梁。
AIDL其實通過我們寫的aidl文件,幫助我們生成了一個接口,一個Stub類用于服務端,一個Proxy類用于客戶端調(diào)用。那么我們是否可以不通過寫AIDL來實現(xiàn)遠程的通信呢?下面向大家展示如何完全不依賴AIDL來實現(xiàn)客戶端與服務端的通信。
4、不依賴AIDL實現(xiàn)程序間通訊
1、服務端代碼
我們新建一個CalcPlusService.java用于實現(xiàn)兩個數(shù)的乘和除
package com.example.zhy_binder;

import android.app.Service;
import android.content.Intent;
import android.os.Binder;
import android.os.IBinder;
import android.os.Parcel;
import android.os.RemoteException;
import android.util.Log;

public class CalcPlusService extends Service
{
    private static final String DESCRIPTOR = "CalcPlusService";
    private static final String TAG = "CalcPlusService";

    public void onCreate()
    {
        Log.e(TAG, "onCreate");
    }

    @Override
    public int onStartCommand(Intent intent, int flags, int startId)
    {
        Log.e(TAG, "onStartCommand");
        return super.onStartCommand(intent, flags, startId);
    }

    public IBinder onBind(Intent t)
    {
        Log.e(TAG, "onBind");
        return mBinder;
    }

    public void onDestroy()
    {
        Log.e(TAG, "onDestroy");
        super.onDestroy();
    }

    public boolean onUnbind(Intent intent)
    {
        Log.e(TAG, "onUnbind");
        return super.onUnbind(intent);
    }

    public void onRebind(Intent intent)
    {
        Log.e(TAG, "onRebind");
        super.onRebind(intent);
    }

    private MyBinder mBinder = new MyBinder();

    private class MyBinder extends Binder
    {
        @Override
        protected boolean onTransact(int code, Parcel data, Parcel reply,
                int flags) throws RemoteException
        {
            switch (code)
            {
            case 0x110:
            {
                data.enforceInterface(DESCRIPTOR);
                int _arg0;
                _arg0 = data.readInt();
                int _arg1;
                _arg1 = data.readInt();
                int _result = _arg0 * _arg1;
                reply.writeNoException();
                reply.writeInt(_result);
                return true;
            }
            case 0x111:
            {
                data.enforceInterface(DESCRIPTOR);
                int _arg0;
                _arg0 = data.readInt();
                int _arg1;
                _arg1 = data.readInt();
                int _result = _arg0 / _arg1;
                reply.writeNoException();
                reply.writeInt(_result);
                return true;
            }
            }
            return super.onTransact(code, data, reply, flags);
        }

    };

}
我們自己實現(xiàn)服務端,所以我們自定義了一個Binder子類,然后復寫了其onTransact方法,我們指定服務的標識為CalcPlusService,然后0x110為乘,0x111為除;
記得在AndroidMenifest中注冊
<service android:name="com.example.zhy_binder.CalcPlusService" >
           <intent-filter>
               <action android:name="com.zhy.aidl.calcplus" />
               <category android:name="android.intent.category.DEFAULT" />
           </intent-filter>
</service>
服務端代碼結(jié)束。
2、客戶端代碼
單獨新建了一個項目,代碼和上例很類似
package com.example.zhy_binder_client03;

import android.app.Activity;
import android.content.ComponentName;
import android.content.Context;
import android.content.Intent;
import android.content.ServiceConnection;
import android.os.Bundle;
import android.os.IBinder;
import android.os.RemoteException;
import android.util.Log;
import android.view.View;
import android.widget.Toast;

public class MainActivity extends Activity
{

    private IBinder mPlusBinder;
    private ServiceConnection mServiceConnPlus = new ServiceConnection()
    {
        @Override
        public void onServiceDisconnected(ComponentName name)
        {
            Log.e("client", "mServiceConnPlus onServiceDisconnected");
        }

        @Override
        public void onServiceConnected(ComponentName name, IBinder service)
        {

            Log.e("client", " mServiceConnPlus onServiceConnected");
            mPlusBinder = service;
        }
    };

    @Override
    protected void onCreate(Bundle savedInstanceState)
    {
        super.onCreate(savedInstanceState);
        setContentView(R.layout.activity_main);

    }

    public void bindService(View view)
    {
        Intent intentPlus = new Intent();
        intentPlus.setAction("com.zhy.aidl.calcplus");
        boolean plus = bindService(intentPlus, mServiceConnPlus,
                Context.BIND_AUTO_CREATE);
        Log.e("plus", plus + "");
    }

    public void unbindService(View view)
    {
        unbindService(mServiceConnPlus);
    }

    public void mulInvoked(View view)
    {

        if (mPlusBinder == null)
        {
            Toast.makeText(this, "未連接服務端或服務端被異常殺死", Toast.LENGTH_SHORT).show();
        } else
        {
            android.os.Parcel _data = android.os.Parcel.obtain();
            android.os.Parcel _reply = android.os.Parcel.obtain();
            int _result;
            try
            {
                _data.writeInterfaceToken("CalcPlusService");
                _data.writeInt(50);
                _data.writeInt(12);
                mPlusBinder.transact(0x110, _data, _reply, 0);
                _reply.readException();
                _result = _reply.readInt();
                Toast.makeText(this, _result + "", Toast.LENGTH_SHORT).show();

            } catch (RemoteException e)
            {
                e.printStackTrace();
            } finally
            {
                _reply.recycle();
                _data.recycle();
            }
        }

    }

    public void divInvoked(View view)
    {

        if (mPlusBinder == null)
        {
            Toast.makeText(this, "未連接服務端或服務端被異常殺死", Toast.LENGTH_SHORT).show();
        } else
        {
            android.os.Parcel _data = android.os.Parcel.obtain();
            android.os.Parcel _reply = android.os.Parcel.obtain();
            int _result;
            try
            {
                _data.writeInterfaceToken("CalcPlusService");
                _data.writeInt(36);
                _data.writeInt(12);
                mPlusBinder.transact(0x111, _data, _reply, 0);
                _reply.readException();
                _result = _reply.readInt();
                Toast.makeText(this, _result + "", Toast.LENGTH_SHORT).show();

            } catch (RemoteException e)
            {
                e.printStackTrace();
            } finally
            {
                _reply.recycle();
                _data.recycle();
            }
        }

    }
}
為了明了,我直接在mulInvoked里面寫了代碼,和服務端都沒有抽象出一個接口。首先綁定服務時,通過onServiceConnected得到Binder驅(qū)動即mPlusBinder;
然后準備數(shù)據(jù),調(diào)用transact方法,通過code指定執(zhí)行服務端哪個方法,代碼和上面的分析一致。
下面看運行結(jié)果:

是不是很好的實現(xiàn)了我們兩個應用程序間的通訊,并沒有使用aidl文件,也從側(cè)面分析了我們上述分析是正確的。

 浙公網(wǎng)安備 33010602011771號