day02 pytorch介紹與安裝
1 框架介紹與安裝?
- 本章節(jié)主要帶領(lǐng)大家學(xué)習使用深度學(xué)習框架 PyTorch:
PyTorch 介紹?

- 在2017年1月, Facebook的人工智能研究院 (FAIR) 向世界推出了PyTorch. 這個基于Torch的框架, 以其Python語言作為前端, 同時為深度學(xué)習研究者和開發(fā)者提供了兩大核心優(yōu)勢:
- 一是強大的GPU加速張量計算能力, 其并行計算能力在當時與NumPy相媲美.
- 二是內(nèi)置的自動微分系統(tǒng), 使得構(gòu)建深度神經(jīng)網(wǎng)絡(luò)變得更加直觀和高效.
- 2018年10月, 在NeurIPS 2018會議上, Facebook宣布了PyTorch 1.0的發(fā)布. 這個版本的推出, 標志著PyTorch在商業(yè)化進程中取得了重要進展.
- 在2019年前, Tensorflow一直作為深度學(xué)習系統(tǒng)中的領(lǐng)頭存在, 而以2019年為分界線, Pytorch異軍突起, 逐漸成為了開發(fā)者和研究人員最為喜愛的框架. 隨著Pytorch的不斷普及和完善, 其生態(tài)也越發(fā)蓬勃.
- 在AI領(lǐng)域, huggingface社區(qū)的開源的transformers庫使用pytorch實現(xiàn)了市面上絕大多數(shù)開源的預(yù)訓(xùn)練模型.
- 微軟的分布式訓(xùn)練框架deepspeed也支持Pytorch, 由于Pytorch備受研究人員的青睞, 近年來絕大多數(shù)開源神經(jīng)網(wǎng)絡(luò)架構(gòu)都采用Pytorch實現(xiàn).
PyTorch 安裝?
- https://github.com/pytorch/pytorch

- 安裝:
pip install torch==2.1.0- 通過本章節(jié)的學(xué)習, 同學(xué)們將會了解Pytorch的發(fā)展歷史, 并掌握 PyTorch 深度學(xué)習框架的安裝.
1 張量的創(chuàng)建?
學(xué)習目標?
- 掌握張量創(chuàng)建
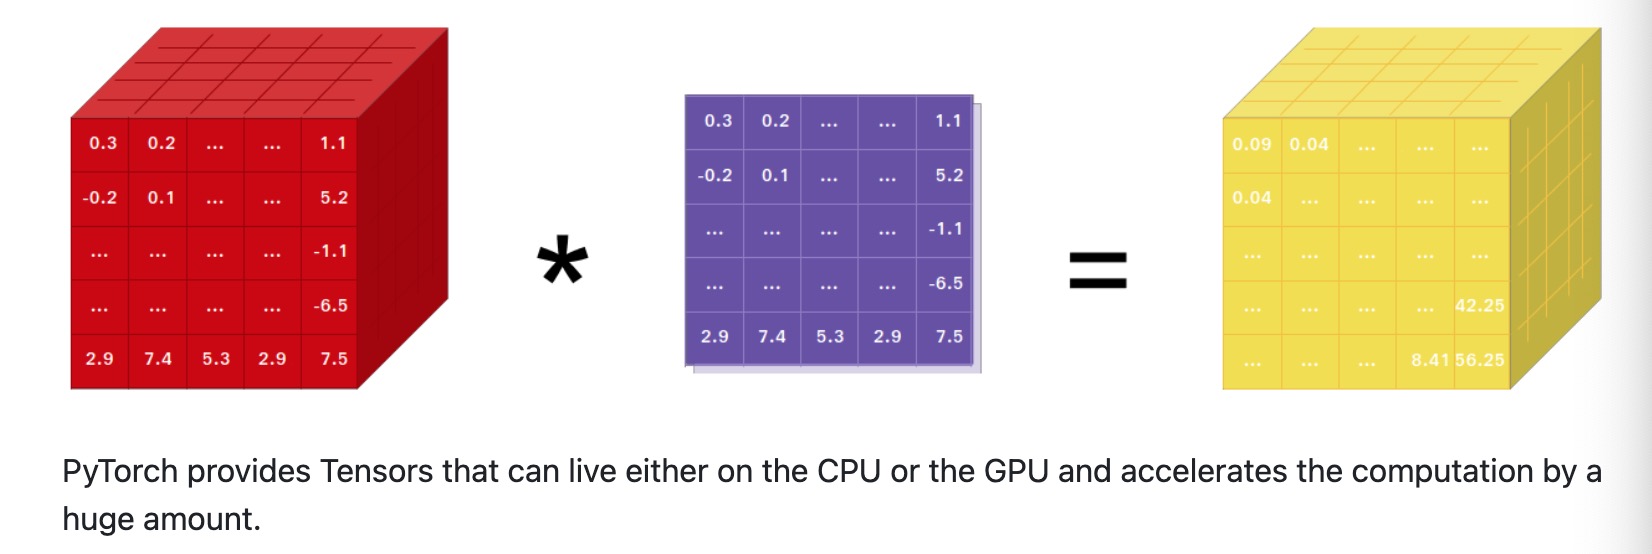
PyTorch 是一個 Python 深度學(xué)習框架,它將數(shù)據(jù)封裝成張量(Tensor)來進行運算。PyTorch 中的張量就是元素為同一種數(shù)據(jù)類型的多維矩陣。在 PyTorch 中,張量以 "類" 的形式封裝起來,對張量的一些運算、處理的方法被封裝在類中。
1. 基本創(chuàng)建方式?
- torch.tensor 根據(jù)指定數(shù)據(jù)創(chuàng)建張量
- torch.Tensor 根據(jù)形狀創(chuàng)建張量, 其也可用來創(chuàng)建指定數(shù)據(jù)的張量
- torch.IntTensor、torch.FloatTensor、torch.DoubleTensor 創(chuàng)建指定類型的張量
import torch
import numpy as np
import random

# 1. 根據(jù)已有數(shù)據(jù)創(chuàng)建張量
def test01():

    # 1. 創(chuàng)建張量標量
    data = torch.tensor(10)
    print(data)

    # 2. numpy 數(shù)組, 由于 data 為 float64, 下面代碼也使用該類型
    data = np.random.randn(2, 3)
    data = torch.tensor(data)
    print(data)

    # 3. 列表, 下面代碼使用默認元素類型 float32
    data = [[10., 20., 30.], [40., 50., 60.]]
    data = torch.tensor(data)
    print(data)


# 2. 創(chuàng)建指定形狀的張量
def test02():

    # 1. 創(chuàng)建2行3列的張量, 默認 dtype 為 float32
    data = torch.Tensor(2, 3)
    print(data)

    # 2. 注意: 如果傳遞列表, 則創(chuàng)建包含指定元素的張量
    data = torch.Tensor([10])
    print(data)

    data = torch.Tensor([10, 20])
    print(data)


# 3. 使用具體類型的張量
def test03():

    # 1. 創(chuàng)建2行3列, dtype 為 int32 的張量
    data = torch.IntTensor(2, 3)
    print(data)

    # 2. 注意: 如果傳遞的元素類型不正確, 則會進行類型轉(zhuǎn)換
    data = torch.IntTensor([2.5, 3.3])
    print(data)

    # 3. 其他的類型
    data = torch.ShortTensor()  # int16
    data = torch.LongTensor()   # int64
    data = torch.FloatTensor()  # float32
    data = torch.DoubleTensor() # float64


if __name__ == '__main__':
    test02()
程序輸出結(jié)果:
tensor(10)
tensor([[ 0.1345,  0.1149,  0.2435],
        [ 0.8026, -0.6744, -1.0918]], dtype=torch.float64)
tensor([[10., 20., 30.],
        [40., 50., 60.]])
tensor([[0.0000e+00, 3.6893e+19, 2.2018e+05],
        [4.6577e-10, 2.4158e-12, 1.1625e+33]])
tensor([10.])
tensor([10., 20.])
tensor([[         0, 1610612736, 1213662609],
        [ 805308409,  156041223,          1]], dtype=torch.int32)
tensor([2, 3], dtype=torch.int32)
2. 創(chuàng)建線性和隨機張量?
- torch.arange 和 torch.linspace 創(chuàng)建線性張量
- torch.random.init_seed 和 torch.random.manual_seed 隨機種子設(shè)置
- torch.randn 創(chuàng)建隨機張量
import torch


# 1. 創(chuàng)建線性空間的張量
def test01():

    # 1. 在指定區(qū)間按照步長生成元素 [start, end, step)
    data = torch.arange(0, 10, 2)
    print(data)

    # 2. 在指定區(qū)間按照元素個數(shù)生成
    data = torch.linspace(0, 11, 10)
    print(data)


# 2. 創(chuàng)建隨機張量
def test02():

    # 1. 創(chuàng)建隨機張量
    data = torch.randn(2, 3)  # 創(chuàng)建2行3列張量
    print(data)

    # 2. 隨機數(shù)種子設(shè)置
    print('隨機數(shù)種子:', torch.random.initial_seed())
    torch.random.manual_seed(100)
    print('隨機數(shù)種子:', torch.random.initial_seed())


if __name__ == '__main__':
    test02()
程序輸出結(jié)果:
tensor([0, 2, 4, 6, 8])
tensor([ 0.0000,  1.2222,  2.4444,  3.6667,  4.8889,  6.1111,  7.3333,  8.5556,
         9.7778, 11.0000])
tensor([[-0.5209, -0.2439, -1.1780],
        [ 0.8133,  1.1442,  0.6790]])
隨機數(shù)種子: 4508475192273306739
隨機數(shù)種子: 100
3. 創(chuàng)建01張量?
- torch.ones 和 torch.ones_like 創(chuàng)建全1張量
- torch.zeros 和 torch.zeros_like 創(chuàng)建全0張量
- torch.full 和 torch.full_like 創(chuàng)建全為指定值張量
import torch


# 1. 創(chuàng)建全0張量
def test01():

    # 1. 創(chuàng)建指定形狀全0張量
    data = torch.zeros(2, 3)
    print(data)

    # 2. 根據(jù)張量形狀創(chuàng)建全0張量
    data = torch.zeros_like(data)
    print(data)


# 2. 創(chuàng)建全1張量
def test02():

    # 1. 創(chuàng)建指定形狀全0張量
    data = torch.ones(2, 3)
    print(data)

    # 2. 根據(jù)張量形狀創(chuàng)建全0張量
    data = torch.ones_like(data)
    print(data)


# 3. 創(chuàng)建全為指定值的張量
def test03():

    # 1. 創(chuàng)建指定形狀指定值的張量
    data = torch.full([2, 3], 10)
    print(data)

    # 2. 根據(jù)張量形狀創(chuàng)建指定值的張量
    data = torch.full_like(data, 20)
    print(data)


if __name__ == '__main__':
    test01()
    test02()
    test03()
程序輸出結(jié)果:
tensor([[0., 0., 0.],
        [0., 0., 0.]])
tensor([[0., 0., 0.],
        [0., 0., 0.]])
tensor([[1., 1., 1.],
        [1., 1., 1.]])
tensor([[1., 1., 1.],
        [1., 1., 1.]])
tensor([[10, 10, 10],
        [10, 10, 10]])
tensor([[20, 20, 20],
        [20, 20, 20]])
4. 張量元素類型轉(zhuǎn)換?
- tensor.type(torch.DoubleTensor)
- torch.double()
import torch


def test():

    data = torch.full([2, 3], 10)
    print(data.dtype)

    # 將 data 元素類型轉(zhuǎn)換為 float64 類型

    # 1. 第一種方法
    data = data.type(torch.DoubleTensor)
    print(data.dtype)

    # 轉(zhuǎn)換為其他類型
    # data = data.type(torch.ShortTensor)
    # data = data.type(torch.IntTensor)
    # data = data.type(torch.LongTensor)
    # data = data.type(torch.FloatTensor)

    # 2. 第二種方法
    data = data.double()
    print(data.dtype)

    # 轉(zhuǎn)換為其他類型
    # data = data.short()
    # data = data.int()
    # data = data.long()
    # data = data.float()


if __name__ == '__main__':
    test()
程序輸出結(jié)果:
torch.int64
torch.float64
torch.float64
5. 小節(jié)?
在本小節(jié)中,我們主要學(xué)習了以下內(nèi)容:
1. 創(chuàng)建張量的方式
    1. torch.tensor 根據(jù)指定數(shù)據(jù)創(chuàng)建張量
    2. torch.Tensor 根據(jù)形狀創(chuàng)建張量, 其也可用來創(chuàng)建指定數(shù)據(jù)的張量
    3. torch.IntTensor、torch.FloatTensor、torch.DoubleTensor 創(chuàng)建指定類型的張量
- 創(chuàng)建線性和隨機張量 - torch.arange 和 torch.linspace 創(chuàng)建線性張量
- torch.random.init_seed 和 torch.random.manual_seed 隨機種子設(shè)置
- torch.randn 創(chuàng)建隨機張量
- 創(chuàng)建01張量 - torch.ones 和 torch.ones_like 創(chuàng)建全1張量
- torch.zeros 和 torch.zeros_like 創(chuàng)建全0張量
- torch.full 和 torch.full_like 創(chuàng)建全為指定值張量
- 張量元素類型轉(zhuǎn)換 - tensor.type(torch.DoubleTensor)
- torch.double()
2 張量數(shù)值計算?
學(xué)習目標?
- 掌握張量基本運算
- 掌握阿達瑪積、點積運算
- 掌握PyTorch指定運算設(shè)備
PyTorch 計算的數(shù)據(jù)都是以張量形式存在, 我們需要掌握張量各種運算. 并且, 我們可以在 CPU 中運算, 也可以在 GPU 中運算.
1. 張量基本運算?
基本運算中,包括 add、sub、mul、div、neg 等函數(shù), 以及這些函數(shù)的帶下劃線的版本 add_、sub_、mul_、div_、neg_,其中帶下劃線的版本為修改原數(shù)據(jù)。
import numpy as np
import torch


def test():

    data = torch.randint(0, 10, [2, 3])
    print(data)
    print('-' * 50)

    # 1. 不修改原數(shù)據(jù)
    new_data = data.add(10)  # 等價 new_data = data + 10
    print(new_data)
    print('-' * 50)

    # 2. 直接修改原數(shù)據(jù)
    # 注意: 帶下劃線的函數(shù)為修改原數(shù)據(jù)本身
    data.add_(10)  # 等價 data += 10
    print(data)

    # 3. 其他函數(shù)
    print(data.sub(100))
    print(data.mul(100))
    print(data.div(100))
    print(data.neg())


if __name__ == '__main__':
    test()
程序輸出結(jié)果:
tensor([[3, 7, 4],
        [0, 0, 6]])
--------------------------------------------------
tensor([[13, 17, 14],
        [10, 10, 16]])
--------------------------------------------------
tensor([[13, 17, 14],
        [10, 10, 16]])
tensor([[-87, -83, -86],
        [-90, -90, -84]])
tensor([[1300, 1700, 1400],
        [1000, 1000, 1600]])
tensor([[0.1300, 0.1700, 0.1400],
        [0.1000, 0.1000, 0.1600]])
tensor([[-13, -17, -14],
        [-10, -10, -16]])
2. 阿達瑪積?
阿達瑪積指的是矩陣對應(yīng)位置的元素相乘.
import numpy as np
import torch


def test():

    data1 = torch.tensor([[1, 2], [3, 4]])
    data2 = torch.tensor([[5, 6], [7, 8]])

    # 第一種方式
    data = torch.mul(data1, data2)
    print(data)
    print('-' * 50)

    # 第二種方式
    data = data1 * data2
    print(data)
    print('-' * 50)


if __name__ == '__main__':
    test()
程序輸出結(jié)果:
tensor([[ 5, 12],
        [21, 32]])
--------------------------------------------------
tensor([[ 5, 12],
        [21, 32]])
--------------------------------------------------
3. 點積運算?
點積運算要求第一個矩陣 shape: (n, m),第二個矩陣 shape: (m, p), 兩個矩陣點積運算 shape 為: (n, p)。
- 運算符 @ 用于進行兩個矩陣的點乘運算
- torch.mm 用于進行兩個矩陣點乘運算, 要求輸入的矩陣為2維
- torch.bmm 用于批量進行矩陣點乘運算, 要求輸入的矩陣為3維
- torch.matmul 對進行點乘運算的兩矩陣形狀沒有限定. - 對于輸入都是二維的張量相當于 mm 運算.
- 對于輸入都是三維的張量相當于 bmm 運算
- 對數(shù)輸入的 shape 不同的張量, 對應(yīng)的最后幾個維度必須符合矩陣運算規(guī)則
import numpy as np
import torch


# 1. 點積運算
def test01():

    data1 = torch.tensor([[1, 2], [3, 4], [5, 6]])
    data2 = torch.tensor([[5, 6], [7, 8]])

    # 第一種方式
    data = data1 @ data2
    print(data)
    print('-' * 50)

    # 第二種方式
    data = torch.mm(data1, data2)
    print(data)
    print('-' * 50)

    # 第三種方式
    data = torch.matmul(data1, data2)
    print(data)
    print('-' * 50)


# 2. torch.mm 和 torch.matmull 的區(qū)別
def test02():

    # matmul 可以兩個維度可以不同
    # 第一個張量: (3, 4, 5)
    # 第二個張量: (5, 4)
    # torch.mm 不可以相乘,而 matmul 則可以相乘

    print(torch.matmul(torch.randn(3, 4, 5), torch.randn(5, 4)).shape)
    print(torch.matmul(torch.randn(5, 4), torch.randn(3, 4, 5)).shape)


# 3. torch.mm 函數(shù)的用法
def test03():

    # 批量點積運算
    # 第一個維度為 batch_size
    # 矩陣的二三維要滿足矩陣乘法規(guī)則

    data1 = torch.randn(3, 4, 5)
    data2 = torch.randn(3, 5, 8)

    data = torch.bmm(data1, data2)
    print(data.shape)


if __name__ == '__main__':
    test01()
    test02()
    test03()
程序輸出結(jié)果:
tensor([[19, 22],
        [43, 50],
        [67, 78]])
--------------------------------------------------
tensor([[19, 22],
        [43, 50],
        [67, 78]])
--------------------------------------------------
tensor([[19, 22],
        [43, 50],
        [67, 78]])
--------------------------------------------------
torch.Size([3, 4, 4])
torch.Size([3, 5, 5])
torch.Size([3, 4, 8])
4. 指定運算設(shè)備?
PyTorch 默認會將張量創(chuàng)建在 CPU 控制的內(nèi)存中, 即: 默認的運算設(shè)備為 CPU。我們也可以將張量創(chuàng)建在 GPU 上, 能夠利用對于矩陣計算的優(yōu)勢加快模型訓(xùn)練。將張量移動到 GPU 上有兩種方法:
- 使用 cuda 方法
- 直接在 GPU 上創(chuàng)建張量
- 使用 to 方法指定設(shè)備
import torch


# 1. 使用 cuda 方法
def test01():

    data = torch.tensor([10, 20 ,30])
    print('存儲設(shè)備:', data.device)

    # 如果安裝的不是 gpu 版本的 PyTorch
    # 或電腦本身沒有 NVIDIA 卡的計算環(huán)境
    # 下面代碼可能會報錯
    data = data.cuda()
    print('存儲設(shè)備:', data.device)

    # 使用 cpu 函數(shù)將張量移動到 cpu 上
    data = data.cpu()
    print('存儲設(shè)備:', data.device)

    # 輸出結(jié)果:
    # 存儲設(shè)備: cpu
    # 存儲設(shè)備: cuda:0
    # 存儲設(shè)備: cpu


# 2. 直接將張量創(chuàng)建在 GPU 上
def test02():

    data = torch.tensor([10, 20, 30], device='cuda:0')
    print('存儲設(shè)備:', data.device)

    # 使用 cpu 函數(shù)將張量移動到 cpu 上
    data = data.cpu()
    print('存儲設(shè)備:', data.device)

    # 輸出結(jié)果:
    # 存儲設(shè)備: cuda:0
    # 存儲設(shè)備: cpu


# 3. 使用 to 方法
def test03():

    data = torch.tensor([10, 20, 30])
    print('存儲設(shè)備:', data.device)

    data = data.to('cuda:0')
    print('存儲設(shè)備:', data.device)

    # 輸出結(jié)果:
    # 存儲設(shè)備: cpu
    # 存儲設(shè)備: cuda:0


# 4. 存儲在不同設(shè)備的張量不能運算
def test04():

    data1 = torch.tensor([10, 20, 30], device='cuda:0')
    data2 = torch.tensor([10, 20, 30])
    print(data1.device, data2.device)

    # RuntimeError: Expected all tensors to be on the same device,
    # but found at least two devices, cuda:0 and cpu!
    data = data1 + data2
    print(data)


if __name__ == '__main__':
    test04()
程序輸出結(jié)果:
存儲設(shè)備: cpu
存儲設(shè)備: cuda:0
存儲設(shè)備: cpu
存儲設(shè)備: cuda:0
存儲設(shè)備: cpu
存儲設(shè)備: cpu
存儲設(shè)備: cuda:0
cuda:0 cpu
5. 小節(jié)?
在本小節(jié)中,我們主要學(xué)習的主要內(nèi)容如下:
- 張量基本運算函數(shù) add、sub、mul、div、neg 等函數(shù), add_、sub_、mul_、div_、neg_ 等 inplace 函數(shù)
- 張量的阿達瑪積運算 mul 和運算符 * 的用法
- 點積運算: - 運算符 @ 用于進行兩個矩陣的點乘運算
- torch.mm 用于進行兩個矩陣點乘運算, 要求輸入的矩陣為2維
- torch.bmm 用于批量進行矩陣點乘運算, 要求輸入的矩陣為3維
- torch.matmul 對進行點乘運算的兩矩陣形狀沒有限定. - 對于輸入都是二維的張量相當于 mm 運算.
- 對于輸入都是三維的張量相當于 bmm 運算
- 對數(shù)輸入的 shape 不同的張量, 對應(yīng)的最后幾個維度必須符合矩陣運算規(guī)則
- 將變量移動到 GPU 設(shè)備的方法,例如: cuda 方法、直接在 GPU 上創(chuàng)建張量、使用 to 方法指定設(shè)備
3 張量類型轉(zhuǎn)換?
學(xué)習目標?
- 掌握張量類型轉(zhuǎn)換方法
張量的類型轉(zhuǎn)換也是經(jīng)常使用的一種操作,是必須掌握的知識點。在本小節(jié),我們主要學(xué)習如何將 numpy 數(shù)組和 PyTorch Tensor 的轉(zhuǎn)化方法.
1. 張量轉(zhuǎn)換為 numpy 數(shù)組?
使用 Tensor.numpy 函數(shù)可以將張量轉(zhuǎn)換為 ndarray 數(shù)組,但是共享內(nèi)存,可以使用 copy 函數(shù)避免共享。
# 1. 將張量轉(zhuǎn)換為 numpy 數(shù)組
def test01():

    data_tensor = torch.tensor([2, 3, 4])
    # 使用張量對象中的 numpy 函數(shù)進行轉(zhuǎn)換
    data_numpy = data_tensor.numpy()

    print(type(data_tensor))
    print(type(data_numpy))

    # 注意: data_tensor 和 data_numpy 共享內(nèi)存
    # 修改其中的一個,另外一個也會發(fā)生改變
    # data_tensor[0] = 100
    data_numpy[0] = 100

    print(data_tensor)
    print(data_numpy)


if __name__ == '__main__':
    test01()
2. numpy 轉(zhuǎn)換為張量?
- 使用 from_numpy 可以將 ndarray 數(shù)組轉(zhuǎn)換為 Tensor,默認共享內(nèi)存,使用 copy 函數(shù)避免共享。
- 使用 torch.tensor 可以將 ndarray 數(shù)組轉(zhuǎn)換為 Tensor,默認不共享內(nèi)存。
# 1. 使用 from_numpy 函數(shù)
def test01():

    data_numpy = np.array([2, 3, 4])
    # 將 numpy 數(shù)組轉(zhuǎn)換為張量類型
    # 1. from_numpy
    # 2. torch.tensor(ndarray)

    # 淺拷貝
    data_tensor = torch.from_numpy(data_numpy)

    # nunpy 和 tensor 共享內(nèi)存
    # data_numpy[0] = 100
    data_tensor[0] = 100

    print(data_tensor)
    print(data_numpy)


# 2. 使用 torch.tensor 函數(shù)
def test02():

    data_numpy = np.array([2, 3, 4])

    data_tensor = torch.tensor(data_numpy)

    # nunpy 和 tensor 不共享內(nèi)存
    # data_numpy[0] = 100
    data_tensor[0] = 100

    print(data_tensor)
    print(data_numpy)


if __name__ == '__main__':
    test01()
    test02()
3. 標量張量和數(shù)字的轉(zhuǎn)換?
對于只有一個元素的張量,使用 item 方法將該值從張量中提取出來。
# 3. 標量張量和數(shù)字的轉(zhuǎn)換
def test03():

    # 當張量只包含一個元素時, 可以通過 item 函數(shù)提取出該值
    data = torch.tensor([30,])
    print(data.item())

    data = torch.tensor(30)
    print(data.item())


if __name__ == '__main__':
    test03()
程序輸出結(jié)果:
30
30
小節(jié)?
在本小節(jié)中, 我們主要學(xué)習了 numpy 和 tensor 互相轉(zhuǎn)換的規(guī)則, 以及標量張量與數(shù)值之間的轉(zhuǎn)換規(guī)則。
4 張量拼接操作?
學(xué)習目標?
- 掌握torch.cat torch.stack使用
張量的拼接操作在神經(jīng)網(wǎng)絡(luò)搭建過程中是非常常用的方法,例如: 在后面將要學(xué)習到的殘差網(wǎng)絡(luò)、注意力機制中都使用到了張量拼接。
1. torch.cat 函數(shù)的使用?
torch.cat 函數(shù)可以將兩個張量根據(jù)指定的維度拼接起來.
import torch


def test():

    data1 = torch.randint(0, 10, [3, 5, 4])
    data2 = torch.randint(0, 10, [3, 5, 4])

    print(data1)
    print(data2)
    print('-' * 50)

    # 1. 按0維度拼接
    new_data = torch.cat([data1, data2], dim=0)
    print(new_data.shape)
    print('-' * 50)

    # 2. 按1維度拼接
    new_data = torch.cat([data1, data2], dim=1)
    print(new_data.shape)
    print('-' * 50)

    # 3. 按2維度拼接
    new_data = torch.cat([data1, data2], dim=2)
    print(new_data.shape)


if __name__ == '__main__':
    test()
程序輸出結(jié)果:
tensor([[[6, 8, 3, 5],
         [1, 1, 3, 8],
         [9, 0, 4, 4],
         [1, 4, 7, 0],
         [5, 1, 4, 8]],

        [[0, 1, 4, 4],
         [4, 1, 8, 7],
         [5, 2, 6, 6],
         [2, 6, 1, 6],
         [0, 7, 8, 9]],

        [[0, 6, 8, 8],
         [5, 4, 5, 8],
         [3, 5, 5, 9],
         [3, 5, 2, 4],
         [3, 8, 1, 1]]])
tensor([[[4, 6, 8, 1],
         [0, 1, 8, 2],
         [4, 9, 9, 8],
         [5, 1, 5, 9],
         [9, 4, 3, 0]],

        [[7, 6, 3, 3],
         [4, 3, 3, 2],
         [2, 1, 1, 1],
         [3, 0, 8, 2],
         [8, 6, 6, 5]],

        [[0, 7, 2, 4],
         [4, 3, 8, 3],
         [4, 2, 1, 9],
         [4, 2, 8, 9],
         [3, 7, 0, 8]]])
--------------------------------------------------
torch.Size([6, 5, 4])
--------------------------------------------------
torch.Size([3, 10, 4])
tensor([[[6, 8, 3, 5, 4, 6, 8, 1],
         [1, 1, 3, 8, 0, 1, 8, 2],
         [9, 0, 4, 4, 4, 9, 9, 8],
         [1, 4, 7, 0, 5, 1, 5, 9],
         [5, 1, 4, 8, 9, 4, 3, 0]],

        [[0, 1, 4, 4, 7, 6, 3, 3],
         [4, 1, 8, 7, 4, 3, 3, 2],
         [5, 2, 6, 6, 2, 1, 1, 1],
         [2, 6, 1, 6, 3, 0, 8, 2],
         [0, 7, 8, 9, 8, 6, 6, 5]],

        [[0, 6, 8, 8, 0, 7, 2, 4],
         [5, 4, 5, 8, 4, 3, 8, 3],
         [3, 5, 5, 9, 4, 2, 1, 9],
         [3, 5, 2, 4, 4, 2, 8, 9],
         [3, 8, 1, 1, 3, 7, 0, 8]]])
2. torch.stack 函數(shù)的使用?
torch.stack 函數(shù)可以將兩個張量根據(jù)指定的維度疊加起來.
import torch


def test():

    data1= torch.randint(0, 10, [2, 3])
    data2= torch.randint(0, 10, [2, 3])
    print(data1)
    print(data2)

    new_data = torch.stack([data1, data2], dim=0)
    print(new_data.shape)

    new_data = torch.stack([data1, data2], dim=1)
    print(new_data.shape)

    new_data = torch.stack([data1, data2], dim=2)
    print(new_data.shape)


if __name__ == '__main__':
    test()
程序輸出結(jié)果:
tensor([[5, 8, 7],
        [6, 0, 6]])
tensor([[5, 8, 0],
        [9, 0, 1]])
torch.Size([2, 2, 3])
torch.Size([2, 2, 3])
torch.Size([2, 3, 2])
3. 小節(jié)?
張量的拼接操作也是在后面我們經(jīng)常使用一種操作。cat 函數(shù)可以將張量按照指定的維度拼接起來,stack 函數(shù)可以將張量按照指定的維度疊加起來。
5 張量索引操作?
學(xué)習目標?
- 掌握張量不同索引操作
我們在操作張量時,經(jīng)常需要去進行獲取或者修改操作,掌握張量的花式索引操作是必須的一項能力。
1. 簡單行、列索引?
準備數(shù)據(jù)
import torch

data = torch.randint(0, 10, [4, 5])
print(data)
print('-' * 50)
程序輸出結(jié)果:
tensor([[0, 7, 6, 5, 9],
        [6, 8, 3, 1, 0],
        [6, 3, 8, 7, 3],
        [4, 9, 5, 3, 1]])
--------------------------------------------------
# 1. 簡單行、列索引
def test01():

    print(data[0])
    print(data[:, 0])
    print('-' * 50)

if __name__ == '__main__':
    test01()
程序輸出結(jié)果:
tensor([0, 7, 6, 5, 9])
tensor([0, 6, 6, 4])
--------------------------------------------------
2. 列表索引?
# 2. 列表索引
def test02():

    # 返回 (0, 1)、(1, 2) 兩個位置的元素
    print(data[[0, 1], [1, 2]])
    print('-' * 50)

    # 返回 0、1 行的 1、2 列共4個元素
    print(data[[[0], [1]], [1, 2]])
if __name__ == '__main__':
    test02()
程序輸出結(jié)果:
tensor([7, 3])
--------------------------------------------------
tensor([[7, 6],
        [8, 3]])
3. 范圍索引?
# 3. 范圍索引
def test03():
    # 前3行的前2列數(shù)據(jù)
    print(data[:3, :2])
    # 第2行到最后的前2列數(shù)據(jù)
    print(data[2:, :2])
if __name__ == '__main__':
    test03()
程序輸出結(jié)果:
tensor([[0, 7],
        [6, 8],
        [6, 3]])
tensor([[6, 3],
        [4, 9]])
4. 布爾索引?
# 布爾索引
def test():

    # 第2列大于5的行數(shù)據(jù)
    print(data[data[:, 2] > 5])
    # 第1行大于5的列數(shù)據(jù)
    print(data[:, data[1] > 5])
if __name__ == '__main__':
    test04()
程序輸出結(jié)果:
tensor([[0, 7, 6, 5, 9],
        [6, 3, 8, 7, 3]])
tensor([[0, 7],
        [6, 8],
        [6, 3],
        [4, 9]])
5. 多維索引?
# 多維索引
def test05():

    data = torch.randint(0, 10, [3, 4, 5])
    print(data)
    print('-' * 50)

    print(data[0, :, :])
    print(data[:, 0, :])
    print(data[:, :, 0])


if __name__ == '__main__':
    test05()
程序輸出結(jié)果:
tensor([[[2, 4, 1, 2, 3],
         [5, 5, 1, 5, 0],
         [1, 4, 5, 3, 8],
         [7, 1, 1, 9, 9]],

        [[9, 7, 5, 3, 1],
         [8, 8, 6, 0, 1],
         [6, 9, 0, 2, 1],
         [9, 7, 0, 4, 0]],

        [[0, 7, 3, 5, 6],
         [2, 4, 6, 4, 3],
         [2, 0, 3, 7, 9],
         [9, 6, 4, 4, 4]]])
--------------------------------------------------
tensor([[2, 4, 1, 2, 3],
        [5, 5, 1, 5, 0],
        [1, 4, 5, 3, 8],
        [7, 1, 1, 9, 9]])
tensor([[2, 4, 1, 2, 3],
        [9, 7, 5, 3, 1],
        [0, 7, 3, 5, 6]])
tensor([[2, 5, 1, 7],
        [9, 8, 6, 9],
        [0, 2, 2, 9]])
6 張量形狀操作?
學(xué)習目標?
- 掌握reshape, transpose, permute, view, contigous, squeeze, unsqueeze等函數(shù)使用
在我們后面搭建網(wǎng)絡(luò)模型時,數(shù)據(jù)都是基于張量形式的表示,網(wǎng)絡(luò)層與層之間很多都是以不同的 shape 的方式進行表現(xiàn)和運算,我們需要掌握對張量形狀的操作,以便能夠更好處理網(wǎng)絡(luò)各層之間的數(shù)據(jù)連接。
1. reshape 函數(shù)的用法?
reshape 函數(shù)可以在保證張量數(shù)據(jù)不變的前提下改變數(shù)據(jù)的維度,將其轉(zhuǎn)換成指定的形狀,在后面的神經(jīng)網(wǎng)絡(luò)學(xué)習時,會經(jīng)常使用該函數(shù)來調(diào)節(jié)數(shù)據(jù)的形狀,以適配不同網(wǎng)絡(luò)層之間的數(shù)據(jù)傳遞。
import torch
import numpy as np


def test():

    data = torch.tensor([[10, 20, 30], [40, 50, 60]])

    # 1. 使用 shape 屬性或者 size 方法都可以獲得張量的形狀
    print(data.shape, data.shape[0], data.shape[1])
    print(data.size(), data.size(0), data.size(1))

    # 2. 使用 reshape 函數(shù)修改張量形狀
    new_data = data.reshape(1, 6)
    print(new_data.shape)


if __name__ == '__main__':
    test()
程序運行結(jié)果:
torch.Size([2, 3]) 2 3
torch.Size([2, 3]) 2 3
torch.Size([1, 6])
2. transpose 和 permute 函數(shù)的使用?
transpose 函數(shù)可以實現(xiàn)交換張量形狀的指定維度, 例如: 一個張量的形狀為 (2, 3, 4) 可以通過 transpose 函數(shù)把 3 和 4 進行交換, 將張量的形狀變?yōu)?(2, 4, 3)
permute 函數(shù)可以一次交換更多的維度。
import torch
import numpy as np


def test():

    data = torch.tensor(np.random.randint(0, 10, [3, 4, 5]))
    print('data shape:', data.size())

    # 1. 交換1和2維度
    new_data = torch.transpose(data, 1, 2)
    print('data shape:', new_data.size())

    # 2. 將 data 的形狀修改為 (4, 5, 3)
    new_data = torch.transpose(data, 0, 1)
    new_data = torch.transpose(new_data, 1, 2)
    print('new_data shape:', new_data.size())

    # 3. 使用 permute 函數(shù)將形狀修改為 (4, 5, 3)
    new_data = torch.permute(data, [1, 2, 0])
    print('new_data shape:', new_data.size())


if __name__ == '__main__':
    test()
程序運行結(jié)果:
data shape: torch.Size([3, 4, 5])
data shape: torch.Size([3, 5, 4])
new_data shape: torch.Size([4, 5, 3])
new_data shape: torch.Size([4, 5, 3])
3. view 和 contigous 函數(shù)的用法?
view 函數(shù)也可以用于修改張量的形狀,但是其用法比較局限,只能用于存儲在整塊內(nèi)存中的張量。在 PyTorch 中,有些張量是由不同的數(shù)據(jù)塊組成的,它們并沒有存儲在整塊的內(nèi)存中,view 函數(shù)無法對這樣的張量進行變形處理,例如: 一個張量經(jīng)過了 transpose 或者 permute 函數(shù)的處理之后,就無法使用 view 函數(shù)進行形狀操作。
import torch
import numpy as np


def test():

    data = torch.tensor([[10, 20, 30], [40, 50, 60]])
    print('data shape:', data.size())

    # 1. 使用 view 函數(shù)修改形狀
    new_data = data.view(3, 2)
    print('new_data shape:', new_data.shape)

    # 2. 判斷張量是否使用整塊內(nèi)存
    print('data:', data.is_contiguous())  # True

    # 3. 使用 transpose 函數(shù)修改形狀
    new_data = torch.transpose(data, 0, 1)
    print('new_data:', new_data.is_contiguous())  # False
    # new_data = new_data.view(2, 3)  # RuntimeError

    # 需要先使用 contiguous 函數(shù)轉(zhuǎn)換為整塊內(nèi)存的張量,再使用 view 函數(shù)
    print(new_data.contiguous().is_contiguous())
    new_data = new_data.contiguous().view(2, 3)
    print('new_data shape:', new_data.shape)


if __name__ == '__main__':
    test()
程序運行結(jié)果:
data shape: torch.Size([2, 3])
new_data shape: torch.Size([3, 2])
data: True
new_data: False
True
new_data shape: torch.Size([2, 3])
4. squeeze 和 unsqueeze 函數(shù)的用法?
squeeze 函數(shù)用刪除 shape 為 1 的維度,unsqueeze 在每個維度添加 1, 以增加數(shù)據(jù)的形狀。
import torch
import numpy as np


def test():

    data = torch.tensor(np.random.randint(0, 10, [1, 3, 1, 5]))
    print('data shape:', data.size())

    # 1. 去掉值為1的維度
    new_data = data.squeeze()
    print('new_data shape:', new_data.size())  # torch.Size([3, 5])

    # 2. 去掉指定位置為1的維度,注意: 如果指定位置不是1則不刪除
    new_data = data.squeeze(2)
    print('new_data shape:', new_data.size())  # torch.Size([3, 5])

    # 3. 在2維度增加一個維度
    new_data = data.unsqueeze(-1)
    print('new_data shape:', new_data.size())  # torch.Size([3, 1, 5, 1])


if __name__ == '__main__':
    test()
程序運行結(jié)果:
data shape: torch.Size([1, 3, 1, 5])
new_data shape: torch.Size([3, 5])
new_data shape: torch.Size([1, 3, 5])
new_data shape: torch.Size([1, 3, 1, 5, 1])
5. 小節(jié)?
本小節(jié)帶著同學(xué)們學(xué)習了經(jīng)常使用的關(guān)于張量形狀的操作,我們用到的主要函數(shù)有:
- reshape 函數(shù)可以在保證張量數(shù)據(jù)不變的前提下改變數(shù)據(jù)的維度.
- transpose 函數(shù)可以實現(xiàn)交換張量形狀的指定維度, permute 可以一次交換更多的維度.
- view 函數(shù)也可以用于修改張量的形狀, 但是它要求被轉(zhuǎn)換的張量內(nèi)存必須連續(xù),所以一般配合 contiguous 函數(shù)使用.
- squeeze 和 unsqueeze 函數(shù)可以用來增加或者減少維度.
7 張量運算函數(shù)?
學(xué)習目標?
- 掌握張量相關(guān)運算函數(shù)
1. 常見運算函數(shù)?
PyTorch 為每個張量封裝很多實用的計算函數(shù),例如計算均值、平方根、求和等等
import torch


def test():

    data = torch.randint(0, 10, [2, 3], dtype=torch.float64)
    print(data)
    print('-' * 50)

    # 1. 計算均值
    # 注意: tensor 必須為 Float 或者 Double 類型
    print(data.mean())
    print(data.mean(dim=0))  # 按列計算均值
    print(data.mean(dim=1))  # 按行計算均值
    print('-' * 50)

    # 2. 計算總和
    print(data.sum())
    print(data.sum(dim=0))
    print(data.sum(dim=1))
    print('-' * 50)

    # 3. 計算平方
    print(data.pow(2))
    print('-' * 50)

    # 4. 計算平方根
    print(data.sqrt())
    print('-' * 50)

    # 5. 指數(shù)計算, e^n 次方
    print(data.exp())
    print('-' * 50)

    # 6. 對數(shù)計算
    print(data.log())  # 以 e 為底
    print(data.log2())
    print(data.log10())


if __name__ == '__main__':
    test()
程序運行結(jié)果:
tensor([[4., 0., 7.],
        [6., 3., 5.]], dtype=torch.float64)
--------------------------------------------------
tensor(4.1667, dtype=torch.float64)
tensor([5.0000, 1.5000, 6.0000], dtype=torch.float64)
tensor([3.6667, 4.6667], dtype=torch.float64)
--------------------------------------------------
tensor(25., dtype=torch.float64)
tensor([10.,  3., 12.], dtype=torch.float64)
tensor([11., 14.], dtype=torch.float64)
--------------------------------------------------
tensor([[16.,  0., 49.],
        [36.,  9., 25.]], dtype=torch.float64)
--------------------------------------------------
tensor([[2.0000, 0.0000, 2.6458],
        [2.4495, 1.7321, 2.2361]], dtype=torch.float64)
--------------------------------------------------
tensor([[5.4598e+01, 1.0000e+00, 1.0966e+03],
        [4.0343e+02, 2.0086e+01, 1.4841e+02]], dtype=torch.float64)
--------------------------------------------------
tensor([[1.3863,   -inf, 1.9459],
        [1.7918, 1.0986, 1.6094]], dtype=torch.float64)
tensor([[2.0000,   -inf, 2.8074],
        [2.5850, 1.5850, 2.3219]], dtype=torch.float64)
tensor([[0.6021,   -inf, 0.8451],
        [0.7782, 0.4771, 0.6990]], dtype=torch.float64)
8 自動微分模塊?
學(xué)習目標?
- 掌握梯度計算
自動微分(Autograd)模塊對張量做了進一步的封裝,具有自動求導(dǎo)功能。自動微分模塊是構(gòu)成神經(jīng)網(wǎng)絡(luò)訓(xùn)練的必要模塊,在神經(jīng)網(wǎng)絡(luò)的反向傳播過程中,Autograd 模塊基于正向計算的結(jié)果對當前的參數(shù)進行微分計算,從而實現(xiàn)網(wǎng)絡(luò)權(quán)重參數(shù)的更新。
1. 梯度基本計算?
我們使用 backward 方法、grad 屬性來實現(xiàn)梯度的計算和訪問.
import torch


# 1. 單標量梯度的計算
# y = x**2 + 20
def test01():

    # 定義需要求導(dǎo)的張量
    # 張量的值類型必須是浮點類型
    x = torch.tensor(10, requires_grad=True, dtype=torch.float64)
    # 變量經(jīng)過中間運算
    f = x ** 2 + 20
    # 自動微分
    f.backward()
    # 打印 x 變量的梯度
    # backward 函數(shù)計算的梯度值會存儲在張量的 grad 變量中
    print(x.grad)


# 2. 單向量梯度的計算
# y = x**2 + 20
def test02():

    # 定義需要求導(dǎo)張量
    x = torch.tensor([10, 20, 30, 40], requires_grad=True, dtype=torch.float64)
    # 變量經(jīng)過中間計算
    f1 = x ** 2 + 20

    # 注意:
    # 由于求導(dǎo)的結(jié)果必須是標量
    # 而 f 的結(jié)果是: tensor([120., 420.])
    # 所以, 不能直接自動微分
    # 需要將結(jié)果計算為標量才能進行計算
    f2 = f1.mean()  # f2 = 1/2 * x

    # 自動微分
    f2.backward()

    # 打印 x 變量的梯度
    print(x.grad)


if __name__ == '__main__':
    test01()
程序運行結(jié)果:
tensor(20., dtype=torch.float64)
tensor([ 5., 10., 15., 20.], dtype=torch.float64)
2. 控制梯度計算?
我們可以通過一些方法使得在 requires_grad=True 的張量在某些時候計算不進行梯度計算。
import torch


# 1. 控制不計算梯度
def test01():

    x = torch.tensor(10, requires_grad=True, dtype=torch.float64)
    print(x.requires_grad)

    # 第一種方式: 對代碼進行裝飾
    with torch.no_grad():
        y = x ** 2
        print(y.requires_grad)

    # 第二種方式: 對函數(shù)進行裝飾
    @torch.no_grad()
    def my_func(x):
        return x ** 2
    print(my_func(x).requires_grad)


    # 第三種方式
    torch.set_grad_enabled(False)
    y = x ** 2
    print(y.requires_grad)


# 2. 注意: 累計梯度
def test02():

    # 定義需要求導(dǎo)張量
    x = torch.tensor([10, 20, 30, 40], requires_grad=True, dtype=torch.float64)

    for _ in range(3):

        f1 = x ** 2 + 20
        f2 = f1.mean()

        # 默認張量的 grad 屬性會累計歷史梯度值
        # 所以, 需要我們每次手動清理上次的梯度
        # 注意: 一開始梯度不存在, 需要做判斷
        if x.grad is not None:
            x.grad.data.zero_()

        f2.backward()
        print(x.grad)


# 3. 梯度下降優(yōu)化最優(yōu)解
def test03():

    # y = x**2
    x = torch.tensor(10, requires_grad=True, dtype=torch.float64)

    for _ in range(5000):

        # 正向計算
        f = x ** 2

        # 梯度清零
        if x.grad is not None:
            x.grad.data.zero_()

        # 反向傳播計算梯度
        f.backward()

        # 更新參數(shù)
        x.data = x.data - 0.001 * x.grad

        print('%.10f' % x.data)


if __name__ == '__main__':
    test01()
    print('--------------------')
    test02()
    print('--------------------')
    test03()
程序運行結(jié)果:
True
False
False
False
tensor([ 5., 10., 15., 20.], dtype=torch.float64)
tensor([ 5., 10., 15., 20.], dtype=torch.float64)
tensor([ 5., 10., 15., 20.], dtype=torch.float64)
3. 梯度計算注意?
當對設(shè)置 requires_grad=True 的張量使用 numpy 函數(shù)進行轉(zhuǎn)換時, 會出現(xiàn)如下報錯:
Can't call numpy() on Tensor that requires grad. Use tensor.detach().numpy() instead.
此時, 需要先使用 detach 函數(shù)將張量進行分離, 再使用 numpy 函數(shù).
注意: detach 之后會產(chǎn)生一個新的張量, 新的張量作為葉子結(jié)點,并且該張量和原來的張量共享數(shù)據(jù), 但是分離后的張量不需要計算梯度。
import torch


# 1. detach 函數(shù)用法
def test01():

    x = torch.tensor([10, 20], requires_grad=True, dtype=torch.float64)

    # Can't call numpy() on Tensor that requires grad. Use tensor.detach().numpy() instead.
    # print(x.numpy())  # 錯誤
    print(x.detach().numpy())  # 正確


# 2. detach 前后張量共享內(nèi)存
def test02():

    x1 = torch.tensor([10, 20], requires_grad=True, dtype=torch.float64)

    # x2 作為葉子結(jié)點
    x2 = x1.detach()

    # 兩個張量的值一樣: 140421811165776 140421811165776
    print(id(x1.data), id(x2.data))
    x2.data = torch.tensor([100, 200])
    print(x1)
    print(x2)

    # x2 不會自動計算梯度: False
    print(x2.requires_grad)


if __name__ == '__main__':
    test01()
    test02()
程序運行結(jié)果:
10. 20.]
140495634222288 140495634222288
tensor([10., 20.], dtype=torch.float64, requires_grad=True)
tensor([100, 200])
False
4. 小節(jié)?
本小節(jié)主要講解了 PyTorch 中非常重要的自動微分模塊的使用和理解。我們對需要計算梯度的張量需要設(shè)置 requires_grad=True 屬性,并且需要注意的是梯度是累計的,在每次計算梯度前需要先進行梯度清零。
10 模型的保存加載?
學(xué)習目標?
- 掌握PyTorch保存模型的方法
- 神經(jīng)網(wǎng)絡(luò)的訓(xùn)練有時需要幾天, 幾周, 甚至幾個月, 為了在每次使用模型時避免高代價的重復(fù)訓(xùn)練, 我們就需要將模型序列化到磁盤中, 使用的時候反序列化到內(nèi)存中.
1: 保存模型參數(shù)?
import torch
import torch.nn as nn


# 假設(shè)我們有一個模型
class SimpleModel(nn.Module):
    def __init__(self):
        super(SimpleModel, self).__init__()
        self.fc = nn.Linear(10, 1)

    def forward(self, x):
        return self.fc(x)

model = SimpleModel()

# 保存模型的參數(shù)
torch.save(model.state_dict(), 'model_weights.pth')
?
2: 保存全部模型?
import torch
import torch.nn as nn


# 假設(shè)我們有一個模型
class SimpleModel(nn.Module):
    def __init__(self):
        super(SimpleModel, self).__init__()
        self.fc = nn.Linear(10, 1)

    def forward(self, x):
        return self.fc(x)

model = SimpleModel()

# 保存全部模型
torch.save(model, 'model.pth')
3: 加載模型參數(shù)?
# 創(chuàng)建一個與保存時相同結(jié)構(gòu)的模型
model = SimpleModel()

# 加載模型的參數(shù)
model.load_state_dict(torch.load('model_weights.pth'))
print(model)
4: 加載全部模型?
model = torch.load('model.pth')
print(model)
- 注意??:
- 模型結(jié)構(gòu): 如果你只保存了模型的參數(shù), 那么在加載時需要確保你有與保存時相同的模型結(jié)構(gòu).
- 設(shè)備兼容性: 如果你在一個設(shè)備上保存了模型(例如GPU), 而在另一個設(shè)備上加載(例如CPU), 你可能需要使用
map_location參數(shù)來指定設(shè)備. device = torch.device('cpu') model.load_state_dict(torch.load('model_weights.pth', map_location=device))
學(xué)員問題
-
問題1: 關(guān)于世界巨頭公司的特點?
- Google: 1998 - 2024, 世界第一!!!
- 搜索??
- 2003 Hadoop: 開啟了大數(shù)據(jù)的時代.
- 2014 Tensorflow: 開啟了人工智能的時代.
- 2017 Transformer
- 2018 BERT
- 2023-2024 被OpenAI小小的壓制
- ??Google過去20多年一直特別喜歡發(fā)論文, 開源分享.
- Facebook (Meta): 低調(diào)奢華有內(nèi)涵!!!
- 總體很低調(diào), 但是發(fā)布了很多非常非常好用的工具, 框架.
- 發(fā)論文, 很低調(diào), 但是仔細看看后很重要 + 很實用.
- Hive --- 大數(shù)據(jù)
- Fasttext --- AI時代
- Pytorch --- AI時代 ??
- 微軟:
- IT第二個時代的老大 (第一個時代老大是誰?) --- IBM
- 明明已經(jīng)趕不上互聯(lián)網(wǎng) + AI時代, 突然投資了OpenAI, 大逆轉(zhuǎn)了
- BATB:
- 追趕階段, AI時代追的最近的時代. 身為差距最短.
- Google: 1998 - 2024, 世界第一!!!
-
問題2: 關(guān)于當前市場上的幾大開發(fā)框架?
- Tensorflow:
- 2014 0.x --- 1.x --- 所有同學(xué)們的幸福?? (徹底忘掉1.x時代, 靜態(tài)圖模式)
- 2024年, Google內(nèi)部很大比例的工程師依然在用1.x (內(nèi)幕??)
- 2019 2.x --- 動態(tài)圖模式 --- 工業(yè)界全部用2.x
- 2014 0.x --- 1.x --- 所有同學(xué)們的幸福?? (徹底忘掉1.x時代, 靜態(tài)圖模式)
- ??Pytorch:
- 2017 動態(tài)圖模式 (2018年)
- 1.3, 1.6, 1.8, 1.10 比較主流的版本.
- 2.1, 2.2, 2.4 初創(chuàng)公司 (版本遷移, 1.x -> 2.x)
- PaddlePaddle:
- 你只要會用了Pytorch, 代碼遷移到飛漿1-2周. (不建議專門學(xué), 用的時候看一下就會了)
- Caffe:
- 太小眾, 偏學(xué)術(shù), 不建議學(xué).
- Tensorflow:
-
問題3: 關(guān)于同學(xué)們的環(huán)境問題?
- 1: 下載anaconda, 安裝conda環(huán)境. https://www.anaconda.com/
- 一個安裝包, 直接點擊安裝.
- 2: 推薦以命令行的模式創(chuàng)建環(huán)境.
- conda create -n deep_learning python=3.10. (3.10, 3.11, 3.12)
- deep_learning是你自己起的環(huán)境名字, 程序員自主決定
- 利用conda創(chuàng)建出來的虛擬環(huán)境, 跟vmware不是一回事 (不建議用vmware模式)
- 3: 激活環(huán)境
- Conda activate deep_learning
- Source activate deep_learning
- 4: 查看環(huán)境中已經(jīng)安裝好的包
- Pip list
- 5: 安裝對應(yīng)的各種包
- pip install torch==2.3.0
- pip install transformers
- 6: 退出虛擬環(huán)境
- Source deactivate deep_learning
- Conda deactivate deep_learning
- 至于IDE的選擇, 怎么舒服怎么來.
- vim
- VScode
- 需要專門為IDE選擇解釋器
- Pycharm
- Jupyter notebook (校園工具)
- 1: 下載anaconda, 安裝conda環(huán)境. https://www.anaconda.com/
-
問題4: 關(guān)于Pytorch的數(shù)據(jù)精度問題?
- 如果不指定數(shù)據(jù)精度, 默認就是float32 --- 也是神經(jīng)網(wǎng)絡(luò)訓(xùn)練最基準的數(shù)據(jù)精度.
- 1: 如果是整型, Pytorch默認的是torch.int64, 數(shù)據(jù)格式后面不顯示; 其他的都顯示torch.int16, torch.int32, torch.int8
- 2: 如果是浮點型, Pytorch默認的是torch.float32, 數(shù)據(jù)格式后面不顯示; 其他的都顯示torch.float16, torch.float64
- int16, int32, int64有什么區(qū)別? (LLL)
- 一個數(shù)值在內(nèi)存中占了多少個比特位.
- 不是計算機專業(yè)的小伙伴可能有點困惑.
- 今天的一個小作業(yè), 回去查查!!! ??
- 如果不指定數(shù)據(jù)精度, 默認就是float32 --- 也是神經(jīng)網(wǎng)絡(luò)訓(xùn)練最基準的數(shù)據(jù)精度.
-
問題5: 小朱老師提問 --- 計算機里有沒有"真隨機數(shù)"?
- 沒有???!!! import random, random.rand() 生成隨機數(shù)
- ??計算機只有"偽隨機數(shù)", 什么意思呢? 就是這些隨機數(shù)都是"計算出來的" !!!
- 1: 給一個起始值 (初始值)
- 2: 按照一整套固定的公式算出來的數(shù)字??
-
作業(yè):
- 第1次作業(yè):
- 1: 今天的一個小作業(yè), 回去查查int16, int32, int64, 底層的內(nèi)存機制!!!
- 2: 第2章, 2.1之前 (張量創(chuàng)建) 代碼跑完, 結(jié)果提交 + 截圖提交.
- 作業(yè)截止時間 12月8日 20:00 之前. 助教?? + 小朱老師??
- 助教郵箱??: wanghao5276@163.com (這個一定要傳, 助教老師統(tǒng)計作業(yè))
- 小朱老師郵箱??: 348811083@qq.com
- 第1次作業(yè):
-
問題1: 學(xué)習的過程中一定要腦洞大開!!! (小朱老師???????的建議)
- 很多的代碼, 回去后各種實驗, 多實驗?zāi)憔秃苁煜ひ恍┣闆r.
- 面試中寫代碼這件事:
- 1: 刷Leetcode --- 淘汰賽 (50%)
- 2: 就讓你寫一個日常工作中的代碼 --- 老鳥??直接寫基本不報錯...... (新手寫了20行, 里面bug好幾行)
-
問題2: 關(guān)于reshape函數(shù)的特點?
- 關(guān)鍵: tensor.reshape(N, M) --- N * M = tensor所有的元素個數(shù) (不能多, 也不能少)
-
問題3: transpose, permute函數(shù)的特點?
- 1: transpose(data, x, y) --- 每次只能調(diào)整2個維度的組合.
- 不管傳進來的data是什么維度, transpose只能一次處理2個維度.
- 2: permute(data, [x, y, z]) --- 每次可以調(diào)整3個維度的組合.
- 核心在于data張量的維度, 必須要和調(diào)整的維度保持一致. 但是data是什么維度都可以接受.
- 1: transpose(data, x, y) --- 每次只能調(diào)整2個維度的組合.
-
問題4: 關(guān)于view()函數(shù)和contiguous()函數(shù)?
- 1: 首先view()函數(shù)使用起來和reshape()函數(shù)特別像, 改變張量的shape
- 2: view() 只能應(yīng)用在內(nèi)存連續(xù)的張量上; 如果data不連續(xù), 使用data.contiguous()變成內(nèi)存連續(xù)的張量.
- 3: 發(fā)現(xiàn)data最初始的時候內(nèi)存不連續(xù), 使用data.reshape()之后內(nèi)存連續(xù)了.
- ??4: 如果data是內(nèi)存連續(xù)的張量, 執(zhí)行res = data.reshape()之后, res是一個共享內(nèi)存的副本; 如果data內(nèi)存不連續(xù)的張量, 執(zhí)行res = data.reshape()之后, res是一個新創(chuàng)建的內(nèi)存的張量.
- ??大作業(yè): 內(nèi)存連續(xù)不連續(xù)不明白. (湖海茫茫) --- 不是幾分鐘能說明白的.??
- 涉及到操作系統(tǒng), 計算機體系結(jié)構(gòu).
- 16GB --- 16000MB --- 16000000KB --- 每一個B (字節(jié)) 背后都有一個地址.
- 栗子??: 變量 x = 100, 本質(zhì)上是一個存儲在內(nèi)存條位置是2003657834563號地址的一個整數(shù), 整數(shù)大小是100. 變量 y = 9.88, 本質(zhì)上是一個存儲在內(nèi)存條位置是57383292617847984號地址的一個32位浮點數(shù).
- 栗子??: x = [1, 2, 3.3, 4, 5.2, 6.66] --- 這不叫內(nèi)存連續(xù), 這只是一個數(shù)組.
- 存儲連續(xù)就是內(nèi)存地址連續(xù). ? (風之子)
- 內(nèi)存連續(xù)和硬盤連續(xù)又有啥關(guān)系? 連續(xù)有啥用? (啊)
- 1: 內(nèi)存連續(xù)是內(nèi)存的事 --- 16GB, 32GB......硬盤連續(xù)是磁盤的事 --- 512GB, 1TB
- 內(nèi)存 PK 硬盤 --- 兩個設(shè)備
- CPU PK GPU --- 兩個設(shè)備
- 2: ??連續(xù)有啥用? (很有用, 很重要, 是傳統(tǒng)編程和AI重點研究的問題)
- 內(nèi)存取數(shù)據(jù)也好, 硬盤取數(shù)據(jù)也好, 連續(xù)地址最快, 不連續(xù)就慢!!!
- 內(nèi)存不連續(xù)差距很小
- 硬盤不連續(xù)差距很大. (Windows小伙伴, 磁盤重新整理)
- 1: 內(nèi)存連續(xù)是內(nèi)存的事 --- 16GB, 32GB......硬盤連續(xù)是磁盤的事 --- 512GB, 1TB
-
??第2次作業(yè):
- 從第2章數(shù)值計算, 到第6章結(jié)束的代碼全跑一遍, 結(jié)果截圖提交.
- 大作業(yè): 內(nèi)存連續(xù)不連續(xù)回去好好查查, 寫一段自己的理解吧.
- 不建議現(xiàn)在看的太深入, 初步理解一下為主.
- 1: 內(nèi)存是有地址概念的.
- 2: 內(nèi)存連續(xù)很重要.
- 3: 內(nèi)存是分8位存儲, 16為存儲, 32為存儲, 64位存儲.
- 不建議現(xiàn)在看的太深入, 初步理解一下為主.
- 第2次作業(yè)截止時間12月16日 20:00 吧.??
-
問題1: 關(guān)于AI領(lǐng)域內(nèi)的源代碼的問題? (小朱老師???????)
- 1: AI一個新的模型, 一個新的架構(gòu), paper的形式發(fā)出來 --- 代碼的實現(xiàn)一個公司一個樣, 一個小隊伍一個樣.
- BERT: 第一版本BERT谷歌發(fā)布的Tensorflow的版本 (1.x版本)
- Huggingface發(fā)布了Pytorch版本, 后續(xù)谷歌發(fā)布2.x版本
- 國內(nèi)百度的版本, 阿里的版本, 清華的, 哈工大.......
- GPT: 第一個版本谷歌發(fā)布 transformer的版本
- OpenAI的GPT1, GPT2
- ChatGLM3-6b, 4-9b 很多的代碼實現(xiàn)已經(jīng)不同了
- Qwen系列的代碼實現(xiàn)又不一樣
- DeepSeek v2的代碼實現(xiàn)又不一樣
- ??各有所長, 盡量同一家的看??
- BERT: 第一版本BERT谷歌發(fā)布的Tensorflow的版本 (1.x版本)
- 2: 你連論文的代碼復(fù)現(xiàn)都不會, 別整AI啦?? !!!
- ? --- 不對, 但是又不是完全對.....
- 2.1: 大廠的算法崗, 獨角獸的算法崗 --- 能力基本是個正常水平.
- 2.2: 代碼復(fù)現(xiàn)在AI里面圈里??是屬于偏高端的能力.......(10% ~ 20%)
- 3: 2025了, BERT + GPT (Transformer的源代碼已經(jīng)是標配了)
- 1: AI一個新的模型, 一個新的架構(gòu), paper的形式發(fā)出來 --- 代碼的實現(xiàn)一個公司一個樣, 一個小隊伍一個樣.
-
問題2: 8.1031e+03 --- 科學(xué)計數(shù)法?
- \(e+03 : 10^3\)
- \(8.1031e+03 = 8103.1\)
- \(e-05 : 10^{-5}\)
- \(8.1031e-05 = 0.000081031\)
-
問題3: 為什么明明我在寫Python的代碼, 為什么非得用Pytorch呢? 我直接用Python + numpy不行嗎?
- 最最核心的原因就是: Tensorflow, Pytorch, PaddlePaddle, 提供了自動微分模塊.
- 自動微分模塊也是當前全世界的幾大框架中, 最值錢的部分.
- 能寫自動微分模塊的在AI里面圈里??是屬于頂尖級的能力.......(萬分之一) --- 巨佬
- 飛槳系統(tǒng), 小朱老師參與開發(fā), 模塊級別開發(fā)
- nn.LSTM(), pd.LSTm()
- 賈揚清 --- Pytorch, PaddlePaddle --- 參考了Caffe的源代碼
- 能寫自動微分模塊的在AI里面圈里??是屬于頂尖級的能力.......(萬分之一) --- 巨佬
-
問題4: 怎么評價一個模型效果好還是不好? (雖然有點超綱 --- 雙子)
- 接下來這幾個月都圍繞這個關(guān)鍵指標
- 準確率
- 召回率
- F1
- BLEU
- Rouge-1, Rouge-2
- Rouge-L
- 分類任務(wù), 檢測任務(wù), 信息抽取任務(wù), 多句關(guān)系任務(wù), 機器翻譯, 文本摘要
- 都會抽象關(guān)鍵指標
- 一句話: ?? 大模型的評價一定是定量的!!!
- 論文, 帖子: 大模型刷榜......刷的就是上面這些核心指標.
-
問題5: 為什么requires_grad = True, 有時候還設(shè)置成False呢?
- 模型訓(xùn)練的時候設(shè)置成True, 需要反向傳播 + 梯度計算 + 參數(shù)更新.
- 模型推理的時候設(shè)置成False, 不需要反向傳播, 不需要計算梯度了.
-
問題6: 關(guān)于每一輪x.grad梯度值會進行累加, 為什么???
- 1: 正向理解不清零肯定有問題 --- 未來神經(jīng)網(wǎng)絡(luò)的訓(xùn)練都是分批次進行的, batch_size = 32 (64, 128), x.grad累加的梯度值更新完了參數(shù)后, 如果不進行清零, 第二個批次進來后, 又有32個樣本計算了梯度, x.grad已經(jīng)累積了64條樣本的梯度, 但是更新所面對的樣本是第二個批次的32個樣本, 發(fā)生了錯位!!!
- 2: 如果沒有累加的功能 --- 反過來batch_size = 32怎么辦呢???
- x.grad --- 累加了32個樣本的梯度 --- 直接進行一次x.grad / 32的操作, 用梯度的平均值來更新參數(shù)!!!
- 3: 訓(xùn)練方法叫多輪反向傳播 + 1次參數(shù)更新 ---- 顯存的消耗會非常大........
- 節(jié)省顯存: 連續(xù)進行8個批次的反向傳播 batch_size = 2, Out Of Memory, 逼著你只能batch_size = 1
- 連續(xù)進行16次反向傳播, 相當于積攢了batch_size = 16的效果, 16個梯度都累加到x.grad中了.
-
作業(yè): 回去提前預(yù)習一下反向傳播算法.

 浙公網(wǎng)安備 33010602011771號