
實現(xiàn)一個前端動態(tài)模塊組件(Vite+原生JS)
1. 引言
在前面的文章《使用Vite創(chuàng)建一個動態(tài)網(wǎng)頁的前端項目》中我們實現(xiàn)了一個動態(tài)網(wǎng)頁。不過這個動態(tài)網(wǎng)頁的實用價值并不高,在真正實際的項目中我們希望的是能實現(xiàn)一個動態(tài)的模塊組件。具體來說,就是有一個頁面控件同時在多個頁面中使用,那么我們肯定想將這個頁面控件封裝起來,以便每個頁面需要的時候調用一下就可以生成。注意,這個封裝起來模塊組件應該要包含完整的HTML+JavaScript+CSS,并且要根據(jù)從后端訪問的數(shù)據(jù)來動態(tài)填充頁面內容。其實像VUE這樣的前端框架就是這種設計思路,同時這也是GUI程序開發(fā)的常見思維模式。
2. 實現(xiàn)
2.1 項目組織
在這里筆者實現(xiàn)的例子是一個博客網(wǎng)站上的分類專欄控件。分類專欄是一般通過后端獲取的,但是這里筆者就將其模擬成直接域內獲取一個數(shù)據(jù)categories.json,里面的內容如下:
[
  {
    "firstCategory": {
      "articleCount": 4,
      "iconAddress": "三維渲染.svg",
      "name": "計算機圖形學"
    },
    "secondCategories": [
      {
        "articleCount": 2,
        "iconAddress": "opengl.svg",
        "name": "OpenGL/WebGL"
      },
      {
        "articleCount": 2,
        "iconAddress": "專欄分類.svg",
        "name": "OpenSceneGraph"
      },
      { "articleCount": 0, "iconAddress": "threejs.svg", "name": "three.js" },
      { "articleCount": 0, "iconAddress": "cesium.svg", "name": "Cesium" },
      { "articleCount": 0, "iconAddress": "unity.svg", "name": "Unity3D" },
      {
        "articleCount": 0,
        "iconAddress": "unrealengine.svg",
        "name": "Unreal Engine"
      }
    ]
  },
  {
    "firstCategory": {
      "articleCount": 4,
      "iconAddress": "計算機視覺.svg",
      "name": "計算機視覺"
    },
    "secondCategories": [
      {
        "articleCount": 0,
        "iconAddress": "圖像處理.svg",
        "name": "數(shù)字圖像處理"
      },
      {
        "articleCount": 0,
        "iconAddress": "特征提取.svg",
        "name": "特征提取與匹配"
      },
      {
        "articleCount": 0,
        "iconAddress": "目標檢測.svg",
        "name": "目標檢測與分割"
      },
      { "articleCount": 4, "iconAddress": "SLAM.svg", "name": "三維重建與SLAM" }
    ]
  },
  {
    "firstCategory": {
      "articleCount": 11,
      "iconAddress": "地理信息系統(tǒng).svg",
      "name": "地理信息科學"
    },
    "secondCategories": []
  },
  {
    "firstCategory": {
      "articleCount": 31,
      "iconAddress": "代碼.svg",
      "name": "軟件開發(fā)技術與工具"
    },
    "secondCategories": [
      { "articleCount": 2, "iconAddress": "cplusplus.svg", "name": "C/C++" },
      { "articleCount": 19, "iconAddress": "cmake.svg", "name": "CMake構建" },
      { "articleCount": 2, "iconAddress": "Web開發(fā).svg", "name": "Web開發(fā)" },
      { "articleCount": 7, "iconAddress": "git.svg", "name": "Git" },
      { "articleCount": 1, "iconAddress": "linux.svg", "name": "Linux開發(fā)" }
    ]
  }
]
這個數(shù)據(jù)的意思是將分類專類分成一級分類專欄和二級分類專欄,每個專欄都有名稱、文章數(shù)、圖標地址屬性,這樣便于我們填充到頁面中。
新建一個components目錄,在這個目錄中新建category.html、category.js、category.css這三個文件,正如前文所說的,我們希望這個模塊組件能同時具有結構、行為和樣式的能力。這樣,這個項目的文件組織結構如下所示:
my-native-js-app
├── public
│ └── categories.json
├── src
│ ├── components
│ │ ├── category.css
│ │ ├── category.html
│ │ └── category.js
│ └── main.js
├── index.html
└── package.json
2.2 具體解析
先看index.html頁面,代碼如下所示:
<!DOCTYPE html>
<html lang="en">
  <head>
    <meta charset="UTF-8" />
    <link rel="icon" type="image/svg+xml" href="/vite.svg" />
    <meta name="viewport" content="width=device-width, initial-scale=1.0" />
    <title>Vite App</title>
  </head>
  <body>
    <div id="app">
      <div id="category-section-placeholder"></div>
    </div>
    <script type="module" src="/src/main.js"></script>
  </body>
</html>
基本都沒有什么變化,只是增加了一個名為category-section-placeholder的元素,這個元素會用來掛接在js中動態(tài)創(chuàng)建的分類專欄目錄元素。
接下來看main.js文件:
import './components/category.js'
里面其實啥都沒干,只是引入了一個category模塊。那么就看一下這個category.js文件:
import "./category.css";

// 定義一個變量來存儲獲取到的分類數(shù)據(jù)
let categoriesJson = null;

// 使用MutationObserver監(jiān)聽DOM變化
const observer = new MutationObserver((mutations) => {
  mutations.forEach((mutation) => {
    if (
      mutation.type === "childList" &&
      mutation.target.id === "category-section-placeholder"
    ) {
      // 在這里調用函數(shù)來填充數(shù)據(jù)
      populateCategories(categoriesJson);
    }
  });
});

// 配置觀察選項
const config = { childList: true, subtree: true };

// 開始觀察目標節(jié)點
const targetNode = document.getElementById("category-section-placeholder");
observer.observe(targetNode, config);

// 獲取分類數(shù)據(jù)
async function fetchCategories() {
  try {
    const backendUrl = import.meta.env.VITE_BACKEND_URL;
    const response = await fetch("/categories.json");
    if (!response.ok) {
      throw new Error("網(wǎng)絡無響應");
    }
    categoriesJson = await response.json();

    // 加載Category.html內容
    fetch("/src/components/category.html")
      .then((response) => response.text())
      .then((data) => {
        document.getElementById("category-section-placeholder").innerHTML =
          data;
      })
      .catch((error) => {
        console.error("Failed to load Category.html:", error);
      });
  } catch (error) {
    console.error("獲取分類專欄失敗:", error);
  }
}

// 填充分類數(shù)據(jù)
function populateCategories(categories) {
  if (!categories || !Array.isArray(categories)) {
    console.error("Invalid categories data:", categories);
    return;
  }

  const categoryList = document.querySelector(".category-list");

  categories.forEach((category) => {
    const categoryItem = document.createElement("li");
    categoryItem.innerHTML = `
        <a href="#" class="category-item">
          <img src="category/${category.firstCategory.iconAddress}" alt="${category.firstCategory.name}" class="category-icon">
          <span class="category-name">${category.firstCategory.name} <span class="article-count">${category.firstCategory.articleCount}篇</span></span>`;
    if (category.secondCategories.length != 0) {
      categoryItem.innerHTML += `
          <ul class="subcategory-list">
            ${category.secondCategories
              .map(
                (subcategory) => `
              <li><a href="#" class="subcategory-item">
                <img src="category/${subcategory.iconAddress}" alt="${subcategory.name}" class="subcategory-icon">
                <span class="subcategory-name">${subcategory.name} <span class="article-count">${subcategory.articleCount}篇</span></span>
              </a></li>
            `
              )
              .join("")}
          </ul>
        </a>
        `;
    }
    categoryList.appendChild(categoryItem);
  });
}

// 確保DOM完全加載后再執(zhí)行
document.addEventListener("DOMContentLoaded", fetchCategories);
這個文件里面的內容比較多,那么我們就按照代碼的執(zhí)行順序進行講解。
document.addEventListener("DOMContentLoaded", fetchCategories);表示當index.html這個頁面加載成功后,就執(zhí)行fetchCategories這個函數(shù)。在這個函數(shù)通過fetch接口獲取目錄數(shù)據(jù),通過也通過fetch接口獲取category.html。category.html中的內容很簡單:
<div class="category-section">
    <h3>分類專欄</h3>
    <ul class="category-list">
    </ul>
</div>
fetch接口是按照文本的方式來獲取category.html的,在這里的document.getElementById("category-section-placeholder").innerHTML = data;表示將這段文本序列化到category-section-placeholder元素的子節(jié)點中。程序執(zhí)行到這里并沒有結束,通過對DOM的變化監(jiān)聽,繼續(xù)執(zhí)行populateCategories函數(shù),如下所示:
// 使用MutationObserver監(jiān)聽DOM變化
const observer = new MutationObserver((mutations) => {
  mutations.forEach((mutation) => {
    if (
      mutation.type === "childList" &&
      mutation.target.id === "category-section-placeholder"
    ) {
      // 在這里調用函數(shù)來填充數(shù)據(jù)
      populateCategories(categoriesJson);
    }
  });
});

// 配置觀察選項
const config = { childList: true, subtree: true };

// 開始觀察目標節(jié)點
const targetNode = document.getElementById("category-section-placeholder");
observer.observe(targetNode, config);
populateCategories的具體實現(xiàn)思路是:現(xiàn)在分類專欄的數(shù)據(jù)已經(jīng)有了,根節(jié)點元素category-list也已經(jīng)知道,剩下的就是通過數(shù)據(jù)來拼接HTML字符串,然后序列化到category-list元素的子節(jié)點下。代碼如下所示:
const categoryList = document.querySelector(".category-list");

categories.forEach((category) => {
const categoryItem = document.createElement("li");
categoryItem.innerHTML = `
    <a href="#" class="category-item">
        <img src="category/${category.firstCategory.iconAddress}" alt="${category.firstCategory.name}" class="category-icon">
        <span class="category-name">${category.firstCategory.name} <span class="article-count">${category.firstCategory.articleCount}篇</span></span>`;
if (category.secondCategories.length != 0) {
    categoryItem.innerHTML += `
        <ul class="subcategory-list">
        ${category.secondCategories
            .map(
            (subcategory) => `
            <li><a href="#" class="subcategory-item">
            <img src="category/${subcategory.iconAddress}" alt="${subcategory.name}" class="subcategory-icon">
            <span class="subcategory-name">${subcategory.name} <span class="article-count">${subcategory.articleCount}篇</span></span>
            </a></li>
        `
            )
            .join("")}
        </ul>
    </a>
    `;
}
categoryList.appendChild(categoryItem);
其實思路很簡單對吧?最后根據(jù)需要實現(xiàn)組件的樣式,category.css文件如下所示:
/* Category.css */
.category-section {
    background-color: #fff;
    border: 1px solid #e0e0e0;
    border-radius: 8px;
    padding: 1rem;
    box-shadow: 0 2px 4px rgba(0, 0, 0, 0.1);
    font-family: Arial, sans-serif;
    max-width: 260px;
    /* 確保不會超出父容器 */
    overflow: hidden;
    /* 處理溢出內容 */
}

.category-section h3 {
    font-size: 1.2rem;
    color: #333;
    border-bottom: 1px solid #e0e0e0;
    padding-bottom: 0.5rem;
    margin: 0 0 1rem;
    text-align: left;
    /* 向左對齊 */
}

.category-list {
    list-style: none;
    padding: 0;
    margin: 0;
}

.category-list li {
    margin: 0.5rem 0;
}

.category-item,
.subcategory-item {
    display: flex;
    align-items: center;
    text-decoration: none;
    color: #333;
    transition: color 0.3s ease;
}

.category-item:hover,
.subcategory-item:hover {
    color: #007BFF;
}

.category-icon,
.subcategory-icon {
    width: 24px;
    height: 24px;
    margin-right: 0.5rem;
}

.category-name,
.subcategory-name {
    /* font-weight: bold; */
    display: flex;
    justify-content: space-between;
    width: 100%;
    color:#000
}

.article-count {
    color: #000;
    font-weight: normal;
}

.subcategory-list {
    list-style: none;
    padding: 0;
    margin: 0.5rem 0 0 1.5rem;
}

.subcategory-list li {
    margin: 0.25rem 0;
}

.subcategory-list a {
    text-decoration: none;
    color: #555;
    transition: color 0.3s ease;
}

.subcategory-list a:hover {
    color: #007BFF;
}
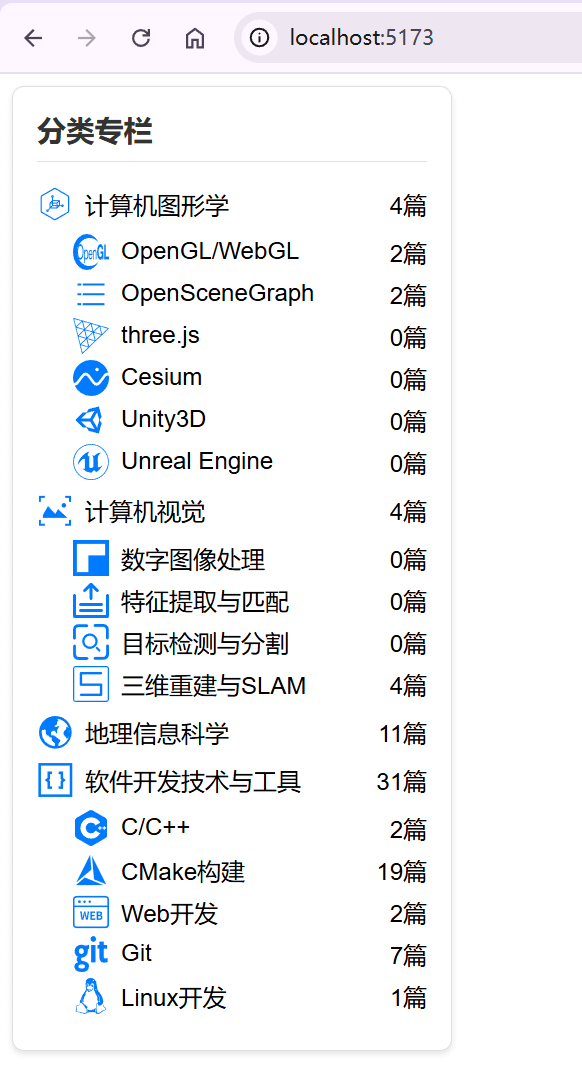
最后顯示的結果如下圖所示:
3. 結語
總結一下前端動態(tài)模塊組件的實現(xiàn)思路:JavaScript代碼永遠是主要的,HTML頁面就好比是JavaScript的處理對象,過程就跟你用C++/Java/C#/Python讀寫文本文件一樣,其實沒什么不同。DOM是瀏覽器解析處理HTML文檔的對象模型,但是本質上HTML是個文本文件(XML文件),需要做的其實就是將HTML元素、CSS元素以及動態(tài)數(shù)據(jù)組合起來,一個動態(tài)模塊組件就實現(xiàn)了。最后照葫蘆畫瓢,依次實現(xiàn)其他的組件模塊在index.html中引入,一個動態(tài)頁面就組合起來了。

 浙公網(wǎng)安備 33010602011771號