
WebGPU學(xué)習(xí)(二): 學(xué)習(xí)“繪制一個(gè)三角形”示例
大家好,本文學(xué)習(xí)Chrome->webgpu-samplers->helloTriangle示例。
上一篇博文:
WebGPU學(xué)習(xí)(一): 開篇
下一篇博文:
WebGPU學(xué)習(xí)(三):MSAA
準(zhǔn)備Sample代碼
克隆webgpu-samplers Github Repo到本地。
(備注:當(dāng)前的version為0.0.2)
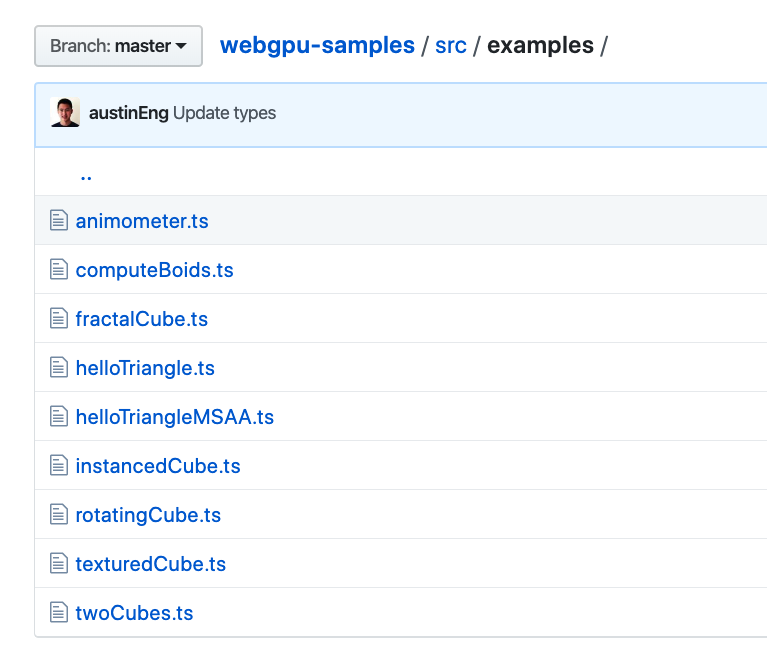
實(shí)際的sample代碼在src/examples/文件夾中,是typescript代碼寫的:
學(xué)習(xí)helloTriangle.ts
打開helloTriangle.ts文件,我們來看下init函數(shù)的內(nèi)容。
首先是shader代碼
    const vertexShaderGLSL = `#version 450
      const vec2 pos[3] = vec2[3](vec2(0.0f, 0.5f), vec2(-0.5f, -0.5f), vec2(0.5f, -0.5f));

      void main() {
          gl_Position = vec4(pos[gl_VertexIndex], 0.0, 1.0);
      }
    `;

    const fragmentShaderGLSL = `#version 450
      layout(location = 0) out vec4 outColor;

      void main() {
          outColor = vec4(1.0, 0.0, 0.0, 1.0);
      }
    `;
這里是vertex shader和fragment shader的glsl代碼。
(webgpu支持vertex shader、fragment shader、compute shader,這里只使用了前面兩個(gè))
“#version 450”聲明了glsl版本為4.5(它要放在glsl的第一行)
第2行定義了三角形的三個(gè)頂點(diǎn)坐標(biāo),使用2維數(shù)組保存(每個(gè)元素為vec2類型)。因?yàn)槎荚谝粋€(gè)平面,所以頂點(diǎn)只定義了x、y坐標(biāo)(頂點(diǎn)的z為0.0)
第5行的gl_VertexIndex為頂點(diǎn)序號(hào),每次執(zhí)行時(shí)值依次為0、1、2(vertex shader被執(zhí)行了3次,因?yàn)橹挥?個(gè)頂點(diǎn))(具體見本文末尾對(duì)draw的分析)
第9行是fragment shader,因?yàn)槿切螢橐粋€(gè)顏色,所以所有片段的顏色為同一個(gè)固定值
然后我們繼續(xù)看下面的代碼
    const adapter = await navigator.gpu.requestAdapter();
    const device = await adapter.requestDevice();
    // 準(zhǔn)備編譯glsl的庫(kù)
    const glslang = await glslangModule();
    // 獲得webgpu上下文
    const context = canvas.getContext('gpupresent');
第4行的glslangModule是import的第三方庫(kù):
import glslangModule from '../glslang';
繼續(xù)往下看
    // 定義swapbuffer的格式為RGBA8位的無符號(hào)歸一化格式
    const swapChainFormat = "bgra8unorm";

    // @ts-ignore:
    const swapChain: GPUSwapChain = context.configureSwapChain({
      device,
      format: swapChainFormat,
    });
@ts-ignore是typescript用來忽略錯(cuò)誤的。因?yàn)閏ontext的類型是RenderingContext,它沒有定義configureSwapChain函數(shù),如果編譯該行typescript會(huì)報(bào)錯(cuò),所以需要忽略錯(cuò)誤。
第5行配置了swap chain。vulkan tutorial對(duì)此進(jìn)行了說明:
swap chain是一個(gè)緩沖結(jié)構(gòu),webgpu會(huì)先將內(nèi)容渲染到swap chain的buffer中,然后再將其顯示到屏幕上;
swap chain本質(zhì)上是等待呈現(xiàn)在屏幕上的一個(gè)圖片隊(duì)列。
接下來就是創(chuàng)建render pipeline
    const pipeline = device.createRenderPipeline({
      layout: device.createPipelineLayout({ bindGroupLayouts: [] }),

      vertexStage: {
        module: device.createShaderModule({
          code: glslang.compileGLSL(vertexShaderGLSL, "vertex"),

          // @ts-ignore
          source: vertexShaderGLSL,
          transform: source => glslang.compileGLSL(source, "vertex"),
        }),
        entryPoint: "main"
      },
      fragmentStage: {
        module: device.createShaderModule({
          code: glslang.compileGLSL(fragmentShaderGLSL, "fragment"),

          // @ts-ignore
          source: fragmentShaderGLSL,
          transform: source => glslang.compileGLSL(source, "fragment"),
        }),
        entryPoint: "main"
      },

      primitiveTopology: "triangle-list",

      colorStates: [{
        format: swapChainFormat,
      }],
    });
了解pipeline
WebGPU有兩種pipeline:render pipeline和compute pipeline,這里只用了render pipeline
這里使用render pipeline descriptor來創(chuàng)建render pipeline,它的定義如下:
dictionary GPUPipelineDescriptorBase : GPUObjectDescriptorBase {
    required GPUPipelineLayout layout;
};

...

dictionary GPURenderPipelineDescriptor : GPUPipelineDescriptorBase {
    required GPUProgrammableStageDescriptor vertexStage;
    GPUProgrammableStageDescriptor fragmentStage;

    required GPUPrimitiveTopology primitiveTopology;
    GPURasterizationStateDescriptor rasterizationState = {};
    required sequence<GPUColorStateDescriptor> colorStates;
    GPUDepthStencilStateDescriptor depthStencilState;
    GPUVertexStateDescriptor vertexState = {};

    unsigned long sampleCount = 1;
    unsigned long sampleMask = 0xFFFFFFFF;
    boolean alphaToCoverageEnabled = false;
    // TODO: other properties
};
render pipeline可以設(shè)置綁定的資源布局、編譯的shader、fixed functions(如混合、深度、模版、cullMode等各種狀態(tài)和頂點(diǎn)數(shù)據(jù)的格式vertexState),相對(duì)于WebGL(WebGL的一個(gè)API只能設(shè)置一個(gè),如使用gl.cullFace設(shè)置cull mode),提升了性能(靜態(tài)設(shè)置了各種狀態(tài),不需要在運(yùn)行時(shí)設(shè)置),便于管理(把各個(gè)狀態(tài)集中到了一起設(shè)置)。
分析render pipeline descriptor
vertexStage和fragmentStage分別設(shè)置vertex shader和fragment shader:
使用第三方庫(kù),將glsl編譯為字節(jié)碼(格式為SPIR-V);
source和transform字段是多余的,可以刪除。
因?yàn)閟hader沒有綁定資源(如uniform buffer, texture等),所以第2行的bindGroupLayouts為空數(shù)組,不需要bind group和bind group layout
第25行的primitiveTopology指定片元的拓?fù)浣Y(jié)構(gòu),此處為三角形。
它可以為以下值:
enum GPUPrimitiveTopology {
    "point-list",
    "line-list",
    "line-strip",
    "triangle-list",
    "triangle-strip"
};
現(xiàn)在先忽略colorStates
我們繼續(xù)分析后面的代碼,接下來定義了frame函數(shù)
frame函數(shù)定義了每幀執(zhí)行的邏輯:
    function frame() {
      const commandEncoder = device.createCommandEncoder({});
      const textureView = swapChain.getCurrentTexture().createView();

      const renderPassDescriptor: GPURenderPassDescriptor = {
        colorAttachments: [{
          attachment: textureView,
          loadValue: { r: 0.0, g: 0.0, b: 0.0, a: 1.0 },
        }],
      };

      const passEncoder = commandEncoder.beginRenderPass(renderPassDescriptor);
      passEncoder.setPipeline(pipeline);
      passEncoder.draw(3, 1, 0, 0);
      passEncoder.endPass();

      device.defaultQueue.submit([commandEncoder.finish()]);
    }

    return frame;
學(xué)習(xí)command buffer
我們不能直接操作command buffer,需要?jiǎng)?chuàng)建command encoder,使用它將多個(gè)commands(如render pass的draw)設(shè)置到一個(gè)command buffer中,然后執(zhí)行submit,把command buffer提交到gpu driver的隊(duì)列中。
根據(jù) webgpu設(shè)計(jì)文檔->Command Submission:
Command buffers carry sequences of user commands on the CPU side. They can be recorded independently of the work done on GPU, or each other. They go through the following stages:
creation -> "recording" -> "ready" -> "executing" -> done
我們知道,command buffer有
creation, recording,ready,executing,done五種狀態(tài)。
根據(jù)該文檔,結(jié)合代碼來分析command buffer的操作流程:
第2行創(chuàng)建command encoder時(shí),應(yīng)該是創(chuàng)建了command buffer,它的狀態(tài)為creation;
第12行開始render pass(webgpu還支持compute pass,不過這里沒用到),command buffer的狀態(tài)變?yōu)閞ecording;
13-14行將“設(shè)置pipeline”、“繪制”的commands設(shè)置到command buffer中;
第15行結(jié)束render pass,(可以設(shè)置下一個(gè)pass,如compute pass,不過這里只用了一個(gè)pass);
第17行“commandEncoder.finish()”將command buffer的狀態(tài)變?yōu)閞eady;
然后執(zhí)行subimit,command buffer狀態(tài)變?yōu)閑xecuting,被提交到gpu driver的隊(duì)列中,不能再在cpu端被操作;
如果提交成功,gpu會(huì)決定在某個(gè)時(shí)間處理它。
分析render pass
第5行的renderPassDescriptor描述了render pass,它的定義為:
dictionary GPURenderPassDescriptor : GPUObjectDescriptorBase {
    required sequence<GPURenderPassColorAttachmentDescriptor> colorAttachments;
    GPURenderPassDepthStencilAttachmentDescriptor depthStencilAttachment;
};
這里只用到了colorAttachments。它類似于WebGL->framebuffer的colorAttachments。這里只用到了一個(gè)color buffer attachment。
我們來看下colorAttachment的定義:
dictionary GPURenderPassColorAttachmentDescriptor {
    required GPUTextureView attachment;
    GPUTextureView resolveTarget;

    required (GPULoadOp or GPUColor) loadValue;
    GPUStoreOp storeOp = "store";
};
這里設(shè)置attachment,將其與swap chain關(guān)聯(lián):
attachment: textureView,
我們現(xiàn)在忽略resolveTarget。
loadValue和storeOp決定渲染前和渲染后怎樣處理attachment中的數(shù)據(jù)。
我們看下它的類型:
enum GPULoadOp {
    "load"
};
enum GPUStoreOp {
    "store",
    "clear"
};

...
dictionary GPUColorDict {
    required double r;
    required double g;
    required double b;
    required double a;
};
typedef (sequence<double> or GPUColorDict) GPUColor;
loadValue如果為GPULoadOp類型,則只有一個(gè)值:“l(fā)oad”,它的意思是渲染前保留attachment中的數(shù)據(jù);
如果為GPUColor類型(如這里的{ r: 0.0, g: 0.0, b: 0.0, a: 1.0 }),則不僅為"load",而且設(shè)置了渲染前的初始值,類似于WebGL的clearColor。
storeOp如果為“store”,意思是渲染后保存被渲染的內(nèi)容到內(nèi)存中,后面可以被讀取;
如果為“clear”,意思是渲染后清空內(nèi)容。
現(xiàn)在我們回頭看下render pipeline中的colorStates:
      colorStates: [{
        format: swapChainFormat,
      }],
colorStates與colorAttachments對(duì)應(yīng),也只有一個(gè),它的format應(yīng)該與swap chain的format相同
我們繼續(xù)看render pass代碼:
      const passEncoder = commandEncoder.beginRenderPass(renderPassDescriptor);
      passEncoder.setPipeline(pipeline);
      passEncoder.draw(3, 1, 0, 0);
      passEncoder.endPass();
draw的定義為:
void draw(unsigned long vertexCount, unsigned long instanceCount,
              unsigned long firstVertex, unsigned long firstInstance);
三角形有3個(gè)頂點(diǎn),這里只繪制1個(gè)實(shí)例,兩者都從0開始(所以vertex shader中的gl_VertexIndex依次為0、1、2),所以第3行為“draw(3, 1, 0, 0)”
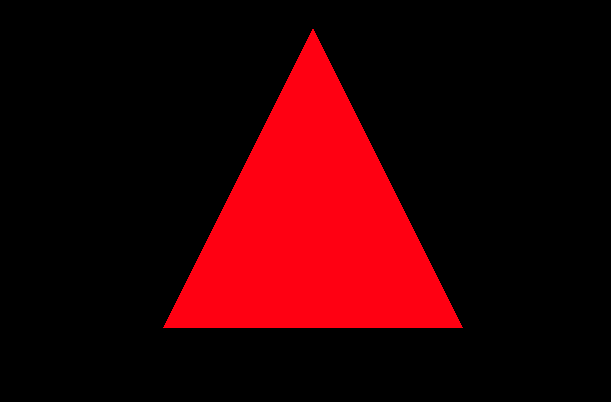
最終渲染結(jié)果
參考資料
webgpu-samplers Github Repo
vulkan tutorial
webgpu設(shè)計(jì)文檔->Command Submission
WebGPU-4
感謝您的閱讀~
掃碼加入我的QQ群:

掃碼加入免費(fèi)知識(shí)星球-YYC的Web3D旅程:


 浙公網(wǎng)安備 33010602011771號(hào)