一文帶你讀懂Arthas實現原理
一. 前言
Arthas 相信大家已經不陌生了,肯定用過太多次了,平時說到 Arthas 的時候都知道是基于Java Agent的,那么他具體是怎么實現呢,今天就一起來看看。
首先 Arthas 是在 GitHub 開源的,我們可以直接去 GitHub 上獲取源碼:Arthas。
本文基于 Arthas 3.6.7 版本源碼進行分析,具體源碼注釋可參考:bigcoder84/arthas
二. arthas源碼調試
在閱讀源碼的時候少不了需要對源碼進行DEBUG,Arthas Debug 需要借助 IDEA 的遠程Debug功能,具體可參考:
Debug Arthas In IDEA · Issue #222 · alibaba/arthas (github.com)
第一步:編寫測試類
public class Main {

    public static void main(String[] args) throws InterruptedException {
        int i = 0;
        while (true) {
            Thread.sleep(2000);
            print(i++);
        }
    }

    public static void print(Integer content) {
        System.out.println("Main print: " + content);
    }
}
第二步:編譯
javac Main.java
第三步:啟動測試類,并開啟遠程debug
java -Xdebug -Xrunjdwp:transport=dt_socket,server=y,address=8000 Main
-Xdebug是通知JVM工作在DEBUG模式下,
-Xrunjdwp是通知JVM使用(java debug wire protocol)來運行調試環境。該參數同時了一系列的調試選項:
- transport指定了調試數據的傳送方式,dt_socket是指用SOCKET模式,另有dt_shmem指用共享內存方式,其中,dt_shmem只適用于Windows平臺。
- server參數是指是否支持在server模式的VM中.
- onthrow指明,當產生該類型的Exception時,JVM就會中斷下來,進行調式。該參數可選。
- launch指明,當JVM被中斷下來時,執行的可執行程序。該參數可選
- suspend指明,是否在調試客戶端建立起來后,再執行JVM。
- onuncaught(=y或n)指明出現uncaught exception 后,是否中斷JVM的執行.
第四步:IDEA開啟遠程DEBUG,連接Main進程

等待IDEA遠程連接到測試進程后,測試代碼則開始正常運行:

第五步:啟動 Arthas attach到目標進程上
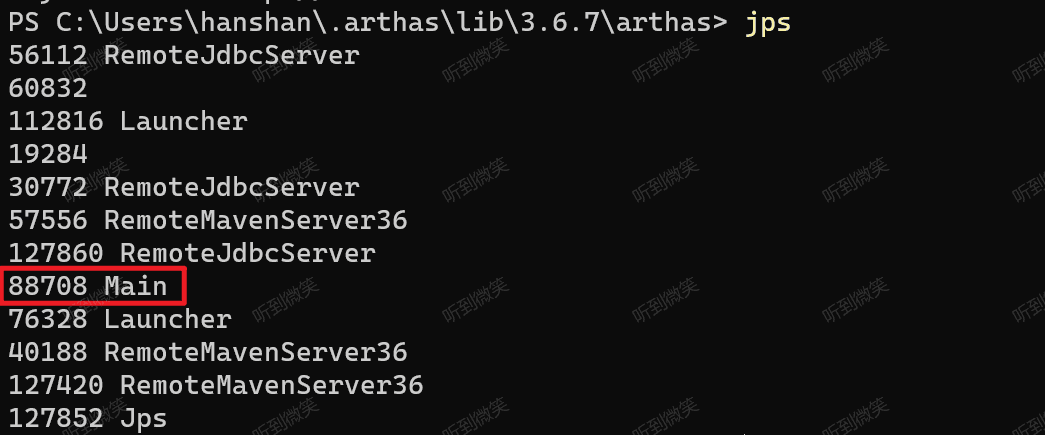
先使用 jps -l 查看測試進程的PID:
再啟動 as.sh 啟動 Arthas:
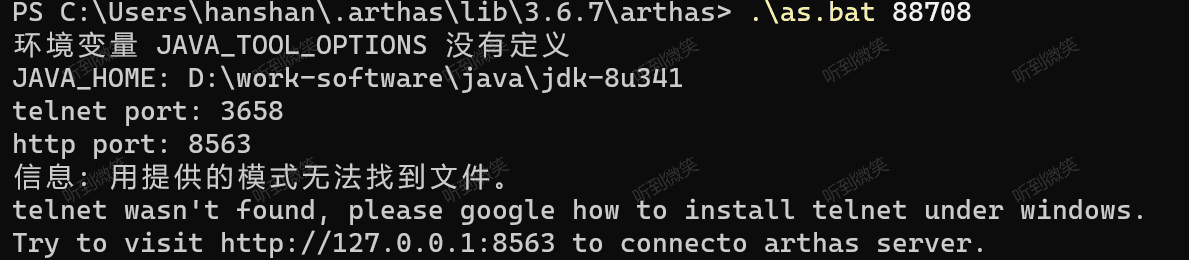
因為我是windows所以啟動的是 as.bat 文件,這個文件在源碼的bin目錄下,但是不建議啟動這里的腳本文件,因為這里只是源碼,缺少依賴的jar包。
我們可以執行下列命令,下載一個官方的Arthas版本:
curl -O https://arthas.aliyun.com/arthas-boot.jar
java -jar arthas-boot.jar
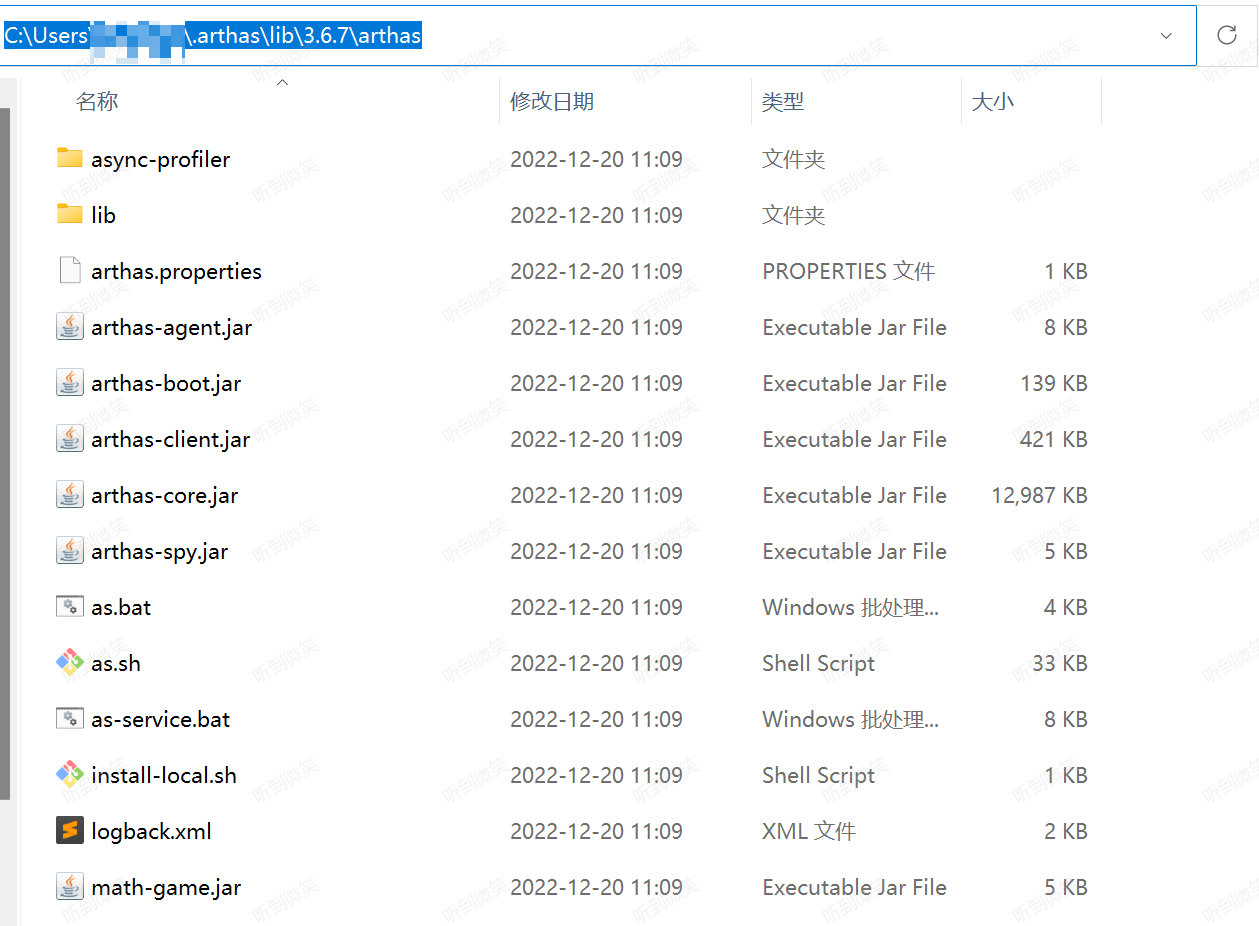
attach到任意進程上去,就會自動下載最新版本的腳本文件,最終文件會下載到 ${home}/.arthas/lib 下。
我們執行這個目錄下的 as.bat 即可:
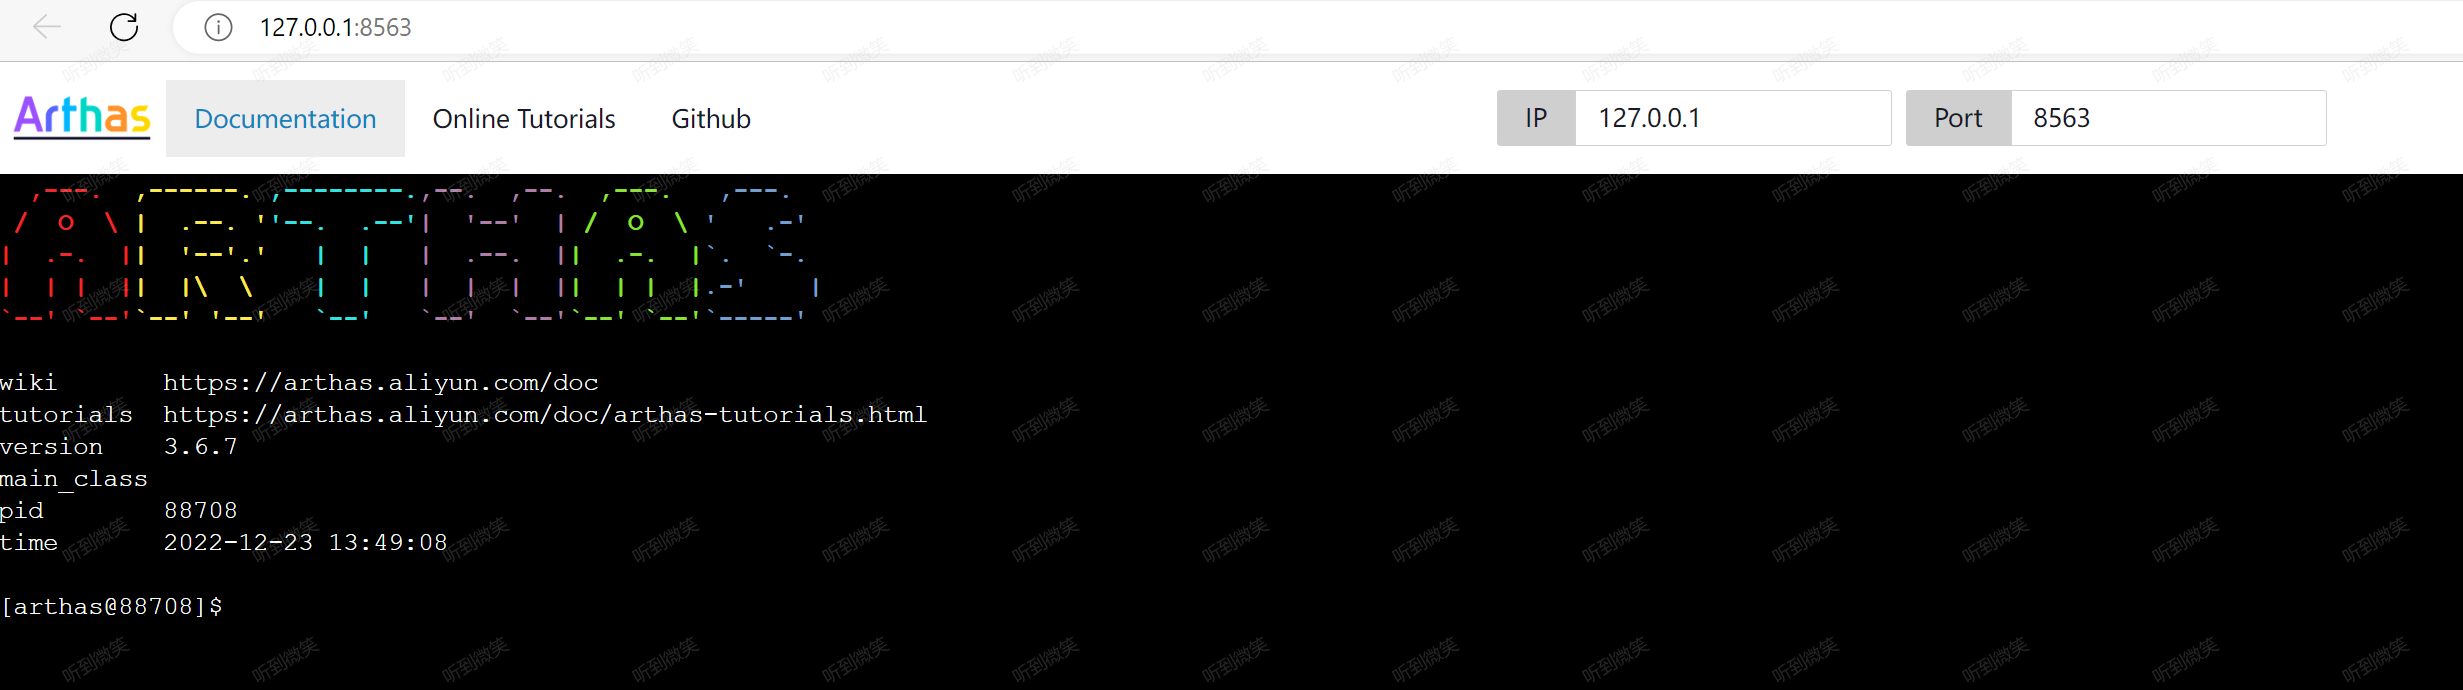
運行起來會,Arthas會自動打開瀏覽器,連接目標進程啟動的 Web Console:
此時,我們打好斷點,在控制臺上輸入命令,即可進入對應的斷點。
參考至:Debug Arthas In IDEA · Issue #222 · alibaba/arthas (github.com)
三. arthas-boot啟動源碼分析
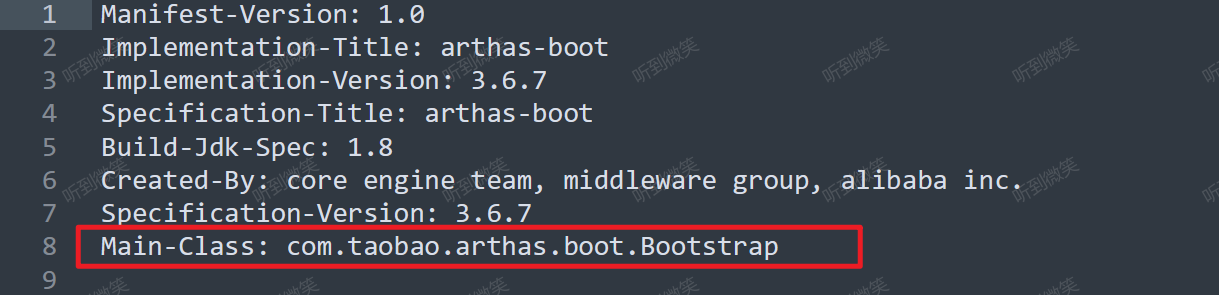
啟動 Arthas 有一種方式是直接 java -jar arthas-boot.jar 這種方式來啟動 arthas-boot.jar 這個jar包,我們有兩種方式可以找到這個jar包的核心啟動類:第一種是直接打開jar包然后找到META-INF/MANIFEST.MF文件,里面有一行是: Main-Class: com.taobao.arthas.boot.Bootstrap 這里就是可以說明這個jar包的啟動主類就是Bootstrap類,如下圖所示:
第二種方式是進入 arthas-boot 的pom文件里可以找到:
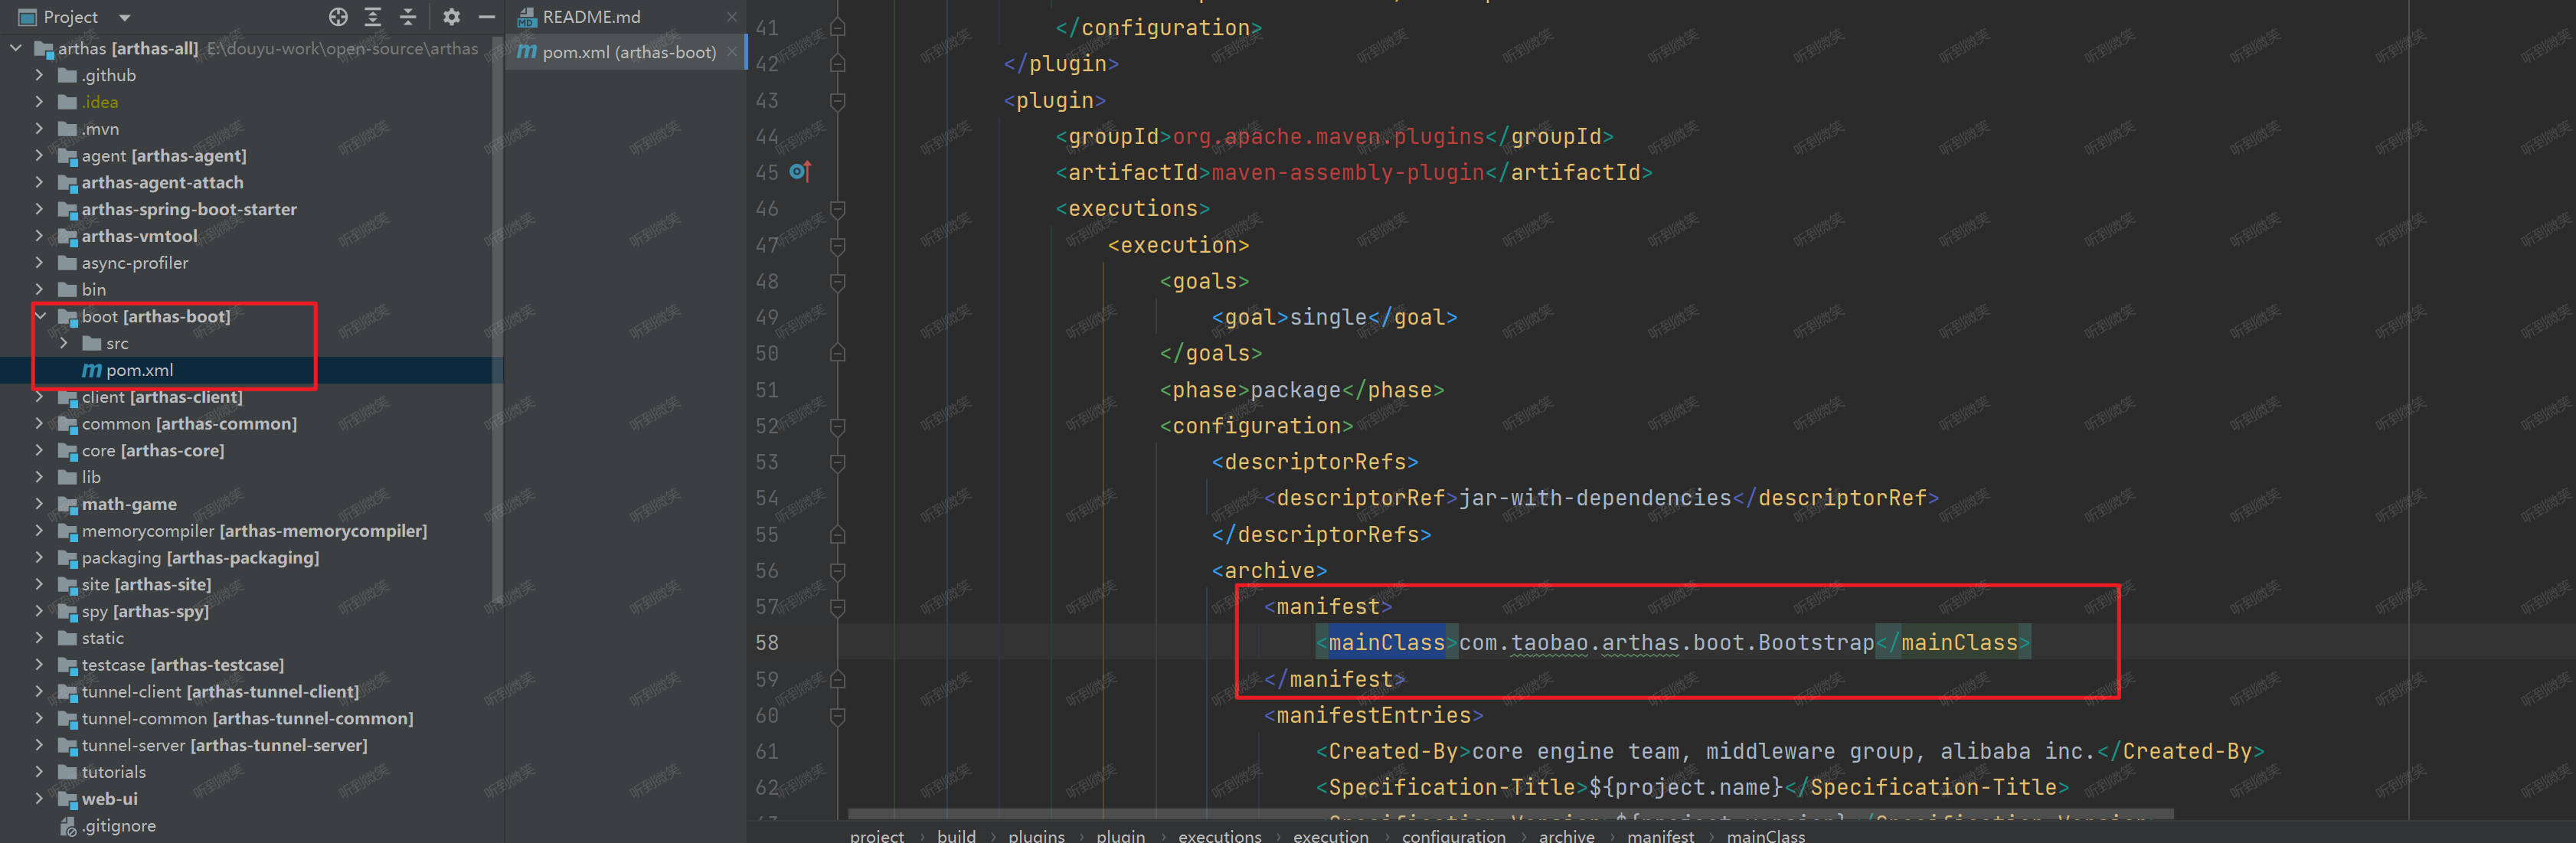
maven-assembly-plugin maven插件主要是用來構建一個可執行的jar包,其中mainClass屬性用于指定java -jar啟動時所執行的類的全限定名稱,該參數會在打包時寫入 META-INF/MANIFEST.MF 文件中。
Bootstrap#main
這樣也可以說明這個jar包的啟動類是Bootstrap。那我們直接找到Bootstrap.java:
 Bootstrap bootstrap = new Bootstrap();

 CLI cli = CLIConfigurator.define(Bootstrap.class);
 CommandLine commandLine = cli.parse(Arrays.asList(args));

 try {
     CLIConfigurator.inject(commandLine, bootstrap);
 } catch (Throwable e) {
     e.printStackTrace();
     System.out.println(usage(cli));
     System.exit(1);
 }
首先 Arthas 的命令行解析是用的阿里巴巴的CLI框架,這里就是new了一個Bootstrap類,然后利用cli框架把啟動的時候的參數注入到Bootstrap類的屬性里面,Bootstrap類有這些屬性:
private String targetIp;
private Integer telnetPort;
private Integer httpPort;
...
比如啟動的時候指定端口:--telnet-port 9999 --http-port 那么參數就可以綁定到這些屬性上面來,具體綁定到方法是用的:
    /**
     * 通過索引下標注入屬性,index = 0代表第一個參數默認代表pid
     * 例如 java -jar arthas-booot.jar 28839 ,代表增強 28839 進程
     * @param pid
     */
    @Argument(argName = "pid", index = 0, required = false)
    @Description("Target pid")
    public void setPid(long pid) {
        this.pid = pid;
    }

    /**
     * 通過參數名稱注入屬性
     * 例如:java -jar arthas-booot.jar -h
     * @param help
     */
    @Option(shortName = "h", longName = "help", flag = true)
    @Description("Print usage")
    public void setHelp(boolean help) {
        this.help = help;
    }

    @Option(longName = "target-ip")
    @Description("The target jvm listen ip, default 127.0.0.1")
    public void setTargetIp(String targetIp) {
        this.targetIp = targetIp;
    }

    @Option(longName = "telnet-port")
    @Description("The target jvm listen telnet port, default 3658")
    public void setTelnetPort(int telnetPort) {
        this.telnetPort = telnetPort;
    }

    @Option(longName = "http-port")
    @Description("The target jvm listen http port, default 8563")
    public void setHttpPort(int httpPort) {
        this.httpPort = httpPort;
    }
是在這些屬性的 set 方法上面加上 Option 注解,設置參數名字,然后在inject方法里面的時候就根據參數名字和set方法的對應關系來調用類的set方法就可以把配置的值設置到屬性里了。
這里我們可以看到在啟動的時候就可以手動指定我們要監聽的java進程PID了,如果啟動的時候沒有指定進程PID,那么 Arthas 就會把本機所有的java進程PID都打印出來,讓你選擇需要監聽哪個進程:
// 獲取參數中的pid
long pid = bootstrap.getPid();
// select pid
if (pid < 0) {
    // 如果啟動時未通過參數指定Java進程PID,則獲取本機所有Java進程列表,讓用戶選擇
    try {
        pid = ProcessUtils.select(bootstrap.isVerbose(), telnetPortPid, bootstrap.getSelect());
    } catch (InputMismatchException e) {
        System.out.println("Please input an integer to select pid.");
        System.exit(1);
    }
    if (pid < 0) {
        System.out.println("Please select an available pid.");
        System.exit(1);
    }
}
- 如果啟動的時候沒有設置那么pid就是-1,這個時候就是調用
ProcessUtils.select方法去找可用的java進程。
ProcessUtils#select
    public static long select(boolean v, long telnetPortPid, String select) throws InputMismatchException {
        // 獲取本機所有的Java進程信息,PID->進程的主類名
        Map<Long, String> processMap = listProcessByJps(v);

        //........

        // 打印所有的Java進程信息
        int count = 1;
        for (String process : processMap.values()) {
            if (count == 1) {
                System.out.println("* [" + count + "]: " + process);
            } else {
                System.out.println("  [" + count + "]: " + process);
            }
            count++;
        }

        // 監聽用戶輸入,選擇的進程
        String line = new Scanner(System.in).nextLine();
        if (line.trim().isEmpty()) {
            // get the first process id
            return processMap.keySet().iterator().next();
        }

        int choice = new Scanner(line).nextInt();

        if (choice <= 0 || choice > processMap.size()) {
            return -1;
        }

        Iterator<Long> idIter = processMap.keySet().iterator();
        for (int i = 1; i <= choice; ++i) {
            if (i == choice) {
                return idIter.next();
            }
            idIter.next();
        }

        return -1;
    }
- 第一步:通過
listProcessByJps獲取本機所有Java進程信息。 - 第二步:將獲取到的進程信息輸出到控制臺
- 第三步:監聽控制臺輸入,獲取到用戶選擇的進程PID

ProcessUtils#listProcessByJps
其中 listProcessByJps 方法把所有可用的java進程用找出來,封裝成Map<Long, String> processMap map對象
    private static Map<Long, String> listProcessByJps(boolean v) {
        Map<Long, String> result = new LinkedHashMap<Long, String>();

        String jps = "jps";
        // 獲取本機jps命令可執行文件
        File jpsFile = findJps();
        if (jpsFile != null) {
            jps = jpsFile.getAbsolutePath();
        }

        AnsiLog.debug("Try use jps to lis java process, jps: " + jps);

        String[] command = null;
        if (v) {
            command = new String[] { jps, "-v", "-l" };
        } else {
            command = new String[] { jps, "-l" };
        }

        // 執行 jps -l 獲取所有運行中的Java進程信息
        List<String> lines = ExecutingCommand.runNative(command);

        AnsiLog.debug("jps result: " + lines);

        long currentPid = Long.parseLong(PidUtils.currentPid());
        for (String line : lines) {
            String[] strings = line.trim().split("\\s+");
            if (strings.length < 1) {
                continue;
            }
            try {
                long pid = Long.parseLong(strings[0]);
                if (pid == currentPid) {
                    // 過濾掉正在運行的 Arthas PID
                    continue;
                }
                if (strings.length >= 2 && isJpsProcess(strings[1])) { // skip jps
                    continue;
                }

                result.put(pid, line);
            } catch (Throwable e) {
                // https://github.com/alibaba/arthas/issues/970
                // ignore
            }
        }

        return result;
    }
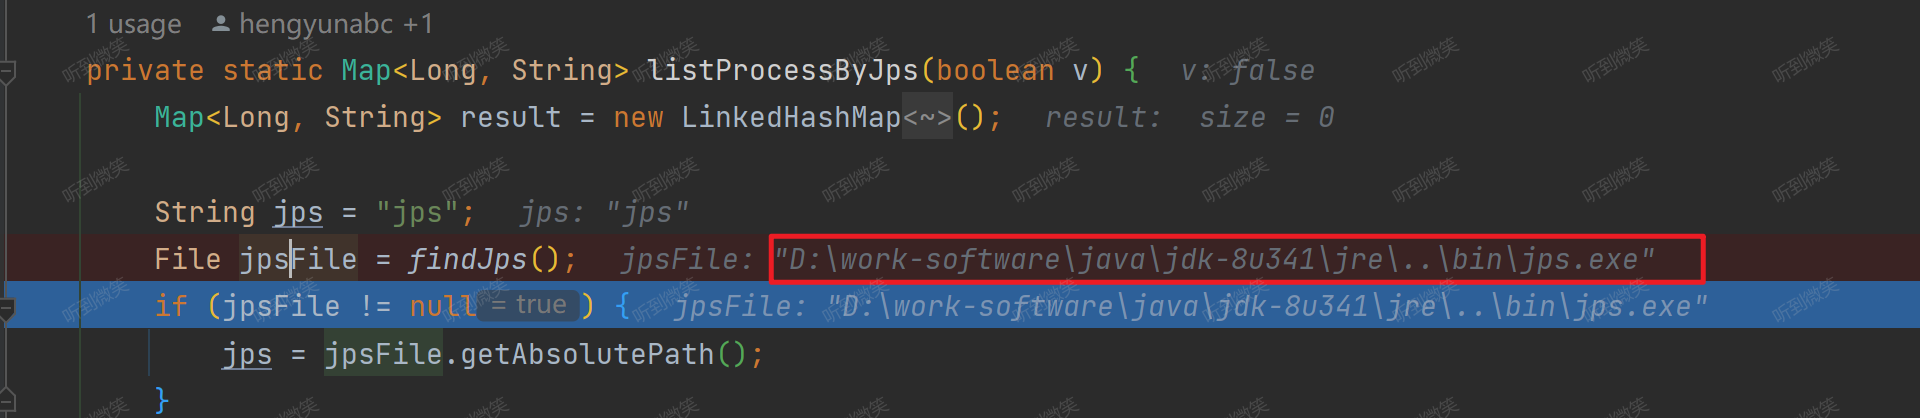
finJps方法,利用系統里配置的 Java 環境變量找到 JDK 目錄下的 bin 目錄里的 jps 文件。- 然后利用 java 的 jps 命令來找到java進程,jps是用于查看有權訪問的hotspot虛擬機的進程。當未指定hostid時,默認查看本機jvm進程,否者查看指定的hostid機器上的jvm進程,此時hostid所指機器必須開啟jstatd服務。jps可以列出jvm進程lvmid、主類類名、main函數參數、jvm參數、jar名稱等信息。然后會執行
jps -l命令來打印本機的java進程信息:
此時 Arthas 就可以拿到需要監聽的 Java 進程的 PID 了,總結一下其實就是用 jps 命令來獲取所有Java 進程然后過濾掉 Arthas 進程讓用戶選擇的,所以我們啟用 Arthas 的用戶一定要有 jps 這個的執行權限才可以。
然后下面的流程就是根據當前 arthas-boot.jar 的路徑找到其他 arthas 核心組件還有一些依賴的驅動,如果是在官網下載的發行版本的話那么就是在 arthas-bin 下就是最完整的,此時的arthas-bin就是arthas.home目錄了,需要的全部驅動和組件都在這里,如果沒有的話或者說版本對應不上的話就會去阿里云上下載最新版本的:
if (needDownload) {
    // try to download arthas from remote server.
    DownloadUtils.downArthasPackaging(bootstrap.getRepoMirror(), bootstrap.isuseHttp(),
                    remoteLastestVersion, ARTHAS_LIB_DIR.getAbsolutePath());
    localLastestVersion = remoteLastestVersion;
}
然后就是啟動 arthas-core.jar:
...
attachArgs.add("-core");
attachArgs.add(new File(arthasHomeDir, "arthas-core.jar").getAbsolutePath());
attachArgs.add("-agent");
attachArgs.add(new File(arthasHomeDir, "arthas-agent.jar").getAbsolutePath());
...
attachArgs參數就是拼接啟動命令的,然后調用ProcessUtils.startArthasCore
方法把參數傳進去,先獲得本機jdk的絕對路徑然后啟動core,詳細代碼就不贅述了,最后傳入的命令是:
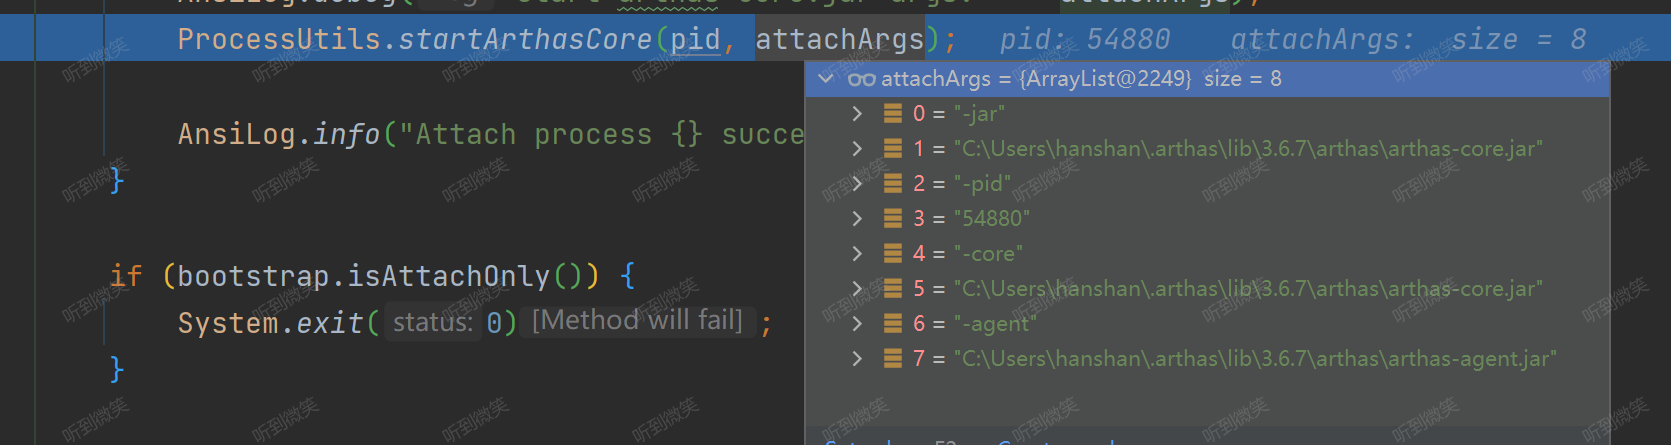
簡單來說就是java -jar arthas-core.jar -pid 54880 -core arthas-core.jar -agent arthas-agent.jar
這里 arthas-boot.jar 的職責就完了,他的職責就是指定 PID 然后啟動 arthas-core。
四. arthas-core啟動源碼分析
用上面同樣的方法,我們打開arthas-core/pom.xml文件,查看arthas-core.jar 啟動時運行的主類名:
<mainClass>com.taobao.arthas.core.Arthas</mainClass>
這個Arthas類的main方法:
public static void main(String[] args) {
    try {
        new Arthas(args);
    } catch (Throwable t) {
        AnsiLog.error("Start arthas failed, exception stack trace: ");
        t.printStackTrace();
        System.exit(-1);
    }
}
很簡單,就是調用了Arthas這個類的構造函數。在構造函數里:
private Arthas(String[] args) throws Exception {
    attachAgent(parse(args));
}
先去 parse 方法解析參數,然后調用 attachAgent 方法,我們先看看是怎么解析參數的:
Arthas#parse
    private Configure parse(String[] args) {
        Option pid = new TypedOption<Long>().setType(Long.class).setShortName("pid").setRequired(true);
        Option core = new TypedOption<String>().setType(String.class).setShortName("core").setRequired(true);
        Option agent = new TypedOption<String>().setType(String.class).setShortName("agent").setRequired(true);
        Option target = new TypedOption<String>().setType(String.class).setShortName("target-ip");
        Option telnetPort = new TypedOption<Integer>().setType(Integer.class)
                .setShortName("telnet-port");
        Option httpPort = new TypedOption<Integer>().setType(Integer.class)
                .setShortName("http-port");
        Option sessionTimeout = new TypedOption<Integer>().setType(Integer.class)
                        .setShortName("session-timeout");

        Option username = new TypedOption<String>().setType(String.class).setShortName("username");
        Option password = new TypedOption<String>().setType(String.class).setShortName("password");

        Option tunnelServer = new TypedOption<String>().setType(String.class).setShortName("tunnel-server");
        Option agentId = new TypedOption<String>().setType(String.class).setShortName("agent-id");
        Option appName = new TypedOption<String>().setType(String.class).setShortName(ArthasConstants.APP_NAME);

        Option statUrl = new TypedOption<String>().setType(String.class).setShortName("stat-url");
        Option disabledCommands = new TypedOption<String>().setType(String.class).setShortName("disabled-commands");

        CLI cli = CLIs.create("arthas").addOption(pid).addOption(core).addOption(agent).addOption(target)
                .addOption(telnetPort).addOption(httpPort).addOption(sessionTimeout)
                .addOption(username).addOption(password)
                .addOption(tunnelServer).addOption(agentId).addOption(appName).addOption(statUrl).addOption(disabledCommands);
        CommandLine commandLine = cli.parse(Arrays.asList(args));

        Configure configure = new Configure();
        configure.setJavaPid((Long) commandLine.getOptionValue("pid"));
        configure.setArthasAgent((String) commandLine.getOptionValue("agent"));
        configure.setArthasCore((String) commandLine.getOptionValue("core"));
        if (commandLine.getOptionValue("session-timeout") != null) {
            configure.setSessionTimeout((Integer) commandLine.getOptionValue("session-timeout"));
        }

        if (commandLine.getOptionValue("target-ip") != null) {
            configure.setIp((String) commandLine.getOptionValue("target-ip"));
        }

        if (commandLine.getOptionValue("telnet-port") != null) {
            configure.setTelnetPort((Integer) commandLine.getOptionValue("telnet-port"));
        }
        if (commandLine.getOptionValue("http-port") != null) {
            configure.setHttpPort((Integer) commandLine.getOptionValue("http-port"));
        }

        configure.setUsername((String) commandLine.getOptionValue("username"));
        configure.setPassword((String) commandLine.getOptionValue("password"));

        configure.setTunnelServer((String) commandLine.getOptionValue("tunnel-server"));
        configure.setAgentId((String) commandLine.getOptionValue("agent-id"));
        configure.setStatUrl((String) commandLine.getOptionValue("stat-url"));
        configure.setDisabledCommands((String) commandLine.getOptionValue("disabled-commands"));
        configure.setAppName((String) commandLine.getOptionValue(ArthasConstants.APP_NAME));
        return configure;
    }
記得到上文說的阿里巴巴自己的命令行解析工具CLI框架嗎,這里還是用了這個,把剛剛在Boot中啟動core的時候傳遞過來的參數封裝成了一個 Configure 對象,把剛剛的參數設置成了這個對象的屬性。然后傳入 attachAgent 方法里面,在 attachAgent 方法里做了什么呢?
Arthas#attachAgent
    private void attachAgent(Configure configure) throws Exception {
        // 第一步:獲取指定PID對應的 VirtualMachineDescriptor
        VirtualMachineDescriptor virtualMachineDescriptor = null;
        for (VirtualMachineDescriptor descriptor : VirtualMachine.list()) {
            String pid = descriptor.id();
            if (pid.equals(Long.toString(configure.getJavaPid()))) {
                virtualMachineDescriptor = descriptor;
                break;
            }
        }
        VirtualMachine virtualMachine = null;
        try {
            // 第二步:連接到Java虛擬機。
            if (null == virtualMachineDescriptor) { // 使用 attach(String pid) 這種方式
                virtualMachine = VirtualMachine.attach("" + configure.getJavaPid());
            } else {
                virtualMachine = VirtualMachine.attach(virtualMachineDescriptor);
            }

            // 獲取系統變量
            Properties targetSystemProperties = virtualMachine.getSystemProperties();
            // 校驗一下JDK版本
            String targetJavaVersion = JavaVersionUtils.javaVersionStr(targetSystemProperties);
            String currentJavaVersion = JavaVersionUtils.javaVersionStr();
            if (targetJavaVersion != null && currentJavaVersion != null) {
                if (!targetJavaVersion.equals(currentJavaVersion)) {
                    AnsiLog.warn("Current VM java version: {} do not match target VM java version: {}, attach may fail.",
                                    currentJavaVersion, targetJavaVersion);
                    AnsiLog.warn("Target VM JAVA_HOME is {}, arthas-boot JAVA_HOME is {}, try to set the same JAVA_HOME.",
                                    targetSystemProperties.getProperty("java.home"), System.getProperty("java.home"));
                }
            }

            // 該參數是通過,arthas-boot.jar 中啟動 arthas-agent.jar時 傳入的 -core參數,具體值是 arthas-agent.jar絕對路徑
            String arthasAgentPath = configure.getArthasAgent();
            //convert jar path to unicode string
            configure.setArthasAgent(encodeArg(arthasAgentPath));
            configure.setArthasCore(encodeArg(configure.getArthasCore()));
            try {
                // 第三步:加載 arthas-agent.jar,增強目標Java進程,實質上就是運行 com.taobao.arthas.agent334.AgentBootstrap.agentmain
                virtualMachine.loadAgent(arthasAgentPath,
                        configure.getArthasCore() + ";" + configure.toString());
            } catch (IOException e) {
                if (e.getMessage() != null && e.getMessage().contains("Non-numeric value found")) {
                    AnsiLog.warn(e);
                    AnsiLog.warn("It seems to use the lower version of JDK to attach the higher version of JDK.");
                    AnsiLog.warn(
                            "This error message can be ignored, the attach may have been successful, and it will still try to connect.");
                } else {
                    throw e;
                }
            } catch (com.sun.tools.attach.AgentLoadException ex) {
                if ("0".equals(ex.getMessage())) {
                    // https://stackoverflow.com/a/54454418
                    AnsiLog.warn(ex);
                    AnsiLog.warn("It seems to use the higher version of JDK to attach the lower version of JDK.");
                    AnsiLog.warn(
                            "This error message can be ignored, the attach may have been successful, and it will still try to connect.");
                } else {
                    throw ex;
                }
            }
        } finally {
            if (null != virtualMachine) {
                virtualMachine.detach();
            }
        }
    }
- 第一步:獲取指定PID對應的
VirtualMachineDescriptor,VirtualMachineDescriptor是連接Java虛擬機的描述對象,有了它就能通過VirtualMachine#attach方法連接到指定Java虛擬機進程。 - 第二步:通過
VirtualMachine#attach方法連接到指定Java虛擬機進程。 - 第三步:使用
arthas-agent.jar增強指定Java進程,這一步實際上就是執行的com.taobao.arthas.agent334.AgentBootstrap#agentmain方法。
五. arthas-agent啟動源碼分析
在上文中結尾中,我們一直說的java agent是啥?這里我們先來復習一下基礎知識。
Arthas的根本原理是什么?對,眾所周知是Java Agent,那么什么是Java Agent呢?
Java Agent 是一種能夠在不影響正常編譯的情況下,修改字節碼的技術。java作為一種強類型的語言,不通過編譯就不能能夠進行jar包的生成。有了 Java Agent 技術,就可以在字節碼這個層面對類和方法進行修改。也可以把 Java Agent 理解成一種字節碼注入的方式。
Java Agent支持目標JVM啟動時加載,也支持在目標JVM運行時加載,這兩種不同的加載模式會使用不同的入口函數,如果需要在目標JVM啟動的同時加載Agent:
[1] public static void premain(String agentArgs, Instrumentation inst); [2] public static void premain(String agentArgs); JVM將首先尋找[1],如果沒有發現[1],再尋找[2]。如果希望在目標JVM運行時加載Agent,則需要實現下面的方法:
[1] public static void agentmain(String agentArgs, Instrumentation inst); [2] public static void agentmain(String agentArgs); 這兩組方法的第一個參數AgentArgs是隨同 “–javaagent”一起傳入的程序參數,如果這個字符串代表了多個參數,就需要自己解析這些參數。inst是Instrumentation類型的對象,是JVM自動傳入的,我們可以拿這個參數進行類增強等操作。
有關Java Agent原理可以參考:JavaAgent詳解
在Java Agent規范中,需要在可執行的jar的 META-INF/MANIFEST.MF 文件中,通過Agent-Class、Premain-Class 指定 agent 啟動時需要運行的類:
Manifest-Version: 1.0
Implementation-Title: arthas-agent
Premain-Class: com.taobao.arthas.agent334.AgentBootstrap
Implementation-Version: 3.6.7
Agent-Class: com.taobao.arthas.agent334.AgentBootstrap
Can-Redefine-Classes: true
Specification-Title: arthas-agent
Can-Retransform-Classes: true
Build-Jdk-Spec: 1.8
Created-By: Maven Archiver 3.5.0
Specification-Version: 3.6.7
與arthas-boot 和 arthas-core類似的是,arthas-agent 也會借助 maven-assembly-plugin 插件構建一個可執行的jar,在插件中指定 Java Agent所需要的配置:
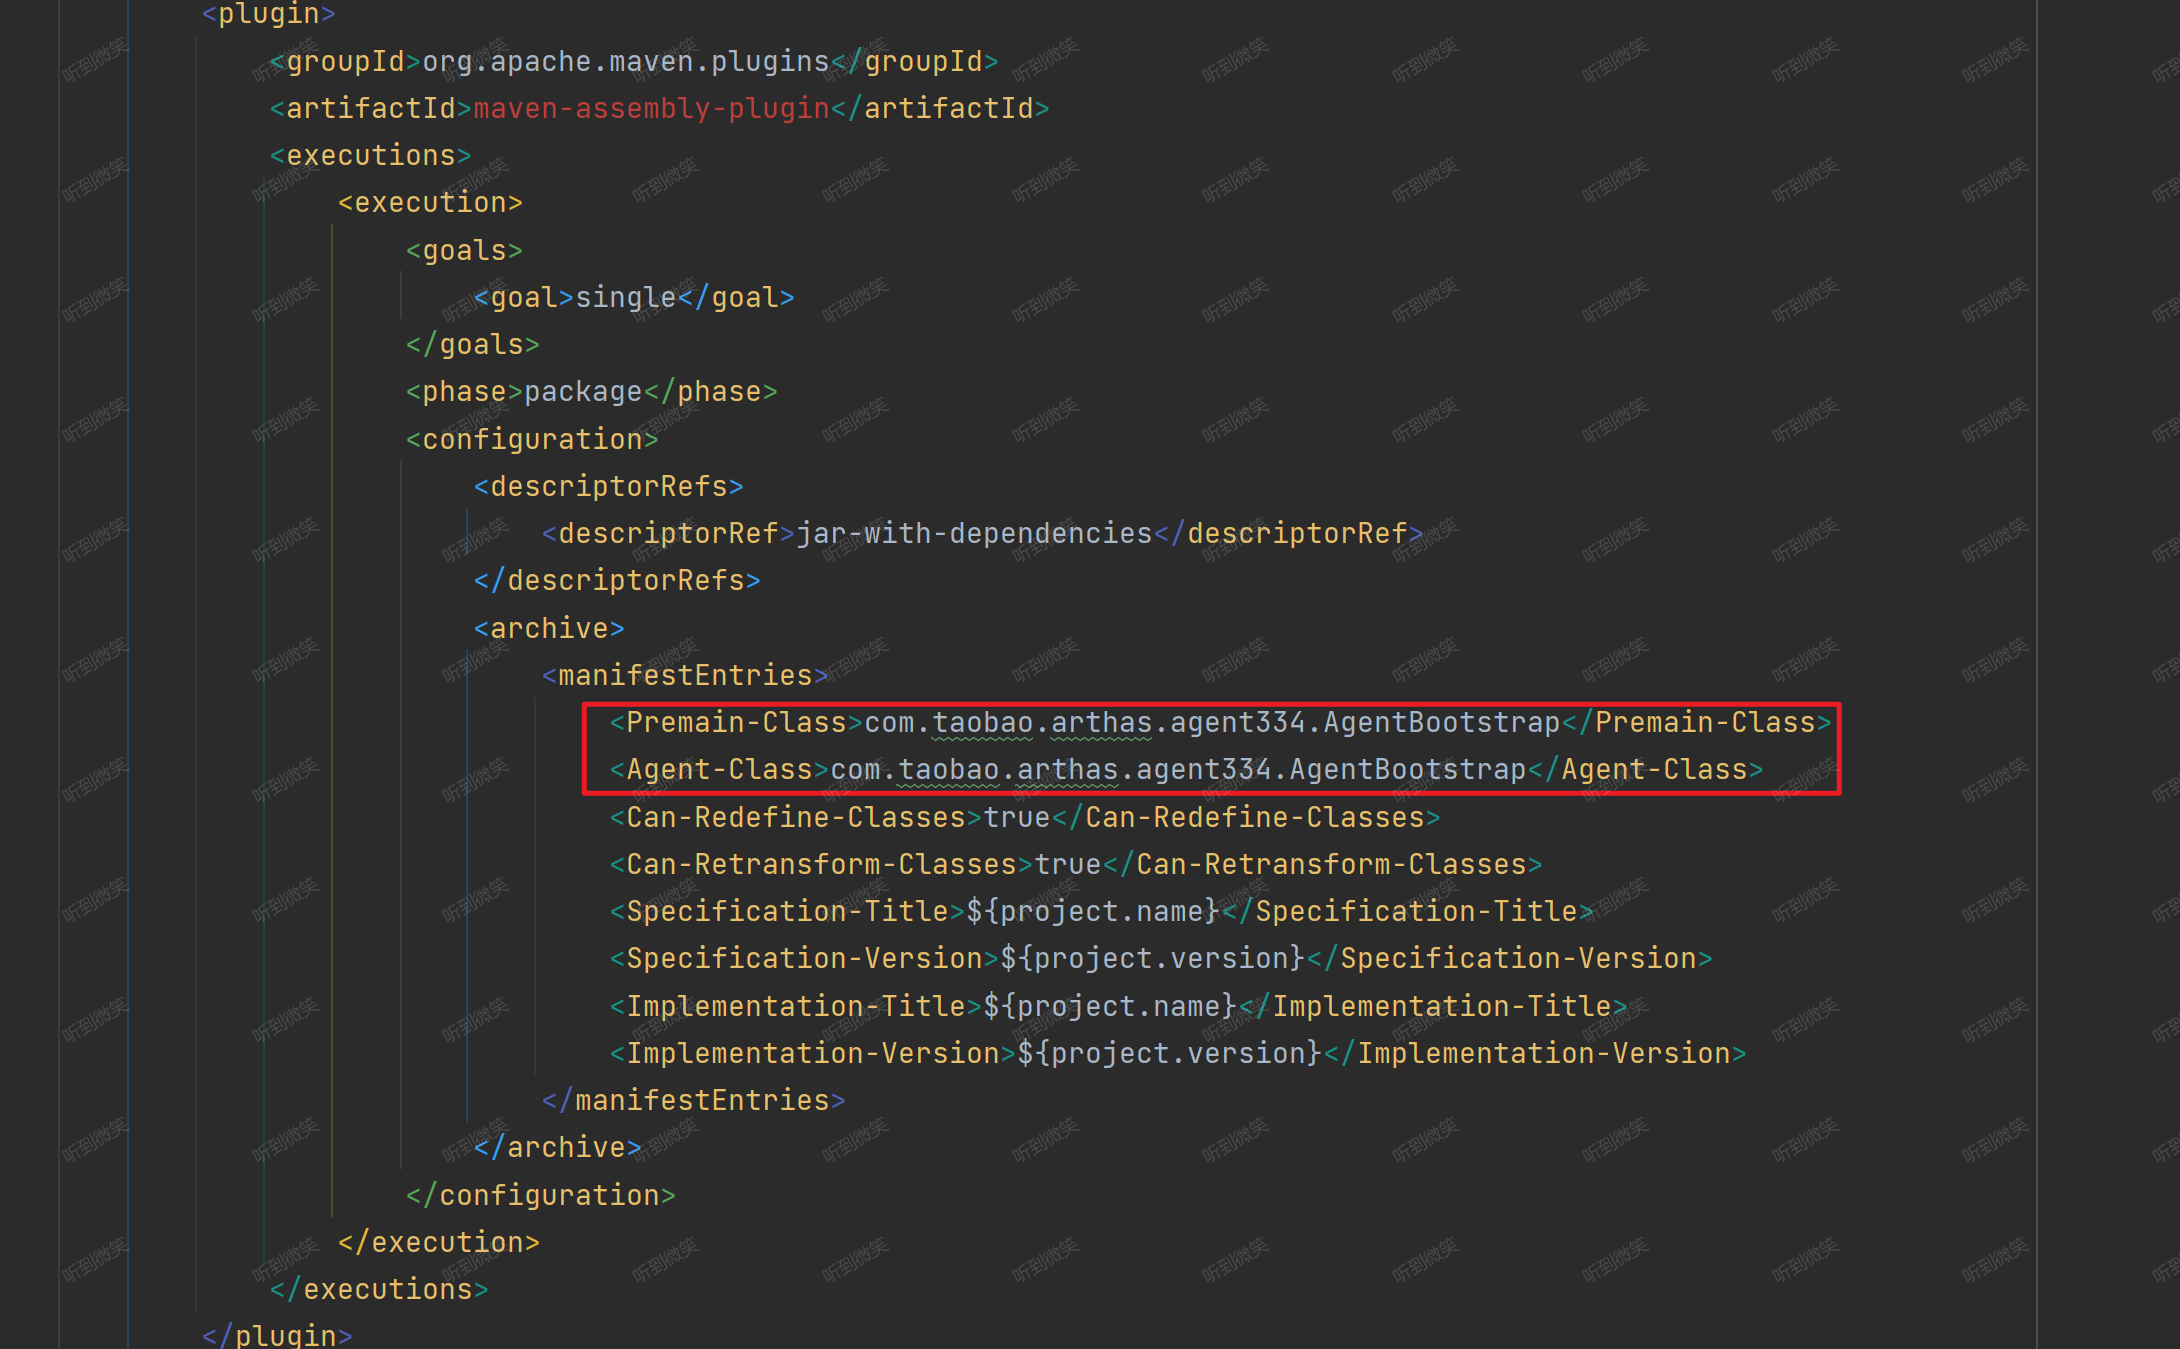
也就是說,我們在運行時動態加載agent的時候,會執行 AgentBootstrap#agentmain 方法:
public static void premain(String args, Instrumentation inst) {
    main(args, inst);
}

public static void agentmain(String args, Instrumentation inst) {
    main(args, inst);
}
這兩個方法都是調用 main 方法,其中args參數就是我們core組件的絕對路徑和啟動core組件的時候的參數:
virtualMachine.loadAgent(arthasAgentPath,configure.getArthasCore() + ";" + configure.toString());
參數內容可參考:
C:\Users\hanshan\.arthas\lib\3.6.7\arthas\\arthas-core.jar;;telnetPort=3658;httpPort=8563;ip=127.0.0.1;arthasAgent=C:\Users\hanshan\.arthas\lib\3.6.7\arthas\\arthas-agent.jar;arthasCore=C:\Users\hanshan\.arthas\lib\3.6.7\arthas\\arthas-core.jar;javaPid=17756;
Instrumentation 參數由 JVM 自動傳入,集中了幾乎所有功能方法,如:類操作、classpath 操作等。這個就是剛剛的JVM對象自己傳入進來的。然后我們繼續看main方法:
    private static synchronized void main(String args, final Instrumentation inst) {
        // 第一步:嘗試判斷arthas是否已在運行,如果是的話,直接就退出
        try {
            Class.forName("java.arthas.SpyAPI"); // 加載不到會拋異常
            if (SpyAPI.isInited()) {
                ps.println("Arthas server already stared, skip attach.");
                ps.flush();
                return;
            }
        } catch (Throwable e) {
            // ignore
        }
        try {
            ps.println("Arthas server agent start...");
            // 第二步:解析參數,參數分為兩個部分,分解開賦給不同的變量
            // 傳遞的args參數分兩個部分:arthasCoreJar路徑和agentArgs, 分別是Agent的JAR包路徑和期望傳遞到服務端的參數
            if (args == null) {
                args = "";
            }
            args = decodeArg(args);

            String arthasCoreJar;
            final String agentArgs;
            int index = args.indexOf(';');
            if (index != -1) {
                arthasCoreJar = args.substring(0, index);
                agentArgs = args.substring(index);
            } else {
                arthasCoreJar = "";
                agentArgs = args;
            }

            // 第三步:查找arthas-core.jar,如果在指定的路徑沒找到,就在當前路徑下找,如果還是沒找到則退出
            File arthasCoreJarFile = new File(arthasCoreJar);
            if (!arthasCoreJarFile.exists()) {
                ps.println("Can not find arthas-core jar file from args: " + arthasCoreJarFile);
                // try to find from arthas-agent.jar directory
                CodeSource codeSource = AgentBootstrap.class.getProtectionDomain().getCodeSource();
                if (codeSource != null) {
                    try {
                        File arthasAgentJarFile = new File(codeSource.getLocation().toURI().getSchemeSpecificPart());
                        arthasCoreJarFile = new File(arthasAgentJarFile.getParentFile(), ARTHAS_CORE_JAR);
                        if (!arthasCoreJarFile.exists()) {
                            ps.println("Can not find arthas-core jar file from agent jar directory: " + arthasAgentJarFile);
                        }
                    } catch (Throwable e) {
                        ps.println("Can not find arthas-core jar file from " + codeSource.getLocation());
                        e.printStackTrace(ps);
                    }
                }
            }
            if (!arthasCoreJarFile.exists()) {
                return;
            }

            /**
             * Use a dedicated thread to run the binding logic to prevent possible memory leak. #195
             */
            // 第四步:獲取自定義的類加載器,盡量減少Arthas對現有工程的侵蝕
            final ClassLoader agentLoader = getClassLoader(inst, arthasCoreJarFile);

            Thread bindingThread = new Thread() {
                @Override
                public void run() {
                    try {
                        // 第五步:調用bind方法啟動arthas服務端
                        bind(inst, agentLoader, agentArgs);
                    } catch (Throwable throwable) {
                        throwable.printStackTrace(ps);
                    }
                }
            };

            bindingThread.setName("arthas-binding-thread");
            bindingThread.start();
            bindingThread.join();
        } catch (Throwable t) {
            t.printStackTrace(ps);
            try {
                if (ps != System.err) {
                    ps.close();
                }
            } catch (Throwable tt) {
                // ignore
            }
            throw new RuntimeException(t);
        }
    }
- 第一步:嘗試判斷arthas是否已在運行,如果是的話,直接就退出。
- 第二步:解析參數,參數分為兩個部分,arthas-core.jar路徑和agentArgs, 分別是Agent的JAR包路徑和期望傳遞到服務端的參數,分解開賦給不同的變量。
- 第三步:查找指定的arthas-core.jar路徑是否存在該jar文件,如果在指定的路徑沒找到,就在當前路徑下找,如果還是沒找到則退出。
- 第四步:獲取自定義的類加載器,盡量減少Arthas對現有工程的侵蝕。
- 第五步:異步調用
bind方法,啟動 Arthas 服務端。
我們繼續看一下 AgentBootstrap#bind 方法:
private static void bind(Instrumentation inst, ClassLoader agentLoader, String args) throws Throwable {
    /**
     * <pre>
     * ArthasBootstrap bootstrap = ArthasBootstrap.getInstance(inst);
     * </pre>
     */
    // 第一步:通過反射,調用 com.taobao.arthas.core.server.ArthasBootstrap#getInstance(java.lang.instrument.Instrumentation, java.util.Map<java.lang.String,java.lang.String>) 獲取 ArthasBootstrap 實例
    Class<?> bootstrapClass = agentLoader.loadClass(ARTHAS_BOOTSTRAP);
    Object bootstrap = bootstrapClass.getMethod(GET_INSTANCE, Instrumentation.class, String.class).invoke(null, inst, args);

    // 第二步:調用isBind方法,判斷服務端是否已經啟動
    boolean isBind = (Boolean) bootstrapClass.getMethod(IS_BIND).invoke(bootstrap);
    if (!isBind) {
        String errorMsg = "Arthas server port binding failed! Please check $HOME/logs/arthas/arthas.log for more details.";
        ps.println(errorMsg);
        throw new RuntimeException(errorMsg);
    }
    ps.println("Arthas server already bind.");
}
-
第一步:用剛剛獲取的自定義類加載器來加載我們的
com.taobao.arthas.core.server.ArthasBootstrap
這個arthas最核心的類,然后用 Java 反射調用它的getInstance方法來獲取實例。 -
第二步:調用它的
isBlind方法判斷服務端是否已經啟動。ArthasBootstrap類是在arthas-core這個組件中的,所以也就解釋為了什么剛剛要傳入core組件的絕對路徑過來。
我們進入 ArthasBootstrap#getInstance 方法中:
    /**
     * 單例
     *
     * @param instrumentation JVM增強
     * @return ArthasServer單例
     * @throws Throwable
     */
    public synchronized static ArthasBootstrap getInstance(Instrumentation instrumentation, Map<String, String> args) throws Throwable {
        if (arthasBootstrap == null) {
            arthasBootstrap = new ArthasBootstrap(instrumentation, args);
        }
        return arthasBootstrap;
    }
- 它最終會調用構造方法初始化實例
    private ArthasBootstrap(Instrumentation instrumentation, Map<String, String> args) throws Throwable {
        this.instrumentation = instrumentation;

        initFastjson();

        // 1. initSpy()
        initSpy();
        // 2. ArthasEnvironment
        initArthasEnvironment(args);

        String outputPathStr = configure.getOutputPath();
        if (outputPathStr == null) {
            outputPathStr = ArthasConstants.ARTHAS_OUTPUT;
        }
        outputPath = new File(outputPathStr);
        outputPath.mkdirs();

        // 3. init logger
        loggerContext = LogUtil.initLogger(arthasEnvironment);

        // 4. 增強ClassLoader
        enhanceClassLoader();
        // 5. init beans
        initBeans();

        // 6. start agent server
        bind(configure);

        executorService = Executors.newScheduledThreadPool(1, new ThreadFactory() {
            @Override
            public Thread newThread(Runnable r) {
                final Thread t = new Thread(r, "arthas-command-execute");
                t.setDaemon(true);
                return t;
            }
        });

        shutdown = new Thread("as-shutdown-hooker") {

            @Override
            public void run() {
                ArthasBootstrap.this.destroy();
            }
        };

        transformerManager = new TransformerManager(instrumentation);
        Runtime.getRuntime().addShutdownHook(shutdown);
    }
我們可以看到整個初始化分為六個步驟,初始化fastjson,這個不重要。
-
初始化spy
-
初始化arthas環境
-
初始化日志
-
增強 ClassLoader
-
初始化bean
-
啟動agent server
第一步:初始化spy
    private void initSpy() throws Throwable {
        // TODO init SpyImpl ?

        // 將Spy添加到BootstrapClassLoader
        ClassLoader parent = ClassLoader.getSystemClassLoader().getParent();
        Class<?> spyClass = null;
        if (parent != null) {
            try {
                spyClass =parent.loadClass("java.arthas.SpyAPI");
            } catch (Throwable e) {
                // ignore
            }
        }
        if (spyClass == null) {
            CodeSource codeSource = ArthasBootstrap.class.getProtectionDomain().getCodeSource();
            if (codeSource != null) {
                File arthasCoreJarFile = new File(codeSource.getLocation().toURI().getSchemeSpecificPart());
                File spyJarFile = new File(arthasCoreJarFile.getParentFile(), ARTHAS_SPY_JAR);
                // 使用Bootstrap ClassLoader 加載 SpyAPI類
                instrumentation.appendToBootstrapClassLoaderSearch(new JarFile(spyJarFile));
            } else {
                throw new IllegalStateException("can not find " + ARTHAS_SPY_JAR);
            }
        }
    }
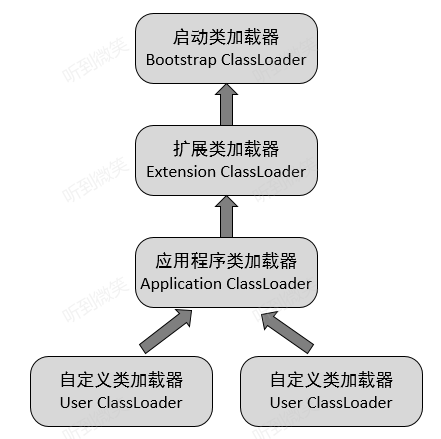
arthas-spy.jar 中代碼會通過 ASM 插入到業務代碼中,由于業務代碼中使用的部分類可能是 BootstrapClassLoader 加載器加載的,而 SpyAPI 正常來說是應該使用 Application ClassLoader 來加載,但是類加載器規范中規定父類加載器加載的類不能引用子類加載器加載的類。所以必須用根加載器加載 SpyAPI ,防止報 NoClassDefFoundError 錯誤。
由父類加載器加載的類,不能引用子類加載器加載的類,否則會拋出 NoClassDefFoundError。
怎么理解這句話呢?
JDK提供的
java.*類都由啟動類加載器加載。如果我們在java agent中修改java包下的類,插入調用logback打印日記的代碼,會怎樣?
由于java agent包下的logback由 Application ClassLoader(應用類加載器)加載,而加載java包下的類的啟動類加載器是 Application ClassLoader 的父類加載器。
在java包下的類中插入調用logback打印日記的代碼,首先在加載java包下的類時,jvm查看啟動類加載器有沒有加載過依賴的logback的類,如果沒有加載過嘗試加載。但啟動類加載器加載不了logback包的類,并且啟動類加載器不會向子類加載器去詢問。任何類加載器都不會向子類加載器詢問子類加載器是否能加載,即使子類加載器加載了這個類。所以就會出現NoClassDefFoundError。
2.initArthasEnvironment
    private void initArthasEnvironment(Map<String, String> argsMap) throws IOException {
        if (arthasEnvironment == null) {
            // 第一步:初始化Arthas環境
            arthasEnvironment = new ArthasEnvironment();
        }

        /**
         * <pre>
         * 腳本里傳過來的配置項,即命令行參數 > System Env > System Properties > arthas.properties
         * arthas.properties 提供一個配置項,可以反轉優先級。 arthas.config.overrideAll=true
         * https://github.com/alibaba/arthas/issues/986
         * </pre>
         */
        Map<String, Object> copyMap;
        if (argsMap != null) {
            copyMap = new HashMap<String, Object>(argsMap);
            // 添加 arthas.home
            if (!copyMap.containsKey(ARTHAS_HOME_PROPERTY)) {
                copyMap.put(ARTHAS_HOME_PROPERTY, arthasHome());
            }
        } else {
            copyMap = new HashMap<String, Object>(1);
            copyMap.put(ARTHAS_HOME_PROPERTY, arthasHome());
        }

        MapPropertySource mapPropertySource = new MapPropertySource("args", copyMap);
        arthasEnvironment.addFirst(mapPropertySource);

        tryToLoadArthasProperties();

        configure = new Configure();
        BinderUtils.inject(arthasEnvironment, configure);
    }
- 根據剛剛arthas-boot給arthas-core,然后arthas-core給arthas-agent,最后arthas-agent再給arthas-core的參數和一些環境變量什么的在初始化我們的configure對象。
3.初始化日志
這里就是用了loggerContext = LogUtil.initLogger(arthasEnvironment); 用剛剛的環境對象來初始化日志的上下文對象,這里用的是logback。
4.enhanceClassLoader
增強ClassLoader
這里代碼就不貼了,總之是因為要解決解決一些 ClassLoader 加載不到 SpyAPI的問題所以才要增強ClassLoader,這里有一個issue——github.com/alibaba/arthas/issues/1596
5.initBeans
初始化bean
這里就是給兩個成員屬性新建賦值:
    private void initBeans() {
        this.resultViewResolver = new ResultViewResolver();
        this.historyManager = new HistoryManagerImpl();
    }
6.啟動 agent server
這里就是我們最后的arthas的啟動代碼了。首先:
        long start = System.currentTimeMillis();
        // 第一步:CAS的去改變綁定狀態
        if (!isBindRef.compareAndSet(false, true)) {
            throw new IllegalStateException("already bind");
        }
        // init random port
		// 第二步:如果啟動的時候未指定Telnet端口和Http端口,則隨機獲取一個可用的端口給Telnet和Http使用。
        if (configure.getTelnetPort() != null && configure.getTelnetPort() == 0) {
            int newTelnetPort = SocketUtils.findAvailableTcpPort();
            configure.setTelnetPort(newTelnetPort);
            logger().info("generate random telnet port: " + newTelnetPort);
        }
        if (configure.getHttpPort() != null && configure.getHttpPort() == 0) {
            int newHttpPort = SocketUtils.findAvailableTcpPort();
            configure.setHttpPort(newHttpPort);
            logger().info("generate random http port: " + newHttpPort);
        }

        // try to find appName
        // 第四步:如果啟動時未指定 `app-name` 屬性,則獲取項目名稱或Spring應用名稱,注入Configuration
        if (configure.getAppName() == null) {
            configure.setAppName(System.getProperty(ArthasConstants.PROJECT_NAME,
                    System.getProperty(ArthasConstants.SPRING_APPLICATION_NAME, null)));
        }
            try {
            if (configure.getTunnelServer() != null) {
                tunnelClient = new TunnelClient();
                tunnelClient.setAppName(configure.getAppName());
                tunnelClient.setId(configure.getAgentId());
                tunnelClient.setTunnelServerUrl(configure.getTunnelServer());
                tunnelClient.setVersion(ArthasBanner.version());
                ChannelFuture channelFuture = tunnelClient.start();
                channelFuture.await(10, TimeUnit.SECONDS);
            }
        } catch (Throwable t) {
            logger().error("start tunnel client error", t);
        }
- 第一步:通過CAS去改變綁定狀態,如果CAS失敗那么就是已經綁定成功。
- 第二步:如果啟動的時候未指定Telnet端口和Http端口,則隨機獲取一個可用的端口給Telnet和Http使用。
- 第三步:在配置對象中設置我們的java程序的項目名稱。
- 第四步:如果啟動時未指定
app-name屬性,則獲取項目名稱或Spring應用名稱,注入Configuration - 第五步:然后是設置我們的TunnelServer,這個是遠程使用arthas會用到的,
     ShellServerOptions options = new ShellServerOptions()
                            .setInstrumentation(instrumentation)
                            .setPid(PidUtils.currentLongPid())
                            .setWelcomeMessage(ArthasBanner.welcome());
            if (configure.getSessionTimeout() != null) {
                options.setSessionTimeout(configure.getSessionTimeout() * 1000);
            }

            this.httpSessionManager = new HttpSessionManager();
            this.securityAuthenticator = new SecurityAuthenticatorImpl(configure.getUsername(), configure.getPassword());
            shellServer = new ShellServerImpl(options);
            List<String> disabledCommands = new ArrayList<String>();
          ...
            BuiltinCommandPack builtinCommands = new BuiltinCommandPack(disabledCommands);
            List<CommandResolver> resolvers = new ArrayList<CommandResolver>();
            resolvers.add(builtinCommands)

          ...

            shellServer.listen(new BindHandler(isBindRef));
上面這段代碼特別長,其實就是初始化 ShellServer,然后配置好,最后調用listen方法啟動命令行服務器,在 listen 方法中,主要是根據之前注冊的 TermServer 來逐個啟動。
最后
sessionManager = new SessionManagerImpl(options, shellServer.getCommandManager(), shellServer.getJobController());
httpApiHandler = new HttpApiHandler(historyManager, sessionManager);

logger().info("as-server listening on network={};telnet={};http={};timeout={};", configure.getIp(),
        configure.getTelnetPort(), configure.getHttpPort(), options.getConnectionTimeout());

// 異步回報啟動次數
if (configure.getStatUrl() != null) {
    logger().info("arthas stat url: {}", configure.getStatUrl());
}
UserStatUtil.setStatUrl(configure.getStatUrl());
UserStatUtil.arthasStart();

try {
    SpyAPI.init();
} catch (Throwable e) {
    // ignore
}
啟動完我們核心的 shellServer 來保持和客戶端連接和監聽客戶端輸入之后我們再啟動我們的 session 管理和 HttpApi 的管理(arthas是支持api調用的所以剛剛要初始化FastJson),然后在設置一些配置什么的,最后再啟動我們剛剛的spy中的 SpyAPI 來實現為后面的命令做準備了。
六. 命令處理源碼分析
在上一節末尾中講解了 Arthas 啟動的時候會啟動 TermServer 也就是命令行服務器。那么 TermServer 是如何監聽監聽命令行輸入的,首先在我們的啟動核心類的 ArthasBootstrap 里面有一段特別長的代碼取初始化 shellServer ,當時這個 shellServer 不是啟動的重點所以沒有具體講,這里我們先回顧下這段代碼:
// com.taobao.arthas.core.server.ArthasBootstrap#bind
ShellServerOptions options = new ShellServerOptions()
                            .setInstrumentation(instrumentation)
                            .setPid(PidUtils.currentLongPid())
                            .setWelcomeMessage(ArthasBanner.welcome());
            if (configure.getSessionTimeout() != null) {
                options.setSessionTimeout(configure.getSessionTimeout() * 1000);
            }

            this.httpSessionManager = new HttpSessionManager();
            this.securityAuthenticator = new SecurityAuthenticatorImpl(configure.getUsername(), configure.getPassword());
            shellServer = new ShellServerImpl(options);
            List<String> disabledCommands = new ArrayList<String>();
          ...
            BuiltinCommandPack builtinCommands = new BuiltinCommandPack(disabledCommands);
            List<CommandResolver> resolvers = new ArrayList<CommandResolver>();
            resolvers.add(builtinCommands)

          ...

            shellServer.listen(new BindHandler(isBindRef));
這里實際上我們重點關注三行代碼即可:
 shellServer = new ShellServerImpl(options);// 第一行
 ...
 BuiltinCommandPack builtinCommands = new BuiltinCommandPack(disabledCommands);// 第二行
 ...
 shellServer.listen(new BindHandler(isBindRef));// 第三行
第一行是new一個shellServer,說明這個shellSver的實現類是 ShellServerImpl。
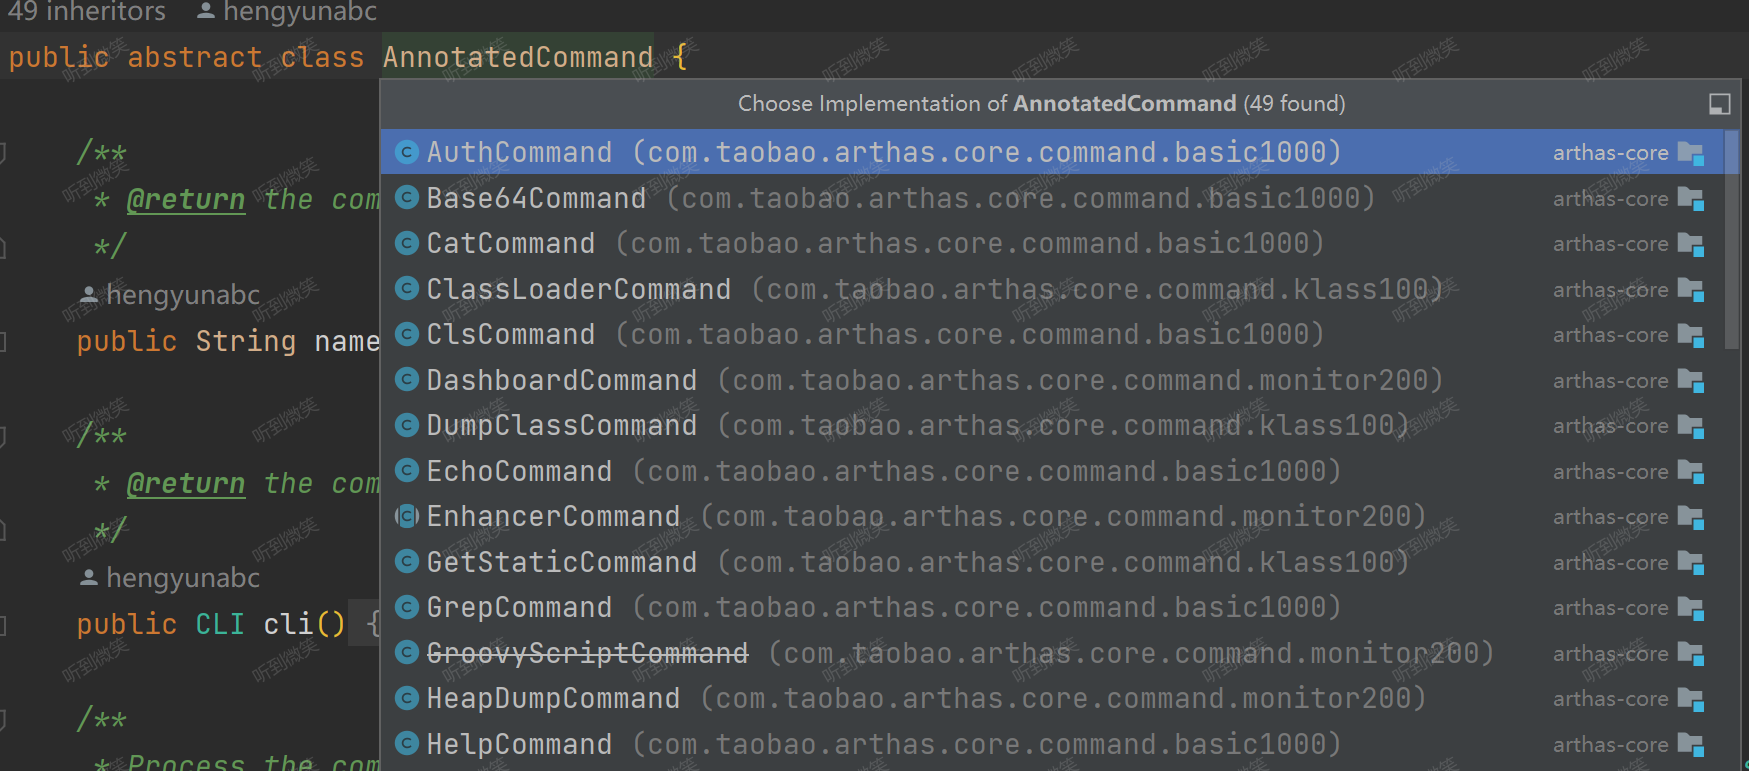
然后第二行代碼是在初始化所有的命令,在 BuiltinCommandPack 的構造函數里有:
    public BuiltinCommandPack(List<String> disabledCommands) {
        initCommands(disabledCommands);
    }


    private void initCommands(List<String> disabledCommands) {
        List<Class<? extends AnnotatedCommand>> commandClassList = new ArrayList<Class<? extends AnnotatedCommand>>(33);
        commandClassList.add(HelpCommand.class);
        commandClassList.add(AuthCommand.class);
        commandClassList.add(KeymapCommand.class);
        commandClassList.add(SearchClassCommand.class);
        commandClassList.add(SearchMethodCommand.class);
        commandClassList.add(ClassLoaderCommand.class);
        commandClassList.add(JadCommand.class);
        commandClassList.add(GetStaticCommand.class);
        commandClassList.add(MonitorCommand.class);
        commandClassList.add(StackCommand.class);
        commandClassList.add(ThreadCommand.class);
        commandClassList.add(TraceCommand.class);
        commandClassList.add(WatchCommand.class);
        commandClassList.add(TimeTunnelCommand.class);
        commandClassList.add(JvmCommand.class);
        commandClassList.add(MemoryCommand.class);
        commandClassList.add(PerfCounterCommand.class);
        // commandClassList.add(GroovyScriptCommand.class);
        commandClassList.add(OgnlCommand.class);
        commandClassList.add(MemoryCompilerCommand.class);
        commandClassList.add(RedefineCommand.class);
        commandClassList.add(RetransformCommand.class);
        commandClassList.add(DashboardCommand.class);
        commandClassList.add(DumpClassCommand.class);
        commandClassList.add(HeapDumpCommand.class);
        commandClassList.add(JulyCommand.class);
        commandClassList.add(ThanksCommand.class);
        commandClassList.add(OptionsCommand.class);
        commandClassList.add(ClsCommand.class);
        commandClassList.add(ResetCommand.class);
        commandClassList.add(VersionCommand.class);
        commandClassList.add(SessionCommand.class);
        commandClassList.add(SystemPropertyCommand.class);
        commandClassList.add(SystemEnvCommand.class);
        commandClassList.add(VMOptionCommand.class);
        commandClassList.add(LoggerCommand.class);
        commandClassList.add(HistoryCommand.class);
        commandClassList.add(CatCommand.class);
        commandClassList.add(Base64Command.class);
        commandClassList.add(EchoCommand.class);
        commandClassList.add(PwdCommand.class);
        commandClassList.add(MBeanCommand.class);
        commandClassList.add(GrepCommand.class);
        commandClassList.add(TeeCommand.class);
        commandClassList.add(ProfilerCommand.class);
        commandClassList.add(VmToolCommand.class);
        commandClassList.add(StopCommand.class);
        try {
            if (ClassLoader.getSystemClassLoader().getResource("jdk/jfr/Recording.class") != null) {
                commandClassList.add(JFRCommand.class);
            }
        } catch (Throwable e) {
            logger.error("This jdk version not support jfr command");
        }

        for (Class<? extends AnnotatedCommand> clazz : commandClassList) {
            Name name = clazz.getAnnotation(Name.class);
            if (name != null && name.value() != null) {
                if (disabledCommands.contains(name.value())) {
                    continue;
                }
            }
            commands.add(Command.create(clazz));
        }
    }
- 這里會把所有的命令的對應的處理類都加載到緩存里,后面會用到,這里可以看到每個命令都對應一個Command對象,注意最后放入緩存的對象是
AnnotatedCommandImpl,上面的每個命令的Command只是這個類的一個屬性。
然后第三行代碼就是初始化監聽命令策略,在里面有:
//com.taobao.arthas.core.shell.impl.ShellServerImpl#listen

@Override
public ShellServer listen(final Handler<Future<Void>> listenHandler) {
    ...
    for (TermServer termServer : toStart) {
        termServer.termHandler(new TermServerTermHandler(this));
        termServer.listen(handler);
    }
    ...
}
設置term處理器和監聽器,接下來看下 TelnetTermServer 中的 listen 方法,termServer 有幾個實現類比如Http、命令行等,這里以 TelnetTermServer 命令行為例講解,在listen方法中:
    // com.taobao.arthas.core.shell.term.impl.TelnetTermServer#listen
	@Override
    public TermServer listen(Handler<Future<TermServer>> listenHandler) {
        bootstrap = new NettyTelnetTtyBootstrap().setHost(hostIp).setPort(port);
        try {
            bootstrap.start(new Consumer<TtyConnection>() {
                @Override
                public void accept(final TtyConnection conn) {
                    termHandler.handle(new TermImpl(Helper.loadKeymap(), conn));
                }
            }).get(connectionTimeout, TimeUnit.MILLISECONDS);
            listenHandler.handle(Future.<TermServer>succeededFuture());
        } catch (Throwable t) {
            logger.error("Error listening to port " + port, t);
            listenHandler.handle(Future.<TermServer>failedFuture(t));
        }
        return this;
    }
這里會調用調用的是 NettyTelnetBootstrap 的 start 方法,主要是通過 netty 來啟動網絡服務,注意這里使用的是阿里巴巴自己的 termd 來實現的,也就是說arthas命令行的核心是用的 termd,github地址為:https://github.com/alibaba/termd,感興趣的讀者可以自行了解,反正這個庫就是支持java命令行的,然后在監聽到有命令的時候會調用 termHandler.handle 來處理,這里的termHandler的實現類是上一步設置的 TermServerTermHandler ,這個這個類的handle方法中是:
public class TermServerTermHandler implements Handler<Term> {
    private ShellServerImpl shellServer;

    public TermServerTermHandler(ShellServerImpl shellServer) {
        this.shellServer = shellServer;
    }

    @Override
    public void handle(Term term) {
        shellServer.handleTerm(term);
    }
}
所以我們又回到了 ShellServerImpl 類,上一節的側重點主要是啟動流程所以這里講的比較簡單,這里補充一下,然后我們在看 ShellServerImpl 的 handleTerm :
    // com.taobao.arthas.core.shell.impl.ShellServerImpl#handleTerm
	public void handleTerm(Term term) {
        synchronized (this) {
            // That might happen with multiple ser
            if (closed) {
                term.close();
                return;
            }
        }

        ShellImpl session = createShell(term);
        tryUpdateWelcomeMessage();
        session.setWelcome(welcomeMessage);
        session.closedFuture.setHandler(new SessionClosedHandler(this, session));
        session.init();
        sessions.put(session.id, session); // Put after init so the close handler on the connection is set
        session.readline(); // Now readline
    }
這里 session.readline() 就是來讀取用戶的輸入,這里 session.setWelcome(welcomeMessage);
就是開啟 Arthas 的時候的歡迎語輸出的地方了。
然后在 session.readline 中:
    public void readline() {
        term.readline(prompt, new ShellLineHandler(this),
                new CommandManagerCompletionHandler(commandManager));
    }
這里就是設置我們最最最核心的命令管理適配器了,也就是InternalCommandManager
這個類,這個類會監聽到命令之后去查找命令然后用相應的處理器來處理,這個是后面arthas命令的核心。
七. 命令的執行
兩個處理器——我們對應的就是 ShellLineHandler 和 CommandManagerCompletionHandler 分別在輸入的時候執行和完成的時候執行,會執行 requestHandler 和 completionHandler 的accept方法,這里會把上文兩個Handler封裝一下,調用accept的時候實際上就是調用Handler的handle方法,所以我們執行命令的最終入口就是 ShellLineHandler 的 handle方法:
ShellLineHandler 是處理命令行輸入的handler,例如我們在命令輸入 jad java.lang.String:
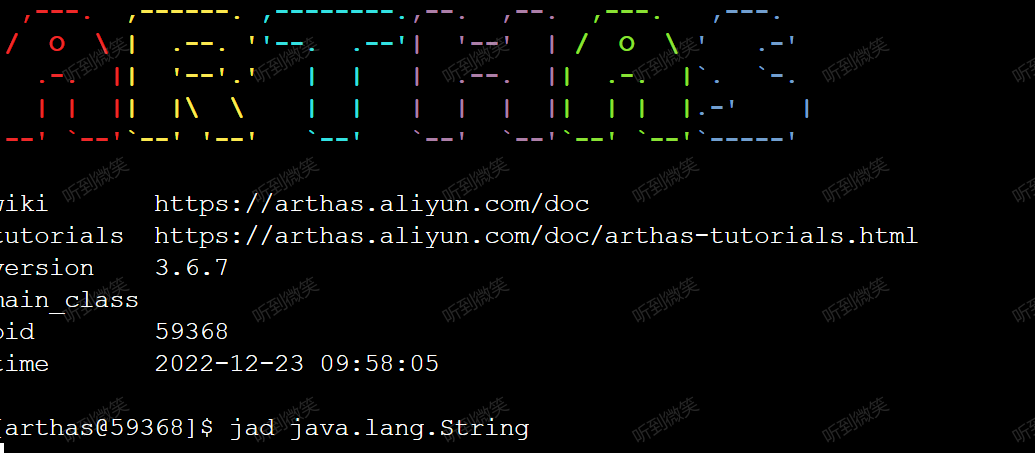
我們通過debug,就能在 ShellLineHandler#handle 方法中獲取到用戶輸入的命令:
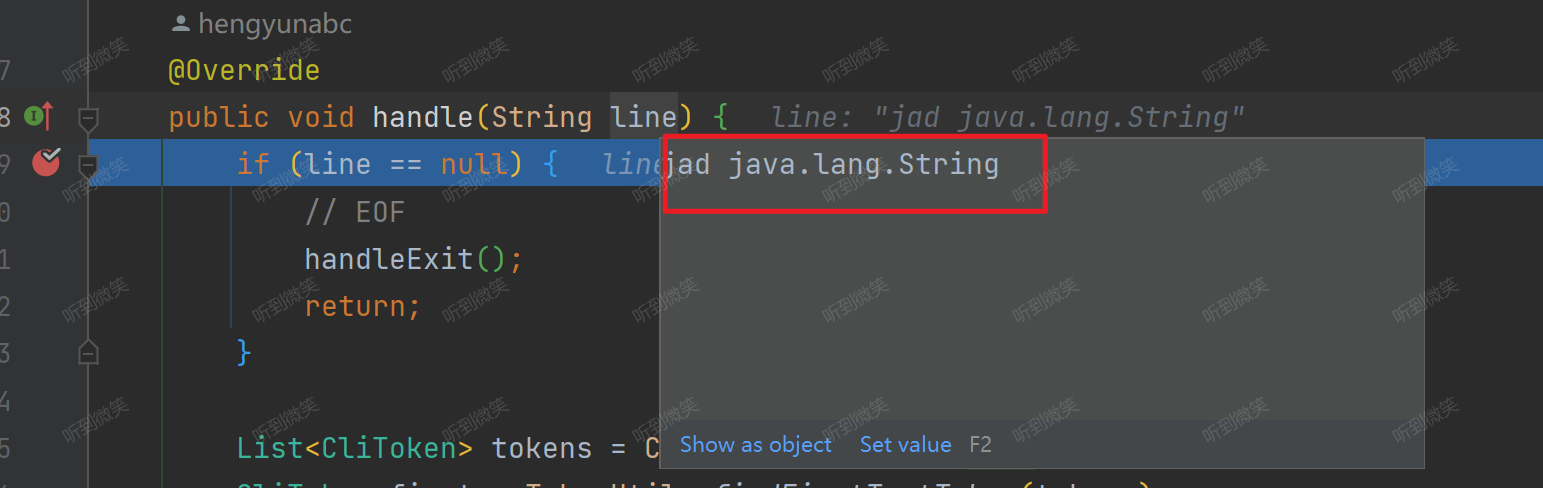
    // com.taobao.arthas.core.shell.handlers.shell.ShellLineHandler#handle
	/**
     * 接收用戶輸入的命令行
     * @param line the event to handle
     */
    @Override
    public void handle(String line) {
        if (line == null) {
            // EOF
            handleExit();
            return;
        }

        List<CliToken> tokens = CliTokens.tokenize(line);
        CliToken first = TokenUtils.findFirstTextToken(tokens);
        if (first == null) {
            // For now do like this
            shell.readline();
            return;
        }

        String name = first.value();
        // 處理特殊命令,這些命令可以實時響應
        if (name.equals("exit") || name.equals("logout") || name.equals("q") || name.equals("quit")) {
            handleExit();
            return;
        } else if (name.equals("jobs")) {
            handleJobs();
            return;
        } else if (name.equals("fg")) {
            handleForeground(tokens);
            return;
        } else if (name.equals("bg")) {
            handleBackground(tokens);
            return;
        } else if (name.equals("kill")) {
            handleKill(tokens);
            return;
        }

        //
        Job job = createJob(tokens);
        if (job != null) {
            job.run();
        }
    }
首先會去解析輸入的命令,一般可能你的命令帶參數比如trace命令會帶上類和方法名,所以這里要把命令從輸入中解析出來,可以看到如果是是 exit、logout、quit、jobs、fg、bg、kill等 Arthas 本身的運行命令直接執行,如果是其他命令就創建一個job來執行。下面會到 JobControllerImpl 的 createJob 的方法里:
    // com.taobao.arthas.core.shell.system.impl.JobControllerImpl#createJob
	@Override
    public Job createJob(InternalCommandManager commandManager, List<CliToken> tokens, Session session, JobListener jobHandler, Term term, ResultDistributor resultDistributor) {
        checkPermission(session, tokens.get(0));
        int jobId = idGenerator.incrementAndGet();
        StringBuilder line = new StringBuilder();
        for (CliToken arg : tokens) {
            line.append(arg.raw());
        }
        boolean runInBackground = runInBackground(tokens);
        Process process = createProcess(session, tokens, commandManager, jobId, term, resultDistributor);
        process.setJobId(jobId);
        JobImpl job = new JobImpl(jobId, this, process, line.toString(), runInBackground, session, jobHandler);
        jobs.put(jobId, job);
        return job;
    }
這里重點關注rocess process = createProcess(session, tokens, commandManager, jobId, term, resultDistributor); 這一行代碼會根據輸入找到命令然后封裝成 Process 然后下面再把 Process 包裝成job,我們先看怎么封裝成 Process:
    //com.taobao.arthas.core.shell.system.impl.JobControllerImpl#createProcess
	/**
     * Try to create a process from the command line tokens.
     *
     * @param line the command line tokens
     * @param commandManager command manager
     * @param jobId job id
     * @param term term
     * @param resultDistributor
     * @return the created process
     */
    private Process createProcess(Session session, List<CliToken> line, InternalCommandManager commandManager, int jobId, Term term, ResultDistributor resultDistributor) {
        try {
            ListIterator<CliToken> tokens = line.listIterator();
            while (tokens.hasNext()) {
                CliToken token = tokens.next();
                if (token.isText()) {
                    // check before create process
                    checkPermission(session, token);
                    Command command = commandManager.getCommand(token.value());
                    if (command != null) {
                        return createCommandProcess(command, tokens, jobId, term, resultDistributor);
                    } else {
                        throw new IllegalArgumentException(token.value() + ": command not found");
                    }
                }
            }
            throw new IllegalArgumentException();
        } catch (Exception e) {
            throw new RuntimeException(e);
        }
    }
這里會用到剛剛解析出來的命令的字符串去 InternalCommandManager 里找到相應的命令,getCommand就是在剛剛啟動加載的命令緩存里去找到相應的命令也就是 AnnotatedCommandImpl 對象。然后在 createCommandProcess 方法里封裝成Proccess對象,這里代碼很長就不贅述了,反正就是把Command對象封裝一下,有的命令會有特殊處理,比如watch命令會有管道符"|"這里要處理一下,然后熱更新命令會有文件等參數也需要處理一下,總之在 createCommandProcess 方法里:
ProcessImpl process = new ProcessImpl(command, remaining, command.processHandler(), ProcessOutput, resultDistributor);
這里就是完成的把命令封裝成了process。然后再把Process放到job里,就完成初始化job等流程了。
在job初始化完畢之后就是調用job的 run 方法來執行了:
    // com.taobao.arthas.core.shell.system.impl.JobImpl#run(boolean)
	@Override
    public Job run(boolean foreground) {
        actualStatus = ExecStatus.RUNNING;
        if (statusUpdateHandler != null) {
            statusUpdateHandler.handle(ExecStatus.RUNNING);
        }
        //set process's tty in JobControllerImpl.createCommandProcess
        //process.setTty(shell.term());
        process.setSession(this.session);
        process.run(foreground);

        if (this.status() == ExecStatus.RUNNING) {
            if (foreground) {
                jobHandler.onForeground(this);
            } else {
                jobHandler.onBackground(this);
            }
        }
        return this;
    }
在job的run里面實際上是在執行process的run方法:
    // com.taobao.arthas.core.shell.system.impl.ProcessImpl#run(boolean)
	@Override
    public synchronized void run(boolean fg) {
        if (processStatus != ExecStatus.READY) {
            throw new IllegalStateException("Cannot run proces in " + processStatus + " state");
        }

        processStatus = ExecStatus.RUNNING;
        processForeground = fg;
        foreground = fg;
        startTime = new Date();

        // Make a local copy
        final Tty tty = this.tty;
        if (tty == null) {
            throw new IllegalStateException("Cannot execute process without a TTY set");
        }

        process = new CommandProcessImpl(this, tty);
        if (resultDistributor == null) {
            resultDistributor = new TermResultDistributorImpl(process, ArthasBootstrap.getInstance().getResultViewResolver());
        }

        final List<String> args2 = new LinkedList<String>();
        for (CliToken arg : args) {
            if (arg.isText()) {
                args2.add(arg.value());
            }
        }

        CommandLine cl = null;
        try {
            if (commandContext.cli() != null) {
                if (commandContext.cli().parse(args2, false).isAskingForHelp()) {
                    appendResult(new HelpCommand().createHelpDetailModel(commandContext));
                    terminate();
                    return;
                }

                cl = commandContext.cli().parse(args2);
                process.setArgs2(args2);
                process.setCommandLine(cl);
            }
        } catch (CLIException e) {
            terminate(-10, null, e.getMessage());
            return;
        }

        if (cacheLocation() != null) {
            process.echoTips("job id  : " + this.jobId + "\n");
            process.echoTips("cache location  : " + cacheLocation() + "\n");
        }
        Runnable task = new CommandProcessTask(process);
        ArthasBootstrap.getInstance().execute(task);
    }
這里重點看這行 Runnable task = new CommandProcessTask(process); 就是初始化一個runnable,然后丟到線程池里執行,那么在CommandProcessTask 的run方法里:
    private class CommandProcessTask implements Runnable {

        private CommandProcess process;

        public CommandProcessTask(CommandProcess process) {
            this.process = process;
        }

        @Override
        public void run() {
            try {
                handler.handle(process);
            } catch (Throwable t) {
                logger.error("Error during processing the command:", t);
                process.end(1, "Error during processing the command: " + t.getClass().getName() + ", message:" + t.getMessage()
                        + ", please check $HOME/logs/arthas/arthas.log for more details." );
            }
        }
    }
執行的就是handler的handle方法,這個handler就是在上一步把Command封裝成Process對象的時候:
ProcessImpl process = new ProcessImpl(command, remaining, command.processHandler(), ProcessOutput, resultDistributor);
放進來的,這個handler就是Command的 processHandler 屬性,所以我們看 Command 緩存的 AnnotatedCommandImpl 類:
 private Handler<CommandProcess> processHandler = new ProcessHandler();
 ...
   private class ProcessHandler implements Handler<CommandProcess> {
        @Override
        public void handle(CommandProcess process) {
            process(process);
        }
    }

...
private void process(CommandProcess process) {
        AnnotatedCommand instance;
        try {
            instance = clazz.newInstance();
        } catch (Exception e) {
            process.end();
            return;
        }
        CLIConfigurator.inject(process.commandLine(), instance);
        instance.process(process);
        UserStatUtil.arthasUsageSuccess(name(), process.args());
    }
這里實際上就是在執行 AnnotatedCommandImpl 的process方法,而process方法就是在執行每種命令Command的process方法
例如用戶輸入jad java.lang.String命令,最終會路由到 com.taobao.arthas.core.command.klass100.JadCommand#process 方法中執行:
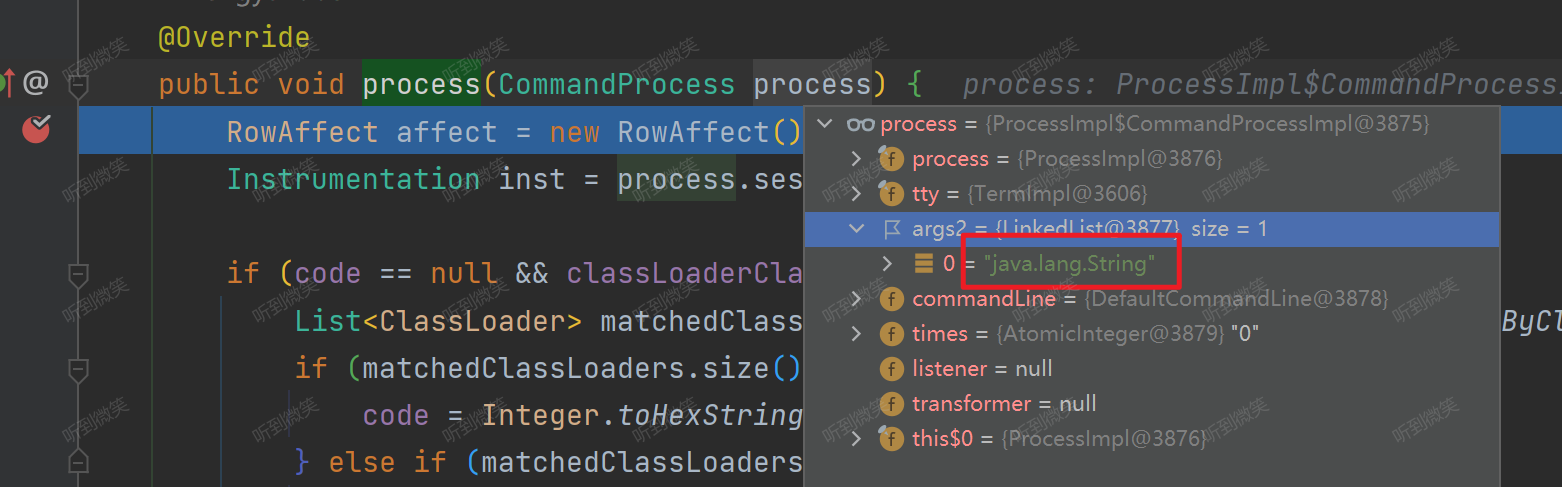
八. jad反編譯命令
在上一節中我們知道了,Arthas將不同命令的處理邏輯封裝在了對應的 AnnotatedCommand 實現里了。例如jad命令的處理類就是JadCommand,當用戶輸入 jad java.lang.String 嘗試反編譯該類時,就會調用 JadCommand#process 方法:
    @Override
    public void process(CommandProcess process) {
        RowAffect affect = new RowAffect();
        Instrumentation inst = process.session().getInstrumentation();

        if (code == null && classLoaderClass != null) {
            List<ClassLoader> matchedClassLoaders = ClassLoaderUtils.getClassLoaderByClassName(inst, classLoaderClass);
            if (matchedClassLoaders.size() == 1) {
                code = Integer.toHexString(matchedClassLoaders.get(0).hashCode());
            } else if (matchedClassLoaders.size() > 1) {
                Collection<ClassLoaderVO> classLoaderVOList = ClassUtils.createClassLoaderVOList(matchedClassLoaders);
                JadModel jadModel = new JadModel()
                        .setClassLoaderClass(classLoaderClass)
                        .setMatchedClassLoaders(classLoaderVOList);
                process.appendResult(jadModel);
                process.end(-1, "Found more than one classloader by class name, please specify classloader with '-c <classloader hash>'");
                return;
            } else {
                process.end(-1, "Can not find classloader by class name: " + classLoaderClass + ".");
                return;
            }
        }

        // 第一步:查找用戶需要反編譯的class類
        Set<Class<?>> matchedClasses = SearchUtils.searchClassOnly(inst, classPattern, isRegEx, code);

        try {
            ExitStatus status = null;
            if (matchedClasses == null || matchedClasses.isEmpty()) {
                status = processNoMatch(process);
            } else if (matchedClasses.size() > 1) {
                status = processMatches(process, matchedClasses);
            } else { // matchedClasses size is 1
                // find inner classes.
                Set<Class<?>> withInnerClasses = SearchUtils.searchClassOnly(inst,  matchedClasses.iterator().next().getName() + "$*", false, code);
                if(withInnerClasses.isEmpty()) {
                    withInnerClasses = matchedClasses;
                }
                // 第二步:處理反編譯邏輯
                status = processExactMatch(process, affect, inst, matchedClasses, withInnerClasses);
            }
            if (!this.sourceOnly) {
                process.appendResult(new RowAffectModel(affect));
            }
            CommandUtils.end(process, status);
        } catch (Throwable e){
            logger.error("processing error", e);
            process.end(-1, "processing error");
        }
    }
該方法看起來比較長,核心邏輯就兩步:
- 第一步:查詢用戶輸入的指定
Class對象。 - 第二步:處理反編譯邏輯。
我們具體來看一下 processExactMatch 方法:
/**
* 處理反編譯邏輯
* @param process
* @param affect
* @param inst
* @param matchedClasses
* @param withInnerClasses
* @return
*/
private ExitStatus processExactMatch(CommandProcess process, RowAffect affect, Instrumentation inst, Set<Class<?>> matchedClasses, Set<Class<?>> withInnerClasses) {
Class<?> c = matchedClasses.iterator().next();
Set<Class<?>> allClasses = new HashSet<Class<?>>(withInnerClasses);
allClasses.add(c);
try {
// 第一步:創建 ClassDumpTransformer
ClassDumpTransformer transformer = new ClassDumpTransformer(allClasses);
// 第二步:觸發 ClassDumpTransformer#transform 將指定Class字節碼寫入文件中
InstrumentationUtils.retransformClasses(inst, transformer, allClasses);
// 第三步:獲取已經寫入到磁盤的字節碼文件
Map<Class<?>, File> classFiles = transformer.getDumpResult();
File classFile = classFiles.get(c);
// 第四步:反編譯指定的字節碼文件
Pair<String,NavigableMap<Integer,Integer>> decompileResult = Decompiler.decompileWithMappings(classFile.getAbsolutePath(), methodName, hideUnicode, lineNumber);
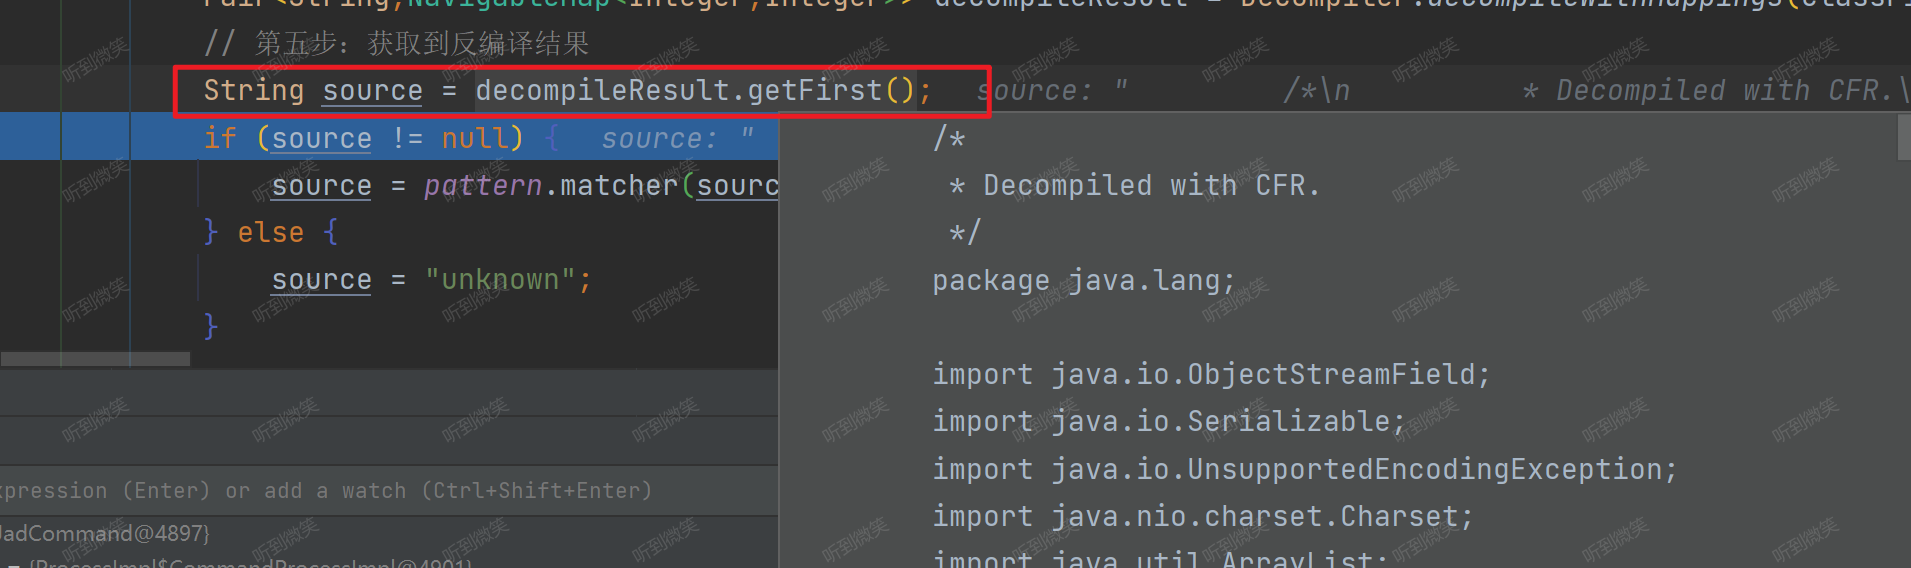
// 第五步:獲取到反編譯結果
String source = decompileResult.getFirst();
if (source != null) {
source = pattern.matcher(source).replaceAll("");
} else {
source = "unknown";
}
JadModel jadModel = new JadModel();
jadModel.setSource(source);
jadModel.setMappings(decompileResult.getSecond());
if (!this.sourceOnly) {
jadModel.setClassInfo(ClassUtils.createSimpleClassInfo(c));
jadModel.setLocation(ClassUtils.getCodeSource(c.getProtectionDomain().getCodeSource()));
}
// 第六步:將反編譯結果返回
process.appendResult(jadModel);
affect.rCnt(classFiles.keySet().size());
return ExitStatus.success();
} catch (Throwable t) {
logger.error("jad: fail to decompile class: " + c.getName(), t);
return ExitStatus.failure(-1, "jad: fail to decompile class: " + c.getName() + ", please check $HOME/logs/arthas/arthas.log for more details.");
}
}
-
第一步:創建 ClassDumpTransformer
-
第二步:觸發 ClassDumpTransformer#transform 將指定Class字節碼寫入文件中
-
第三步:獲取已經寫入到磁盤的字節碼文件
-
第四步:反編譯指定的字節碼文件
-
第五步:獲取到反編譯結果
-
第六步:將反編譯結果返回

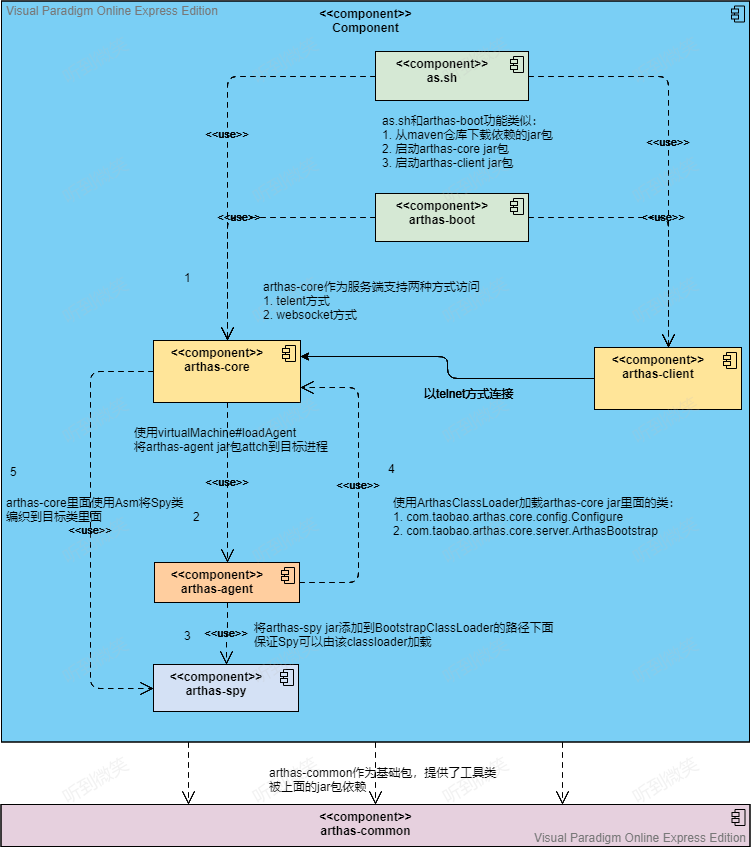
九. 總結
至此 Arthas 整體流程分享完成,我們從 arthas-boot 開始,它的核心作用就是啟動引導用戶選擇需要增強的Java進程PID,最終將PID傳入 arthas-core 中;arthas-core根據用戶選擇的PID,利用Java Agent機制使用 arthas-agent 對目標進程進行增強;arthas-agent被喚醒后,就會啟動命令行服務器監聽命令,并匹配對應的命令處理器(XxxCommand)對用戶命令進行處理,并返回。
本文以 jad 命令為引子,簡單介紹了 Arthas 處理用戶命令的全過程。但是其它諸如(watch、redefine)這類需要字節碼增強的命令未做介紹,有興趣的小伙伴可以自己研究一下,我也會用專門的文章分析這些命令的奇技淫巧。
參考文章:
Arthas源碼分析—啟動源碼分析 - 墨天輪 (modb.pro)
實現一個分布式調用鏈路追蹤Java探針你可能會遇到的問題 - 掘金 (juejin.cn)
文章詳情|arthas原理簡介 (codefun007.xyz)
arthas源碼解析(二)啟動流程 - 知乎 (zhihu.com)

 浙公網安備 33010602011771號