
ubuntu 安裝和配置 GitLab
一、概述
GitLab 是一個(gè)基于 Web 的開源 Git 軟件倉(cāng)庫(kù)管理器,用 Ruby 編寫,包括 wiki,問題管理,代碼審查,監(jiān)控以及持續(xù)集成和部署。它使開發(fā)人員能夠創(chuàng)建,審查和部署他們的項(xiàng)目。
有三種不同版本的 GitLab 可用,社區(qū)版 (CE) ,企業(yè)版 (EE) 和 GitLab 托管版本。
如果你想遠(yuǎn)離 GitHub , GitLab 是首選。它可以從不同的來源導(dǎo)入項(xiàng)目和問題,包括 GitHub ,這使得遷移過程無憂無慮。 GitLab 界面設(shè)計(jì)精良,干凈,直觀,并且在用戶體驗(yàn)和功能方面與 GitHub 相近。
根據(jù)所需的用例,有幾種方法可以安裝 GitLab 。本教程介紹了使用 Omnibus 軟件包在 Ubuntu 18.04 系統(tǒng)上安裝和配置 GitLab (CE) 所需的步驟。
二、安裝
官方的建議是使用腳本直接執(zhí)行安裝,對(duì)于網(wǎng)絡(luò)不好的情況,還是直接下載安裝包吧。
下載安裝包,訪問鏈接:
https://packages.gitlab.com/gitlab/gitlab-ce
這里選擇最新版本,gitlab-ce_12.1.4-ce.0_amd64.deb
wget --content-disposition https://packages.gitlab.com/gitlab/gitlab-ce/packages/ubuntu/xenial/gitlab-ce_12.1.4-ce.0_amd64.deb/download.deb
本地安裝
dpkg -i gitlab-ce_12.1.4-ce.0_amd64.deb
出現(xiàn)以下提示,表示安裝成功

       *.                  *.
      ***                 ***
     *****               *****
    .******             *******
    ********            ********
   ,,,,,,,,,***********,,,,,,,,,
  ,,,,,,,,,,,*********,,,,,,,,,,,
  .,,,,,,,,,,,*******,,,,,,,,,,,,
      ,,,,,,,,,*****,,,,,,,,,.
         ,,,,,,,****,,,,,,
            .,,,***,,,,
                ,*,.


     _______ __  __          __
    / ____(_) /_/ /   ____ _/ /_
   / / __/ / __/ /   / __ `/ __ \
  / /_/ / / /_/ /___/ /_/ / /_/ /
  \____/_/\__/_____/\__,_/_.___/
修改配置文件
vim /etc/gitlab/gitlab.rb
修改以下信息
external_url 'http://192.168.10.123:80'
......
gitlab_rails['time_zone'] = 'Asia/Shanghai'
gitlab_rails['gitlab_email_from'] = 'xxxxxx@163.com'
......
gitlab_rails['smtp_enable'] = true
gitlab_rails['smtp_address'] = "smtp.163.com"
gitlab_rails['smtp_port'] = 25
gitlab_rails['smtp_user_name'] = "xxxxxx@163.com"
gitlab_rails['smtp_password'] = "111111" # 客戶端授權(quán)密碼
gitlab_rails['smtp_domain'] = "163.com"
gitlab_rails['smtp_authentication'] = "login"
gitlab_rails['smtp_enable_starttls_auto'] = true
......
user["git_user_email"] = "xxxxxx@163.com"
只要修改配置文件就要reconfigure
sudo gitlab-ctl reconfigure
查看狀態(tài)
root@ubuntu:~# gitlab-ctl status
run: alertmanager: (pid 12758) 66s; run: log: (pid 12379) 219s
run: gitaly: (pid 12684) 70s; run: log: (pid 11883) 357s
run: gitlab-monitor: (pid 12721) 69s; run: log: (pid 12309) 240s
run: gitlab-workhorse: (pid 12708) 70s; run: log: (pid 12226) 264s
run: grafana: (pid 12781) 65s; run: log: (pid 12538) 113s
run: logrotate: (pid 12259) 253s; run: log: (pid 12268) 252s
run: nginx: (pid 12242) 259s; run: log: (pid 12250) 258s
run: node-exporter: (pid 12715) 69s; run: log: (pid 12296) 244s
run: postgres-exporter: (pid 12770) 65s; run: log: (pid 12399) 213s
run: postgresql: (pid 12004) 349s; run: log: (pid 12016) 346s
run: prometheus: (pid 12732) 69s; run: log: (pid 12351) 225s
run: redis: (pid 11840) 367s; run: log: (pid 11847) 364s
run: redis-exporter: (pid 12725) 69s; run: log: (pid 12330) 232s
run: sidekiq: (pid 12200) 271s; run: log: (pid 12211) 270s
run: unicorn: (pid 12171) 277s; run: log: (pid 12189) 276s
訪問web頁(yè)面
如果訪問失敗的502的話,兩種可能:
1.內(nèi)存不足,
2.unicorn['port'] = 8080端口被占用 將其更改為9090或者8090直到正常訪問
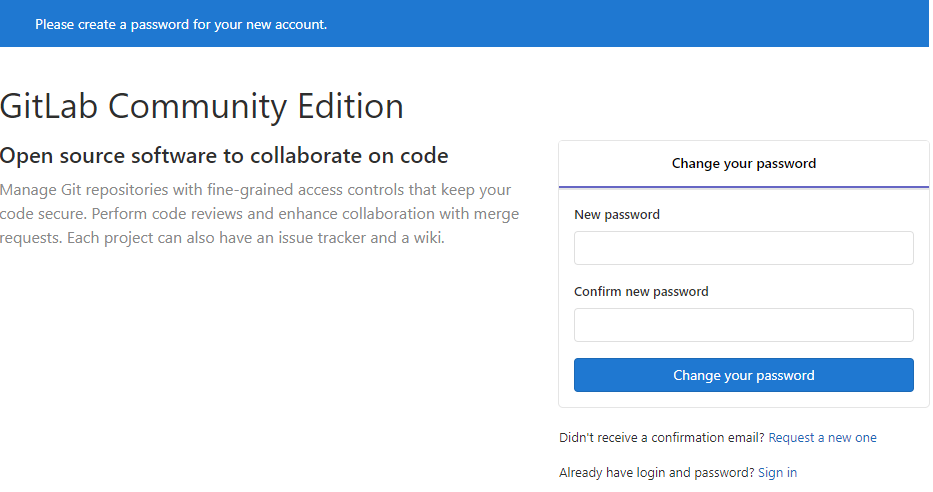
初次訪問Web頁(yè)面會(huì)強(qiáng)制讓你改密碼,初始用戶名/密碼:root/5iveL!fe
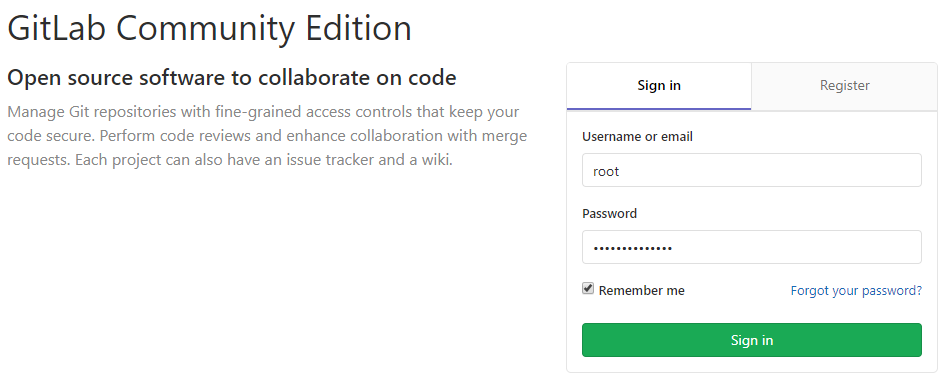
修改完密碼之后,使用新的密碼登錄
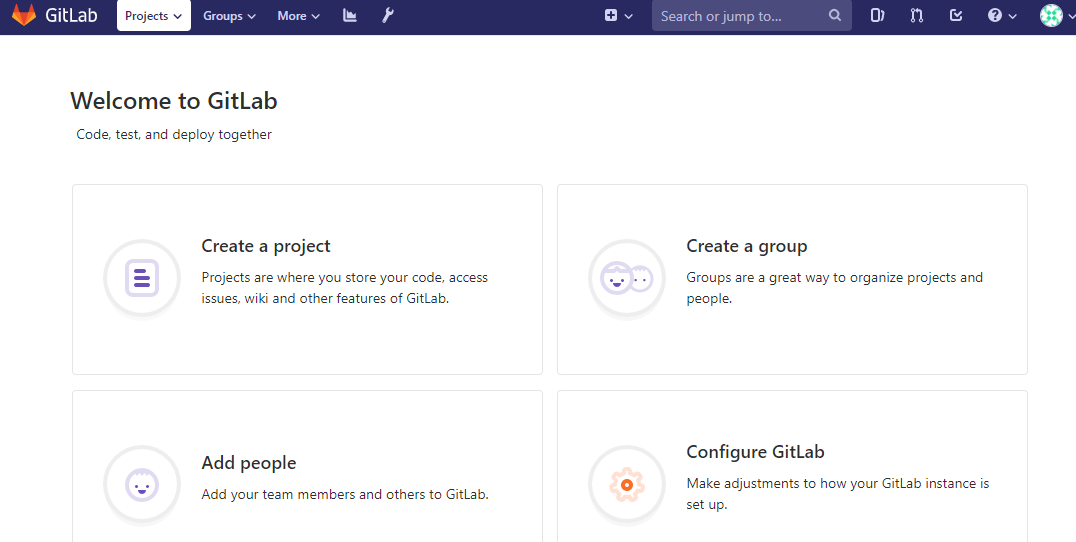
登錄之后,效果如下:
最后,附上 GitLab 常用命令:
| 常用命令 | 說明 |
|---|---|
| sudo gitlab-ctl reconfigure | 重新加載配置,每次修改/etc/gitlab/gitlab.rb文件之后執(zhí)行 |
| sudo gitlab-ctl status | 查看 GitLab 狀態(tài) |
| sudo gitlab-ctl start | 啟動(dòng) GitLab |
| sudo gitlab-ctl stop | 停止 GitLab |
| sudo gitlab-ctl restart | 重啟 GitLab |
| sudo gitlab-ctl tail | 查看所有日志 |
| sudo gitlab-ctl tail nginx/gitlab_acces.log | 查看 nginx 訪問日志 |
| sudo gitlab-ctl tail postgresql | 查看 postgresql 日志 |
gitlab給成員開通賬號(hào),然后成員登錄后在個(gè)人中心SSH秘鑰中選擇生成,然后復(fù)制命令在本地電腦換成自己的郵箱后執(zhí)行,在C盤用戶.ssh文件夾中打開.pub文件 里面的內(nèi)容就是秘鑰 填入gitlab后臺(tái)就行了
本文參考鏈接:

 浙公網(wǎng)安備 33010602011771號(hào)